Roundcube is one of the best known open source solutions to manage a reliable and customizable email service through a web service.
In this tutorial there are all the information to install and manage a webmail service with Roundcube on CentOS 7. As it is based on PHP, Roundcube requires the installation of a web server such as NGINX or Apache and relies on a MySQL-like database such as MariaDB.
First, connect to your server via an SSH connection. If you haven’t done so yet, following our guide it is recommended to connect securely with SSH. In case of a local server, go to the next step and open the terminal of your server.
Installation of NGINX and PHP
Proceed by installing an instance of NGINX with support for PHP and MySQL:
$ sudo yum install nginx php php-fpm php-mcrypt php-cli php-gd php-curl php-xml php-mysql php-mbstring php-pspell php-imagick
At the end of the installation of all the packages, start NGINX and enable its automatic start-up on the system:
$ sudo systemctl start nginx$ sudo systemctl enable nginx
The use of Roundcube requires the variation of two parameters within the PHP configuration file present in /etc/php.ini:
# Impostazione della nostra timezone

date.timezone = "Europe/Rome"
cgi.fix_pathinfo=0
Save the file just modified, start and enable the PHP-FPM service:
$ sudo systemctl start php-fpm$ sudo systemctl enable php-fpm
Installation of MariaDB
In order to function properly Roundcube needs MariaDB database, that can be installed with the following command:
$ sudo yum install mariadb-server
Once the installation is completed, start the service:
$ sudo systemctl start mariadb

$ sudo systemctl enable mariadb
Proceed with the security of MariaDB by running a script included in MariaDB to increase security and limit access to your databases:
Start the utility script provided by MariaDb "mysql_secure_installation" and answer all the questions:
$ sudo mysql_secure_installation
First, you will be asked whether you want to enable the password validation system. If you enable this system, when you set a password for a user it will be evaluated. If the password does not respect the minimum security requirements, it is rejected with an error message.
Then, you will be asked if you want to change the root password to one of your preference. If you enable the password validation system, you will have to enter a password that respects the security criteria.
Following some best practices for creating a secure password is recommended. This includes:
-
The use of both upper and lower case
-
The use of both letters and numbers
-
The use of non-alphanumeric characters like @ # $% ˆ &!
-
The use of passwords other than those previously used
Finally, choose whether to remove anonymous users, test databases and whether to disable remote login with the root user. For an adequate level of security, confirming all these changes is recommended.
At this point, confirm the update of the displayed table to apply the new security criteria.
Enter current password for root (enter for none):

OK, successfully used password, moving on...
                Setting the root password ensures that nobody can log into MariaDB

root user without the proper authorisation.
                Set root password? [Y/n] Y

New password:

Re-enter new password:

Password updated successfully!

Reloading privilege tables..

 ... Success!
                Remove anonymous users? [Y/n] Y

 ... Success!
                Normally, root should only be allowed to connect from 'localhost'.  This

ensures that someone cannot guess at the root password from the network.
                Disallow root login remotely? [Y/n] Y

 ... Success!
                Remove test database and access to it? [Y/n] Y

 - Dropping test database...

 ... Success!

 - Removing privileges on test database...

 ... Success!
                Reload privilege tables now? [Y/n] Y

 ... Success!
                Cleaning up...
                All done!  If you've completed all of the above steps, your MariaDB

installation should now be secure.
                Thanks for using MariaDB!
After restarting the service, a database for Roundcube and a new user for it (by changing the password) can be created:
$ mysql -u root -p
MariaDB [(none)]> CREATE DATABASE roundcubemail /*!40101 CHARACTER SET utf8 COLLATE utf8_general_ci */;

MariaDB [(none)]> CREATE USER 'roundcube'@'localhost' IDENTIFIED BY 'mf0c3mhx';

MariaDB [(none)]> GRANT ALL PRIVILEGES ON roundcubemail.* TO 'roundcube'@'localhost';

MariaDB [(none)]> FLUSH PRIVILEGES;

MariaDB [(none)]> exit
Roundcube installation
In order to download the latest version of Roundcube you will need wget. If not installed on your system, do it with the following command:
Otherwise, continue by downloading and extracting the package from github:
Then move everything to the NGINX directory:
$ sudo mv roundcubemail-1.3.7 /var/www/html/roundcubemail

$ sudo cd /var/www/html/roundcubemail/
The Roundcube package contains an sql file that has to be imported into the newly created database with the required structure:
$ mysql -u root -p roundcubemail < SQL/mysql.initial.sql
During the import process, you will be asked for the database root password entered during the installation of MariaDB.
Once the database configuration is completed, ìprepare the NGINX virtual server for the domain mail.domain.com. First, make sure that the owner of the html folder is NGINX:
$ sudo chown -R nginx:nginx /var/www/html/roundcubemail
Now create and edit the virtual host file/etc/nginx/conf.d/mail.example.com.conf as follows:
server {

        listen 80;

        server_name mail.domain.com;


        root /var/www/html/roundcubemail;

        index  index.php index.html;


        #i# Logging

        access_log /var/log/nginx/mail.domain.com_access_log;

        error_log   /var/log/nginx/mail.domain.com_error_log;


        location / {

                try_files $uri $uri/ /index.php?q=$uri&$args;

        }


        location ~ ^/(README.md|INSTALL|LICENSE|CHANGELOG|UPGRADING)$ {

                deny all;

        }


        location ~ ^/(config|temp|logs)/ {

                deny all;

        }


        location ~ /\. {

                deny all;

                access_log off;

                log_not_found off;

        }


        location ~ \.php$ {

                include /etc/nginx/fastcgi_params;

                #fastcgi_pass 127.0.0.1:9000;

                fastcgi_pass unix:/var/run/php-fpm/php-fpm.sock;

                fastcgi_index index.php;

                fastcgi_param SCRIPT_FILENAME $document_root$fastcgi_script_name;

        }

}
Before saving all the changes, remember to change the ‘domain.com’ domain to your domain.
In case of permission errors, modify the PHP-FPM configuration present in /etc/php-fpm.d/www.conf by changing these parameters:
user = nginx

group = nginx

listen = /var/run/php-fpm/php-fpm.sock

listen.owner = nginx

listen.group = nginx

listen.mode = 0660
Also, make sure that the owner of the PHP "session" directory is NGINX:
$ sudo chown -R nginx:nginx /var/lib/php/session/
At this point, Roundcube is ready to be configured from the web interface.
Roundcube configuration via web interface
To continue the installation, through a web browser go to : http://mail.domain.com/installer/
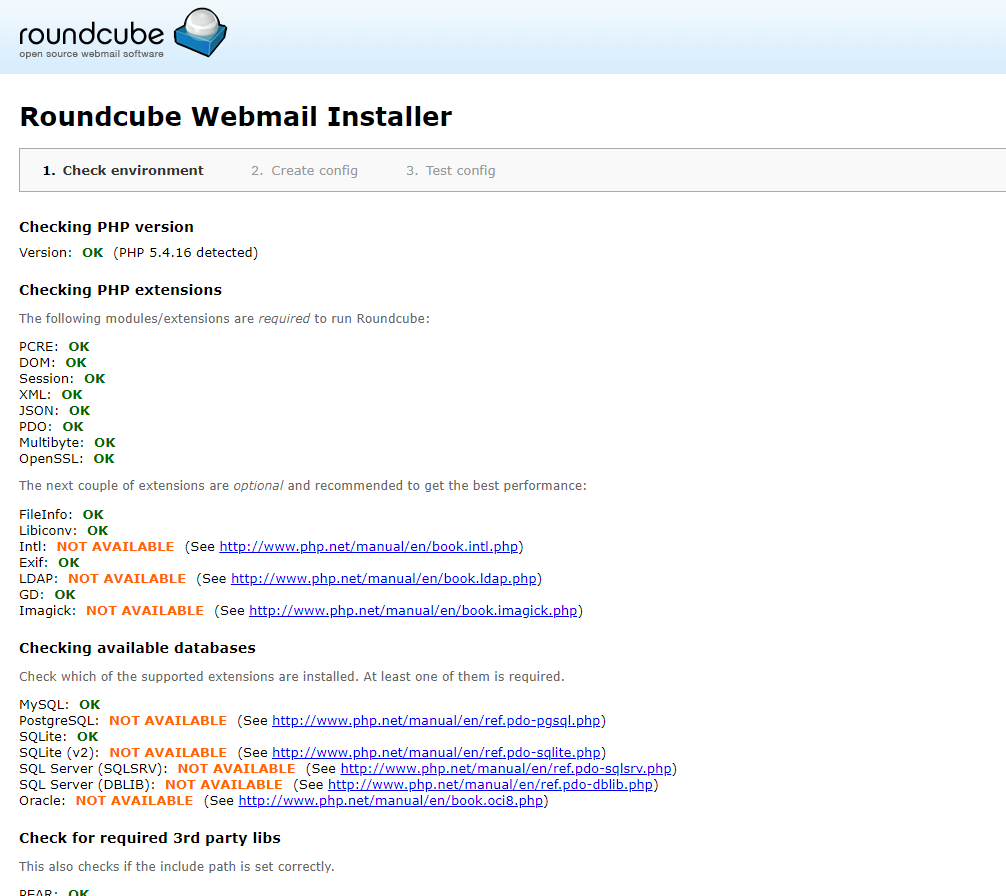
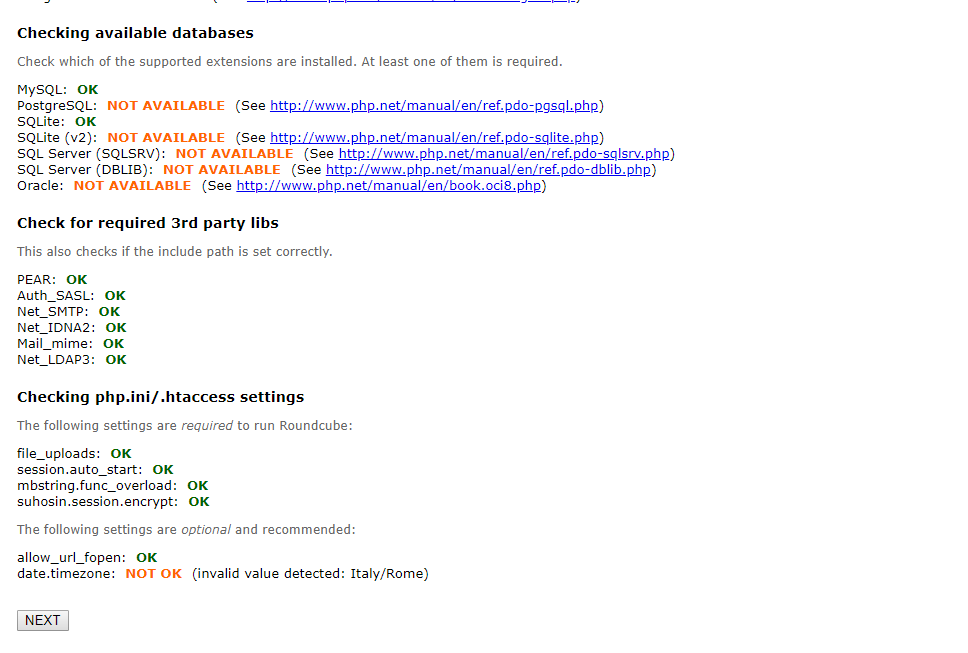
In this first phase, the Roundcube installer shows a summary of the requirements for operating the system correctly. Click on the "NEXT" button to continue.
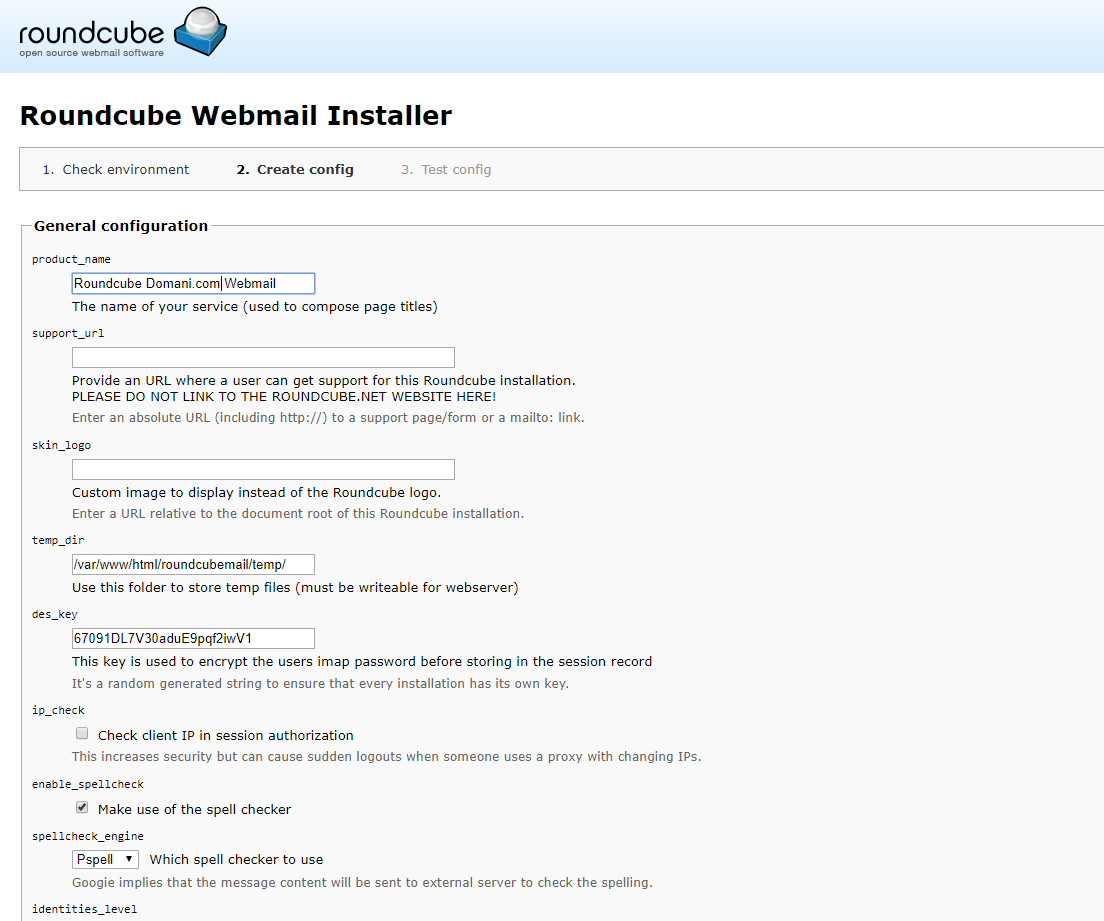
In this second phase, a series of operating parameters have to be entered. Leave everything unchanged except the product_name where o enter your domain name or a nickname of your choice.
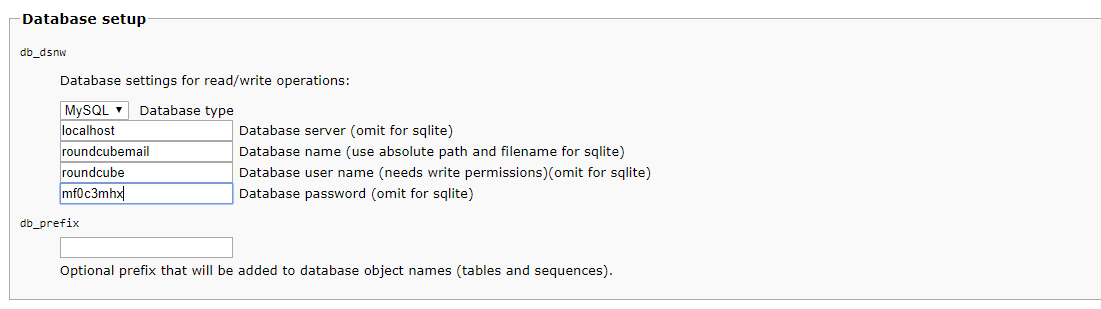
Changing the access data to the sql server with those entered during the installation phase is important. When completed, click "NEXT" to continue.
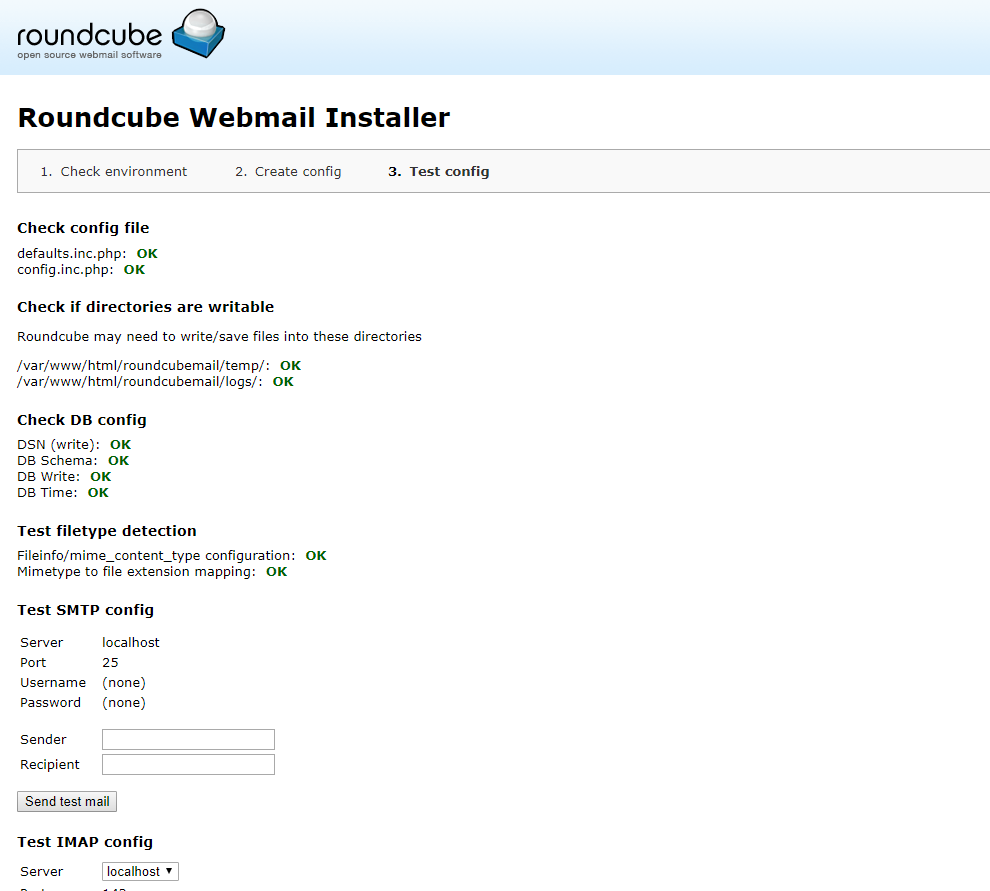
Once the second phase is completed, test the IMAP / SMTP parameters of your server to verify that Roundcube is able to send/receive mail.
Once finished, delete all the necessary files for the installation present in the /var/www/html/roundcubemail/installer folder by running the command:
$ sudo rm -rf /var/www/html/roundcubemail/installer
If you want to modify or change the parameters entered during the configuration phase, modifying the file in the /var/www/html/roundcubemail/config/config.inc.php directory is always possible.
Access Webmail
Our Roudcube instance is ready to use at the URL http://mail.domain.com/ . Then, log in using the login details of a mailbox configured with Dovecot.