WordPress is one of the best known CMS (Content Management System) based on PHP and MySQL and used on a large scale for the creation of websites and blogs.
In this tutorial you will find all the necessary steps to install the WordPress CMS on a Cloud Server with Ubuntu 18.04 and a LAMP configuration.
Prerequisites
To proceed with the installation of WordPress, first, install Apache, MySQL and PHP on your Linux server. This configuration is called LAMP as it takes its name from the initial letters of its four software components .
If i Apache, MySQL and PHP haven’t been installed yet, follow our guide on How to create a LAMP configuration on your Ubuntu 18.04 server.
To access your WordPress site, your own domain name, which can be be configured, is needed .
To get started, connect to your server via an SSH connection. If you haven’t done so yet, following our guide is recommended to connect securely with the SSH protocol. In case of a local server, go to the next step and open the terminal of your server.
Downloading WordPress
To install the latest version of WordPress, go to the public folder of your domain and use the wget command to download the package directly from the official website:
cd /var/www/mydomain.com/

wget https://wordpress.org/latest.tar.gz
Once the download is completed, extract the content and move the content of the "wordpress" directory to the main root of the Apache Virtual Host as follows:
sudo tar -xzvf latest.tar.gz

sudo mv wordpress/* ./

sudo rm wordpress/ -R
Then edit the read/write permissions as follows:
sudo chown -R www-data ./*
Creating the MySQL database for WordPress
WordPress uses the MySQL database to manage the information, content and users of your website.
As MySQL is already installed on your server, proceed directly with the creation of the database for WordPress. Log in as administrator on the MySQL shell:
sudo mysql -u root -p
Then, create the "wp" database typing:
CREATE DATABASE wp;
CREATE USER 'wp' @ '%' IDENTIFIED BY 'INSERT_PASSWORD';
GRANT ALL PRIVILEGES ON wp. * TO 'wp' @ '%';
FLUSH PRIVILEGES;
exit
Remember to change the password entered above with your own.
Configuring WordPress
At this point, continue with the configuration of WordPress. To do so, type in the browser the IP address of your Cloud Server or the name of your domain, if you have one.
N.B. To make the website visible on your domain, y DNS needs to be previously configured so that the A record can point to the IP of your server.
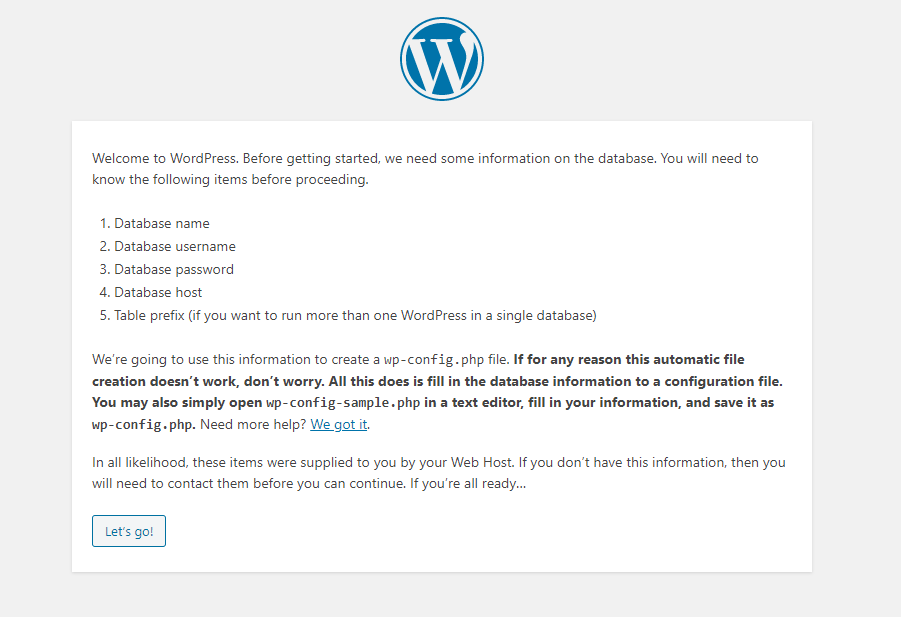
Click on "Let's get started!" to proceed with the installation wizard.
Enter the name of the database indicated during the installation, the username and password. Finally, complete the fields as shown below, and click on the "Send" button to proceed.
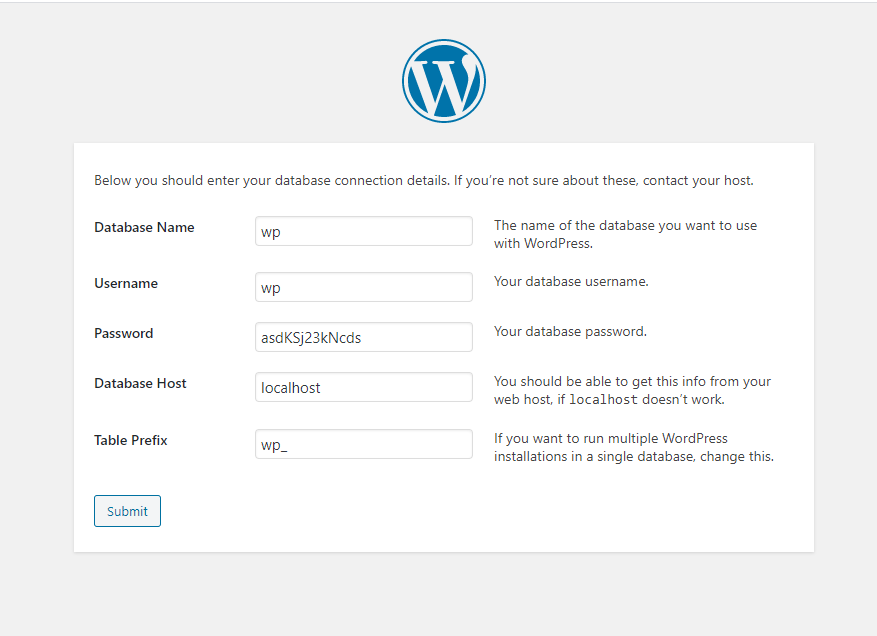
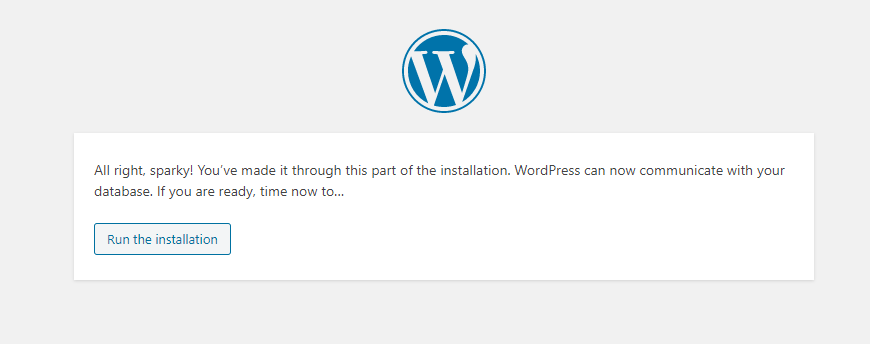
If the data are correct, you can proceed by clicking on the "Start installation" button.
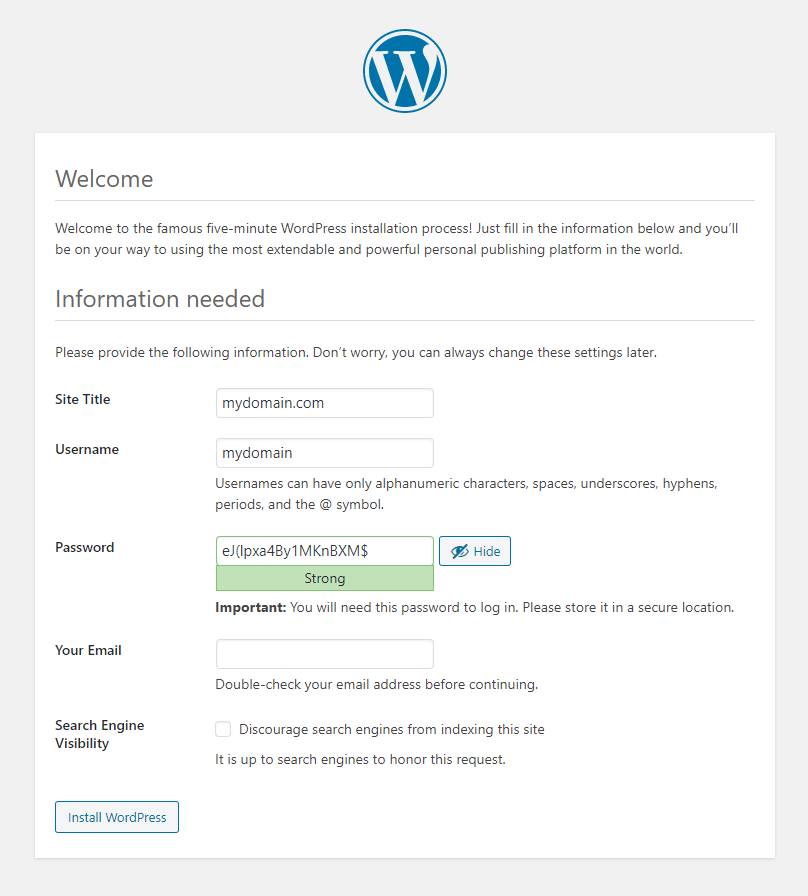
In the following screen, a series of data relating to your website, including the login password for the main account, the email and the name of the site, are requested.
If you prefer, disable visibility to search engines, and re-enable it after finishing the configuration of the site.
Click on the "Install WordPress" button to complete the installation procedure.
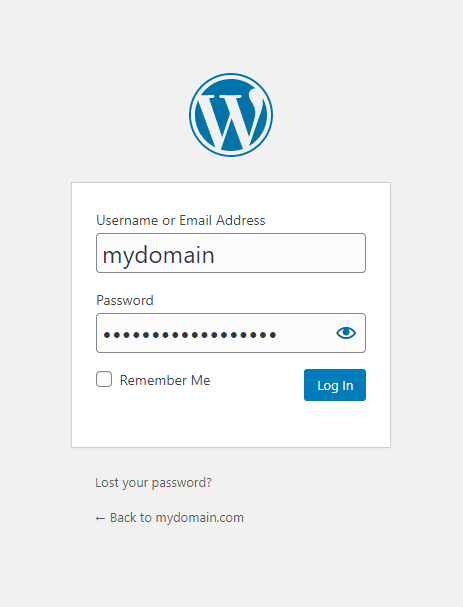
Finally, click on the "Login" button (or visit the url www.mydomain.it/wp-login.php) to access the login mask. If the installation was successful, the following screen will be shown:
.png.aspx;)
Use the credentials set above to log in to the WordPress backend interface as an administrator.
At this point, the WordPress admin panel will be shown, so, start setting up your website.
Conclusions
WordPress is a highly flexible CMS and allows you to create websites of various kinds, from the simple showcase site to e-commerce websites, thanks to the installation of additional plugins.
If you want to create an e-commerce with WordPress, consult our guide on How to install the WooCommerce plugin .