PhpMyAdmin is a GUI (Graphic User Interface) that allows to create, store and edit entire databases created with MySQL.
In this guide you will learn how to install phpMyAdmin and how to secure its access on Linux Ubuntu 18.04.
First, connect to your server via an SSH connection. If you haven’t done so yet, following our guide is recommended to
securely connect with the SSH protocol. In case of a local server, go to the next step and open the terminal of your server.
Installing phpMyAdmin
PhpMyAdmin is on the standard Ubuntu repository.
First update the apt index, and then download and install phpMyAdmin:
$ sudo apt update
$ sudo apt install phpmyadmin php-mbstring php-gettext
By typing Y and pressing Enter to confirm.
The following screen will be displayed:
.png.aspx;)
Select apache here, but be careful, the red dash does not select apache 2. To select it, press the spacebar and then press Enter. If you do not press the spacebar, the files required for installation will not be transferred.
Once pressed Enter, the following screen will be displayed:
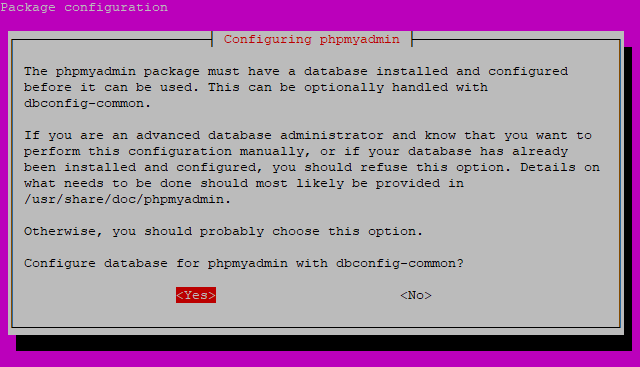
Select Yes and press Enter.
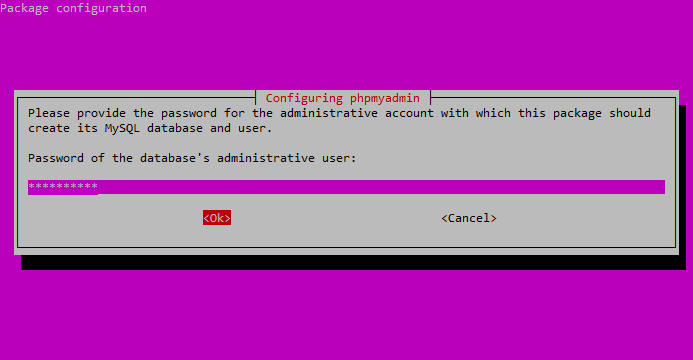
You are now required to enter a password for the administrator database. Enter a new password, press Tab to select OK and press Enter.
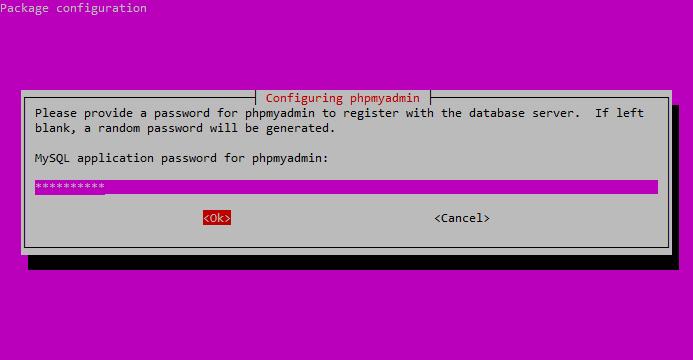
Now enter and confirm a password for the application.
Just like beforehand, enter a new password, press TAB to select Ok and press Enter.
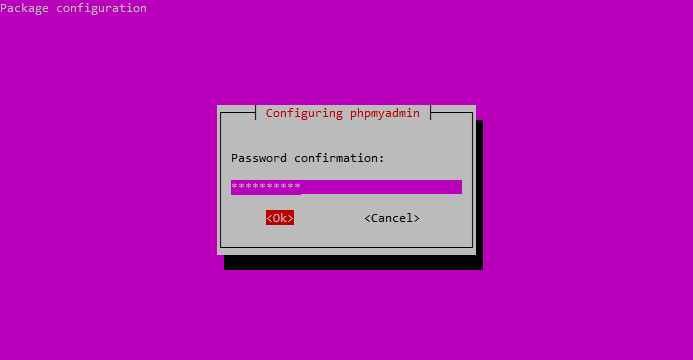
Confirm the password.
Once the installation is completed, a phpMyAdmin configuration file will be added here:
/etc/apache2/conf-enabled/phpmyadmin.conf The
The only thing you will need to do is activating the PHP mbstring extension. To do so type in:
$ sudo phpenmod mbstring
To apply all the changes, restart Apache by typing:
$ sudo systemctl restart apache2
Managing access privileges
To use phpMyAdmin, do not log in as the user created automatically during the installation. instead log in as a MySQL user root or as a database manager via phpMyAdmin interface.
You can either choose to configure only one of these two users or both.
Configuring the Password for the MySQL root account
Accessing as a MySQL root user requires an authentication auth_socket instead of a simple password. To log in as MySQL root via phpMyAdmin change the authentication method.
To do so, open the MySQL prompt
$ sudo mysql
Check the authentication methods for each MySQL user by typing:
SELECT user, authentication_string, plugin, host FROM mysql.user;
A list of all authentication methods for MySQL users is now displayed. Here you can clearly see how the root user has an auth_socket authentication type.
+------------------+-------------------------------------------+-----------------------+-----------+

| user             | authentication_string                     | plugin | host |

+------------------+-------------------------------------------+-----------------------+-----------+

| root             |                         | auth_socket | localhost |

| mysql.session    | *THISISNOTAVALIDPASSWORDTHATCANBEUSEDHERE | mysql_native_password | localhost |

| mysql.sys        | *THISISNOTAVALIDPASSWORDTHATCANBEUSEDHERE | mysql_native_password | localhost |

| debian-sys-maint | *8486437DE5F65ADC4A4B001CA591363B64746D4C | mysql_native_password | localhost |

| phpmyadmin       | *5FD2B7524254B7F81B32873B1EA6D681503A5CA9 | mysql_native_password | localhost |

+------------------+-------------------------------------------+-----------------------+-----------+

5 rows in set (0.00 sec)
To change the authentication type from auth_socket to mysql_native_password and use a password to log in to the root user, type:
ALTER USER 'root' @ 'localhost' IDENTIFIED WITH mysql_native_password BY 'password';
Instead of password, enter a password that you will have to remember.
Confirm the changes you just made by typing:
FLUSH PRIVILEGES;
In this way, the server will be notified that the authentication method for the root user has to be updated.
Check if the changes are saved by retyping:
SELECT user, authentication_string, plugin, host FROM mysql.user;
If everything was done correctly, the authentication method for the root user will be changed and the screen displayed will be similar to the following:
+------------------+-------------------------------------------+-----------------------+-----------+

| user             | authentication_string                     | plugin | host |

+------------------+-------------------------------------------+-----------------------+-----------+

| root             | *DE06E242B88EFB1FE4B5083587C260BACB2A6158 | mysql_native_password | localhost |

| mysql.session    | *THISISNOTAVALIDPASSWORDTHATCANBEUSEDHERE | mysql_native_password | localhost |

| mysql.sys        | *THISISNOTAVALIDPASSWORDTHATCANBEUSEDHERE | mysql_native_password | localhost |

| debian-sys-maint | *8486437DE5F65ADC4A4B001CA591363B64746D4C | mysql_native_password | localhost |

| phpmyadmin       | *5FD2B7524254B7F81B32873B1EA6D681503A5CA9 | mysql_native_password | localhost |

+------------------+-------------------------------------------+-----------------------+-----------+

5 rows in set (0.00 sec)
Once done, use the password previously chosen to authenticate yourself as root user in the phpMyAdmin interface.
Configure the Password for the dedicated MySQL user
To access phpMyAdmin not as a root user but as a user created specifically for this purpose, there is nothing to do but create one.
To do so, log in again to the MySQL prompt.
In case of already configured password-based authentication for root user, type:
$ mysql -u root -p
If you have decided not to use the root user, type:
$ sudo mysql
Now, create a new user, and then choose a name and a password by typing:
$ CREATE USER 'username' @ 'localhost' IDENTIFIED BY 'password';
Replace 'username' and 'password' with the ones chosen by you.
To give all the necessary privileges to the new user, type:
$ GRANT ALL PRIVILEGES ON *. * TO 'username' @ 'localhost' WITH GRANT OPTION;
Then exit the MySQL prompt by typing:
$ exit
Access to phpMyAdmin for the first time
To connect to the server, all you have to do is use this URL on a browser of your choice: http: // IP-SERVER / phpmyadmin
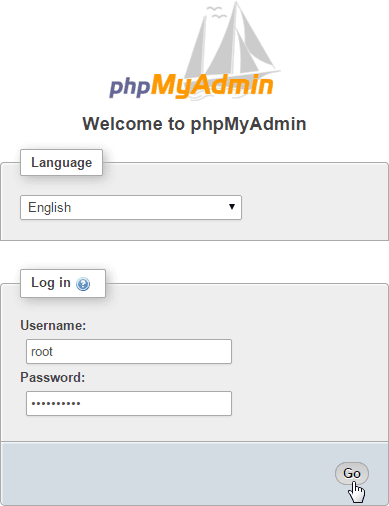
If the address is correct, a screen will be displayed and you will be required to enter your username and password.
Here you can log in either as root user or as the newly created user.
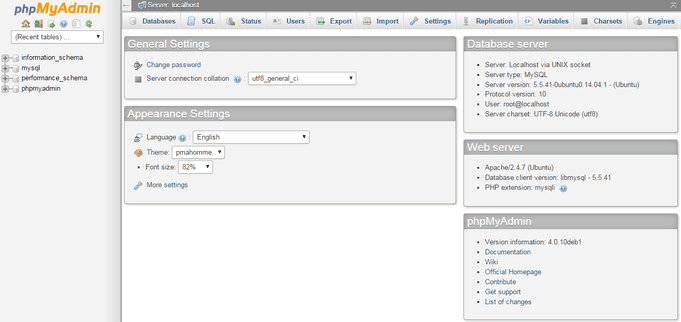
If everything was correctly run, the phpMyAdmin dashboard will be displayed.
Protection against external attacks
phpMyAdmin configured in this way is particularly vulnerable to external attacks, as these databases are particularly interesting for some people.
The easiest way to prevent these attacks is to add an access port to the entire application using an integrated Apache function.
This function is .htaccess.
To configure this function, access the .conf file in the apache directory.
To do so type:
$ sudo nano /etc/apache2/conf-available/phpmyadmin.conf
Inside the .conf file, search for the section:
<Directory / usr / share / phpmyadmin>
and add:
AllowOverride All
Once added the directive AllowOverride All, save and close the .conf file and restart Apache to implement all the changes.
To do so, type:
$ sudo systemctl restart apache2
Once .htaccess for your application is enabled, create a new one.
The file is in the application directory.
To do so, type:
$ sudo nano /usr/share/phpmyadmin/.htaccess
In the file, write:
			AuthType Basic

			AuthName "Reserved files"

			AuthUserFile /etc/phpmyadmin/.htpasswd

			Require valid-user
This file will simply create a dialog box for authentication.
The "title" of the dialog box will be "Reserved files". You can change this name as you like. Not giving a highly specific name to ensure that any malicious users don’t get interested in bypassing this protection is recommended.
Save the file and close it.
Now create a password file.
To create it type:
$ sudo htpasswd -c /etc/phpmyadmin/.htpasswd username
Replace "username" with a name of your choice.
You will be required to choose and confirm a password, a file with the password in /etc/phpmyadmin/.htpasswd will then be created.
From now on, before accessing phpMyAdmin, additional usernames and passwords to make everything safer will be required.
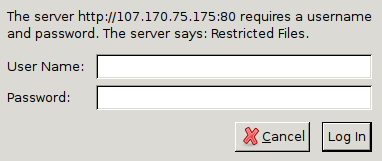
Once entered your username and password, the normal phpMyAdmin login window, where to enter your MySQL credentials will be displayed.