Introduction
Drupal is an open source software based on PHP that, by working on the server side, allows the creation of dynamic websites, even quite complex ones. It is a free, modular and highly customizable CMS (Content Management System), and bea valid alternative to more popular tools such as WordPress or Joomla.
In this tutorial you will see all the steps to correctly install Drupal 8 (version 8.4.5) on your Cloud Server with Linux Ubuntu 20.04.
Prerequisites
As for the operation of any CMS, it is essential that a Web Server is installed on your server and that there is a Database where to save information and contents. Here, we will use Apache and MariaDB respectively. Furthermore, Drupal is based on PHP, so it requires this component to be installed on your system as well.
In the next steps you will see how to install Apache, MariaDB and PHP on your Ubuntu 20.04 server, before proceeding with the installation of Drupal. If these components are already installed on your server, skip these steps and proceed directly to the fourth step “Creating the database for Drupal”.
To get started, connect to your server via an SSH connection. If you haven’t done so yet, following our guide is recommended to connect securely with the SSH protocol. In case of a local server, go to the next step and open the terminal of your server.
Installing Apache2
Apache is one of the most popular web servers nowadays. To install it, refer to the official Ubuntu repositories.
sudo apt update
sudo apt install apache2 -y
If the system notifies you of the need to restart the server to install Apache2, select the "yes" item and press Enter.
Once the installation is completed, enable Apache2 at system startup.
sudo systemctl stop apache2.service
sudo systemctl start apache2.service
sudo systemctl enable apache2.service
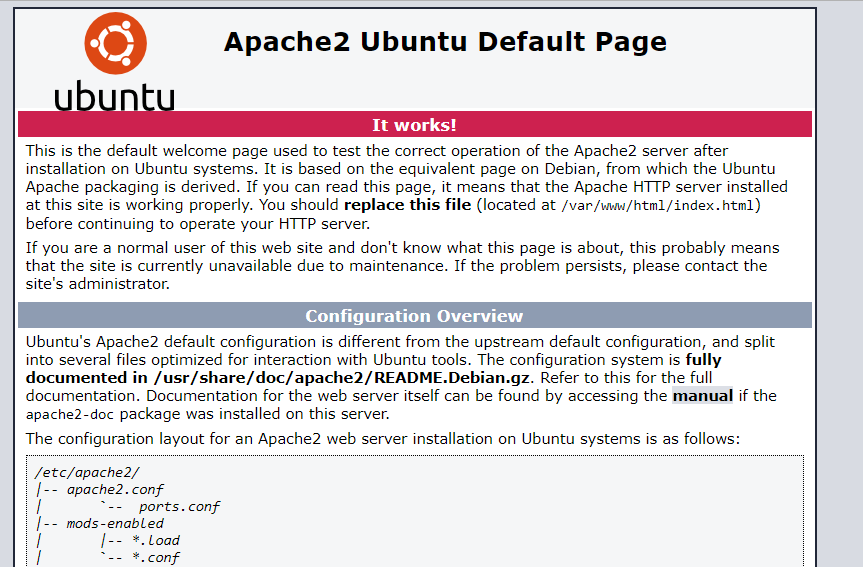
To verify that Apache is running, go to:
http://server_ip
NB Replace "server_ip" with the IP address of your Server. When operating directly on the machine, simply type "localhost".
Installing MariaDB
MariaDB is a good open source database, which can be used alongside Drupal. To install it on your server, simply run the following command:
sudo apt-get install mariadb-server mariadb-client -y
As with Apache, MariaDB has also to be run at Server startup, as it is a component that works in parallel with Drupal. To make this operation effective, just type:
sudo systemctl stop mariadb.service
sudo systemctl start mariadb.service
sudo systemctl enable mariadb.service
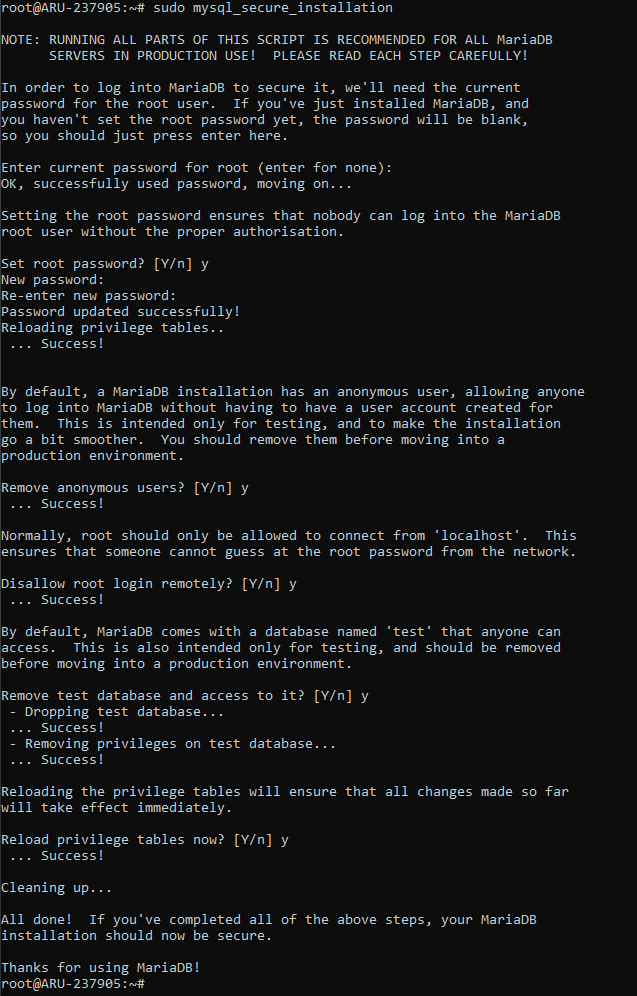
To increase MariaDB Database security certain parameters and requirements for data access can be specified. By defining these parameters, remote access by root user and access by anonymous users are either allowed or denied. To do so, type the command:
sudo mysql_secure_installation
You will be requested to specify a range of information. Follow the list below for the configuration.
- Enter current password for root (enter for none): Press Enter.
- Set root password ?: Type "Y" and press Enter.
- New password: Enter the password for the MariaDB root user and press Enter.
- Re-enter new password: Retype the password and press Enter.
- Remove anonymous users ?: Type Y and press Enter to not accept anonymous access to the Database.
- Disallow root login remotely ?: Type Y and press Enter to deny access to the Database as a Remote Root user.
- Remove test database and access to it ?: Remove the initial test databases automatically created when MariaDB is installed and press Enter.
- Reload privilege tables now ?: Type Y and press Enter to update the newly added information.
At the end of this configuration operation, to verify that MariaDB has been installed correctly, type:
sudo mysql -u root -p
After entering the password specified above, you will enter the MariaDB shell. To exit, just type:
EXIT;
In this way, the shell of MariaDB will have been closed. So, proceed with the next operations.
Installing PHP 7.2
Unlike the previously mentioned tools, PHP is not available in the official Ubuntu repositories, therefore it has to be installed using third-party repositories.
First, add the necessary repositories:
sudo apt-get install software-properties-common -y
sudo add-apt-repository ppa:ondrej/php
Then, update the repositories:
sudo apt update
At this point, you are ready to install PHP 7.2 and all the necessary submodules.
sudo apt install php7.2 libapache2-mod-php7.2 php7.2-common php7.2-mbstring php7.2-xmlrpc php7.2-soap php7.2-gd php7.2-xml php7.2-intl php7.2-mysql php7.2-cli php7.2-zip php7.2-curl -y
Finally, open the "php.ini" file and make the following changes
sudo nano /etc/php/7.2/apache2/php.ini
- file_uploads = On
- allow_url_fopen = On
- memory_limit = 256M
- upload_max_filesize = 100M
- max_execution_time = 360
- date.timezone = America / Chicago
Save and close the file (CTRL + X / Y / Enter).
To verify that the installation of PHP 7.2 has been successful, restart Apache and create a "phpinfo.php" file in the Apache root.
sudo systemctl restart apache2.service
sudo nano /var/www/html/phpinfo.php
Inside the newly opened text editor, paste the following statement:
<?php phpinfo(); ?>
Save and close the file (CTRL + X / Y / Enter).
Then, go to the same address used previously to verify the installation of Apache2, but add "/phpinfo.php" to the URL.
NB If you are working directly on your local Server, go to the address "http: //localhost/phpinfo.php", otherwise replace "localhost" with the IP address of your Cloud Server.

Drupal database creation
Before actually installing Drupal, one last fundamental operation must be carried out: create a database where all data can be saved. Enter the MariaDB Shell as shown above.
sudo mysql -u root -p
Creating a database dedicated to Drupal:
CREATE DATABASE drupaldb;
NB The database has been here called "drupaldb", but it can be assigned any name of your choice. Not changing this name if you want to keep the correspondence with the next commands is recommended.
Then, create a user that can access this database and that has all the privileges.
GRANT ALL ON drupaldb.* TO 'drupal_user'@'localhost' IDENTIFIED BY 'drupal_passwd' WITH GRANT OPTION;
NB Replace "drupal_user" with the name you wish to attribute to the user that can log in as administrator and replace "drupal_passwd" with the respective password to be associated with it.
FLUSH PRIVILEGES;
EXIT;
Downloading Drupal 8
All preparations for the installation of the Drupal CMS have been completed. All you have to do is download the software and configure it.
With the following commands Drupal can be downloaded and extracted in the appropriate directory:
cd /tmp && wget https://ftp.drupal.org/files/projects/drupal-8.9.1.tar.gz
tar -zxvf drupal*.gz
sudo mv drupal-8.9.1 /var/www/html/drupal
Then, make sure that these directories have the right permissions for it to function properly:
sudo chown -R www-data:www-data /var/www/html/drupal/
sudo chmod -R 755 /var/www/html/drupal/
Configuring Drupal and Apache2
At this point, just configure Apache2 for Drupal. To allow the website to be published, a Virtual Host has to be configured.
Create a configuration file to specify which users can access the service.
sudo nano /etc/apache2/sites-available/drupal.conf
In the text editor that will be displayed, paste the following text, replacing "example.com" with the domain of your website and "[email protected]" with the administrator's email address.
 ServerAdmin [email protected]
 DocumentRoot /var/www/html/drupal/
 ServerName example.com
 ServerAlias www.example.com

 ErrorLog ${APACHE_LOG_DIR}/error.log
 CustomLog ${APACHE_LOG_DIR}/access.log combined

 Options FollowSymlinks
 AllowOverride All
 Require all granted

 RewriteEngine on
 RewriteBase /
 RewriteCond %{REQUEST_FILENAME} !-f
 RewriteCond %{REQUEST_FILENAME} !-d
 RewriteRule ^(.*)$ index.php?q=$1 [L,QSA]
Save and close the file (CTRL + X / Y / Enter).
Enable this new configuration file in order for Apache2 to take it into account at the next restart.
sudo a2ensite drupal.conf
sudo a2enmod rewrite
sudo a2enmod env
sudo a2enmod dir
sudo a2enmod mime
Finally, restart Apache:
sudo systemctl restart apache2.service
Drupal: first access and configuration
When working directly on your Server, access the Drupal configuration page by going to:
http://localhost/drupal
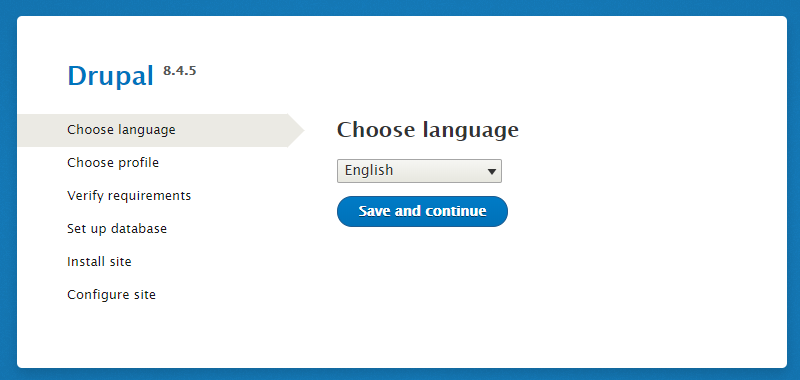
When working from an external machine, the IP of the Server instead of "localhost" will be indicated. A page like the one shown in the figure below will be displayed. Then, select your language and click on the "Save and continue" button to continue.
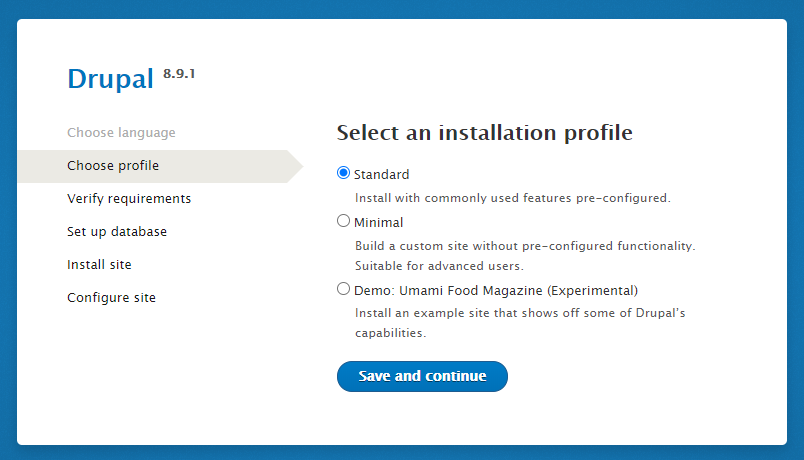
When asked which profile to install, leave the check mark on the Standard item and go ahead.
You will be requested to define the database to be used and to indicate the data for the user with whom Drupal will have the rights to write the information. In this section, enter the previously defined data: in our case "drupaldb", "drupal_user" and "drupal_passwd".
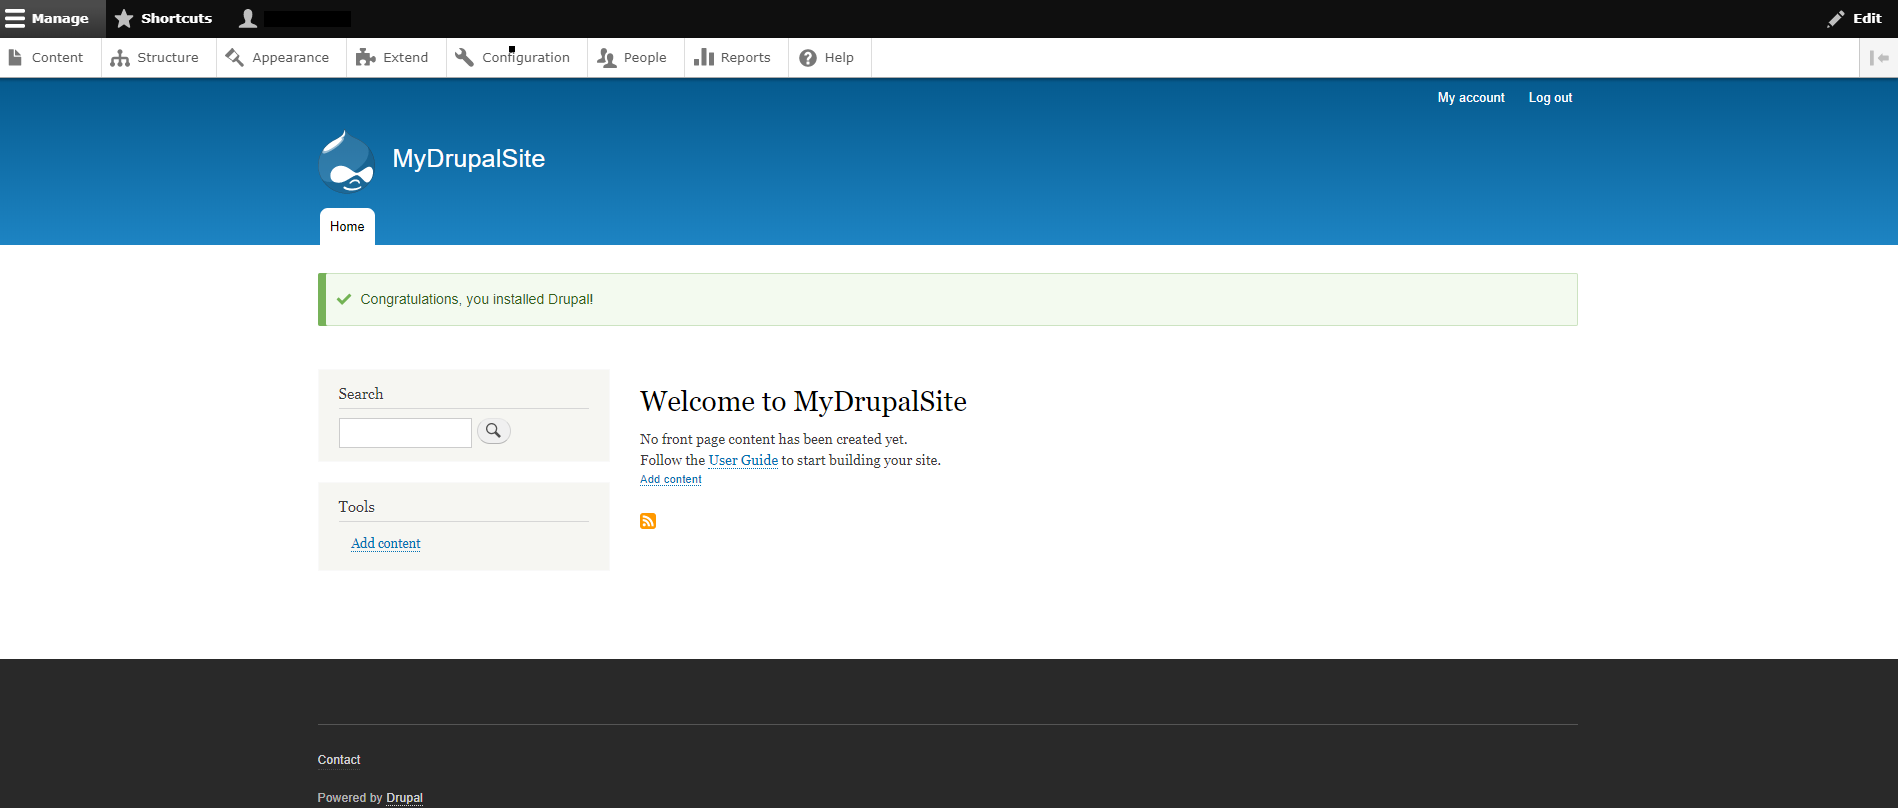
Finally, in the last section specify the information for your site, the email address and the login data for the administrator. When this last phase is completed, the Drupal backend homepage, announcing that the installation was successful, will openi!
From now on you can start using and configuring the CMS according to your needs.