TeamSpeak is a system for communicating with other users via the Internet through VoIP (Voice Over Internet Protocol) technology. Widely used by all online gaming enthusiasts, TeamSpeak goes on any platform with clear communications and low lag.
With this guide you will learn to install and configure a private server for Teamspeak 3 on Ubuntu 20.04.
First, connect to your server via an SSH connection. If you haven’t t done so yet, following our guide is recommended to connect securely with the SSH protocol. In case of a local server, go to the next step and open the terminal of your server.
Installation of the server
Create a new user by typing:
You will be required to choose a new password. Add user to sudo group:
$ sudo adduser teamspeak sudo
Once the new user is created, enter as teamspeak user by typing:
Download and install the Teamspeak server. The latest server version can be found at : https://www.teamspeak.com/en/downloads/#server
To download it, simply replace the URL of the most recent version in the command:
$ wget https://files.teamspeak-services.com/releases/server/3.9.0/teamspeak3-server_linux_amd64-3.9.0.tar.bz2
Extract the archive.
$ sudo tar xvf teamspeak3-server_linux_amd64-3.9.0.tar.bz2
If you download a more recent version of the Teamspeak server, edit the extraction command as follows, by replacing XXX with the correct version:
$ tar xvf teamspeak3-server_linux_amd64-X.X.X.tar.bz2
The extraction command will create a new folder in the root directory.
Delete the downloaded file by typing:
$ sudo rm teamspeak3-server_linux_amd64-3.9.0.tar.bz2
The newly created folder contains the conditions necessary to use the TeamSpeak server. To accept the conditions, create a file.
First, enter the folder containing the extracted archive.
$ cd teamspeak3-server_linux_amd64
Once entered the folder, to read the terms and conditions, type:
To create the file and accept the terms and conditions:
$ sudo touch .ts3server_license_accepted
Starting the TeamSpeak server
To start the TeamSpeak server, stay in the teamspeak3-server_linux_amd64 folder and type:
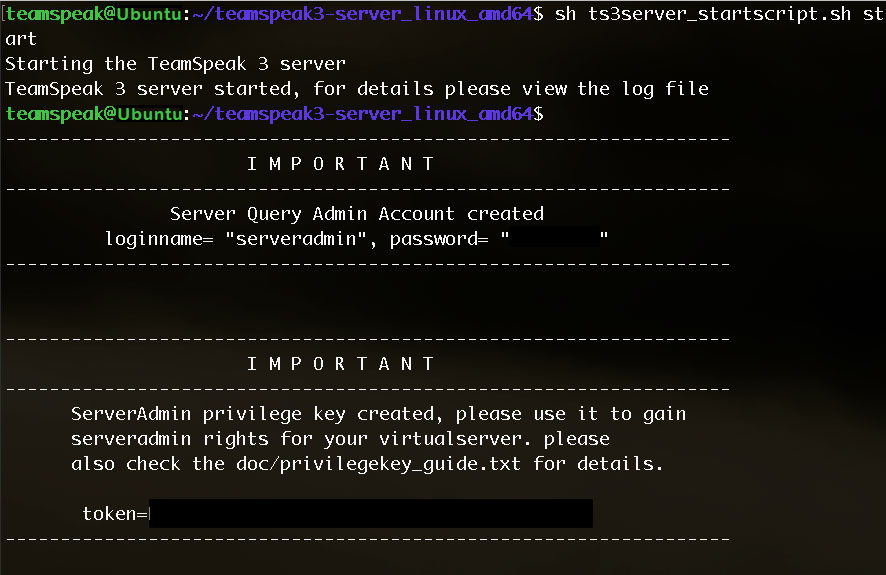
$ sudo sh ts3server_startscript.sh start
A screen providing the necessary information to obtain administrator privileges for the server will be displayed.
To manage the server a script is needed. Create a script by typing:
$ sudo nano /home/teamspeak/run.sh
The script inside it has to contain:
#!/bin/sh

### BEGIN INIT INFO

# Provides:         teamspeak

# Required-Start:   $local_fs $network

# Required-Stop:    $local_fs $network

# Default-Start:    2 3 4 5

# Default-Stop:     0 1 6

# Description:      Teamspeak 3 Server

### END INIT INFO
                ######################################


                USER="teamspeak"

DIR="/opt/teamspeak3/server"
                ###### Teamspeak 3 server start/stop script ######
                case "$1" in

start)

su $USER -c "${DIR}/ts3server_startscript.sh start"

;;

stop)

su $USER -c "${DIR}/ts3server_startscript.sh stop"

;;

restart)

su $USER -c "${DIR}/ts3server_startscript.sh restart"

;;

status)

su $USER -c "${DIR}/ts3server_startscript.sh status"

;;

*)

echo "Usage: {start|stop|restart|status}" >&2

exit 1

;;

esac

exit 0
Once the text is edited, press CTRL + Q. Then you will be asked whether you want to save and add an extension.
Save and do not add any extension.
Make run.sh an executable:
$ sudo chmod +x /etc/init.d/teamspeak
This enables the execution of the script.
Add the script to the services:
$ sudo update-rc.d teamspeak defaults
Managing TeamSpeak server status
If everything was correctly installed, the script will start with the boot. To manage the TeamSpeak server, just type the following commands.
To start the server:
$ sudo service teamspeak start
To stop the server:
$ sudo service teamspeak stop
To restart the server:
$ sudo service teamspeak restart
To check the server status:
$ sudo service teamspeak status
Connecting with a Client
Download the latest TeamSpeak 3 client from the site https://www.teamspeak.com/en/your-download/.
Then open the client and log in.
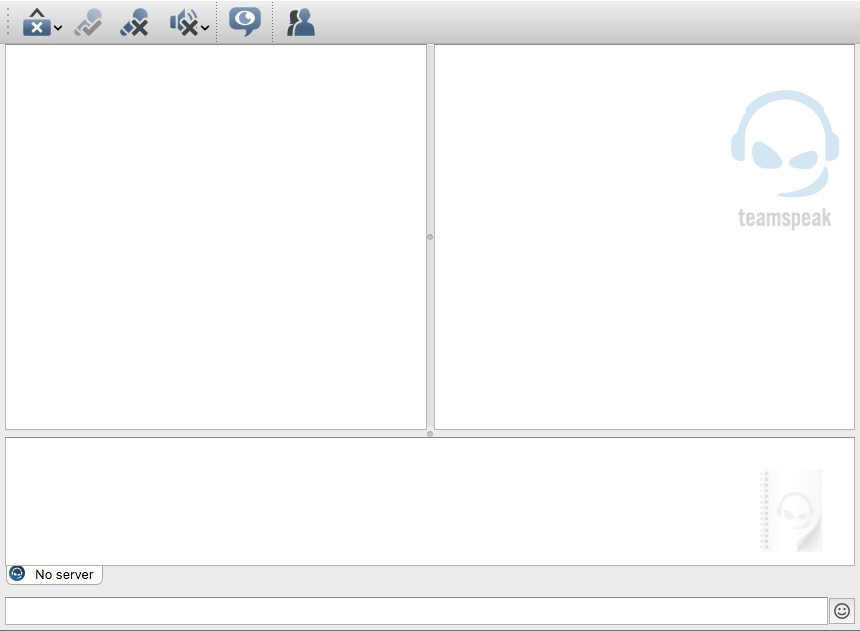
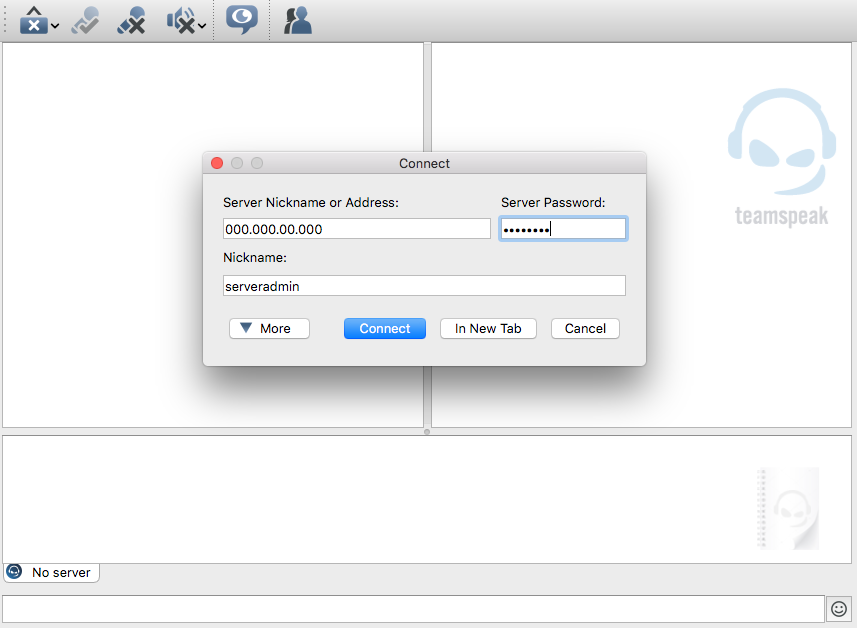
Once inside the client, create a new connection.
A dialog where to enter server IP, nickname and password will be displayed.
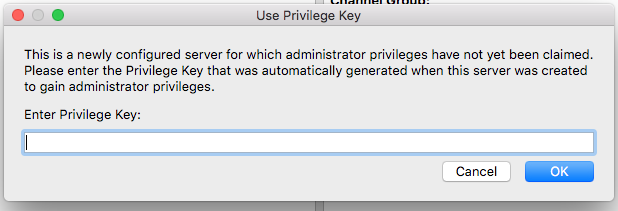
When connecting for the first time, you will be asked for the key for administrator privileges.
Insert the key for full control of the channel.
Now, to use TeamSpeak with your friends just send the server ip and password.
Configuration of the Firewall
In case of a firewall on your system, set it up to enable TeamSpeak traffic.
When using the UFW firewall, unlock the ports in this way to allow proper functioning of the TeamSpeak server:
iptables -A INPUT -p udp --dport 9987 -j ACCEPT

iptables -A INPUT -p udp --sport 9987 -j ACCEPT

iptables -A INPUT -p tcp --dport 30033 -j ACCEPT

iptables -A INPUT -p tcp --sport 30033 -j ACCEPT

iptables -A INPUT -p tcp --dport 10011 -j ACCEPT

iptables -A INPUT -p tcp --sport 10011 -j ACCEPT