Introduction
Each website published on the Internet is hosted on a web server (host), connected to the network with a public IP address and able to manage requests for web pages on a browser (client) such as Chrome, Firefox or Internet Explorer.
If you need to host a website on your machine, first, install a web server. Among those available, one of the best known is Apache, an open source software compatible with both Unix and Windows systems.
But what if you need to host multiple websites on the same server, despite having only one public IP address available? In this case, configure Virtual Hosts on Apache to associate different domains with the same IP address.
In this tutorial, you will then see how to install Apache 2 on your Ubuntu 20.04 server and how to configure it to create two virtual hosts and host two separate websites on a single server.
To get started, connect to your server via an SSH connection. If you haven’t done so yet, following our guide is recommended to connect securely with the SSH protocol. In case of a local server, go to the next step and open the terminal of your server.
Installing Apache
To install Apache 2 through the official Ubuntu repositories, proceed by typing:
sudo apt-get update
sudo apt install apache2
Since Apache communicates externally, it should be inserted among the exceptions of your Firewall. In case of using UFW, allow bidirectional communications between Apache and a Client by typing:
sudo ufw allow 'Apache Full'
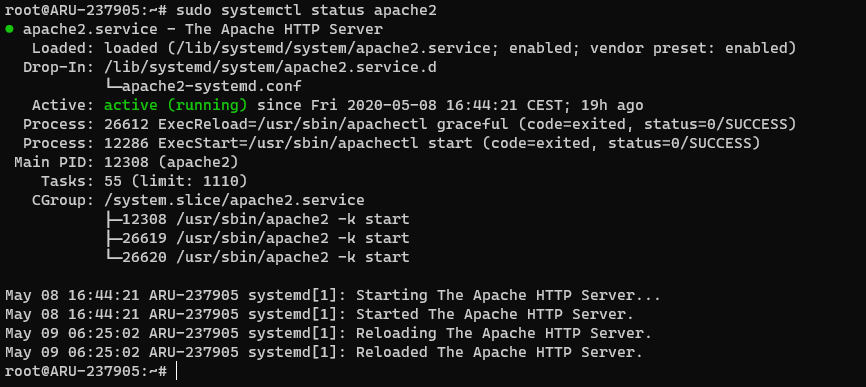
Apache should already be running. To check its stateuse the command:
sudo systemctl status apache2
Then, open your browser and connect to the IP address of your Server:
- http: // your_IP_address (replace with the IP of your Cloud Server, when connecting from the outside)
- http: // localhost (when accessing the server locally).
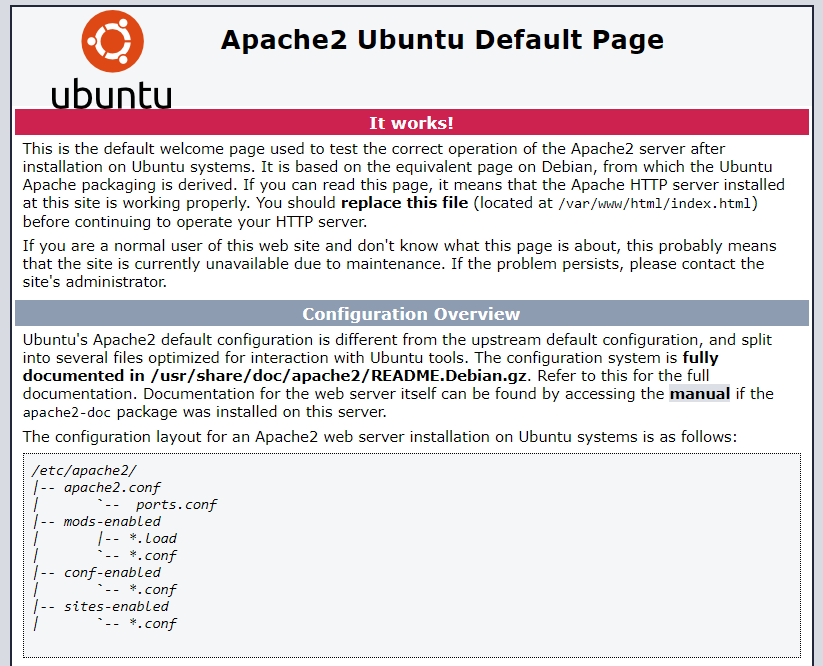
If the web server was successfully installed, the Apache welcome page will be displayed.
If this is not the case, some problems may have occurred while installing Apache. In this case, uninstalling Apache and proceeding with a new installation is advisable.
To remove Apache, just type:
sudo apt-get purge apache2
Configuring Virtual Host on Apache
The example of Virtual Host configuration shown in this tutorial is name-based, since it relies on the website's domain name to distinguish requests. There is another IP-based mode, when multiple domains have to be each associated with a different IP address.
In the example of this tutorial, mypersonaldomain.com will be used as a domain, but you will have to use an existing domain that you own.
By accessing the IP address of the Server where you have just installed Apache, you can normally find the content of your website inside a public folder at var/www/html.
If you want to host multiple websites, it’s therefore easy to see how to create as many folders as there are websites provided that, for each website, the configuration file of the virtual host which will make it accessible via the web, is correctly set up.
So, move inside/var/www and create the folder for your site. For your convenience, you may assign the corresponding domain name to each folder:
cd ~/var/www
sudo mkdir -p mypersonaldomain.com/html/
Define your current user as owner of those folders and assign the right permissions for reading and editing files:
sudo chown -R $USER:$USER /var/www/mypersonaldomain.com/html
sudo chmod -R 755 /var/www/mypersonaldomain.com
Create an index.html file within your domain to have a visual feedback when trying to connect to the contents of that folder:
sudo nano mypersonaldomain.com/html/index.html
Copy the following HTML code into the text editor:
<html>
  <head>
    <title>Welcome</title>
  </head>
  <body>
    <h1>Hello, you’re connected to mypersonaldomain.com!</h1>
  </body>
</html>
Save and close using the CTRL + X combination, then press Y and confirm by pressing ENTER.
All you have to do is generate the configuration file for your virtual host, by typing:
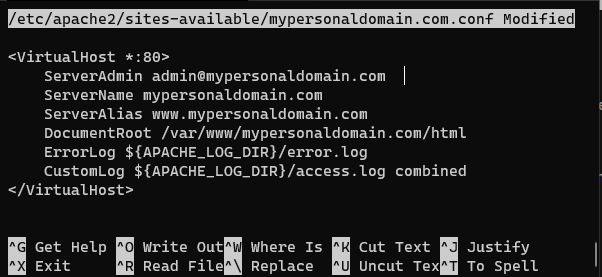
sudo nano /etc/apache2/sites-available/mypersonaldomain.com.conf
Paste the following content into the editor just opened, paying attention to replace mypersonaldomain.com with your domain every time.
<VirtualHost *: 80>
   ServerAdmin [email protected]
  ServerName mypersonaldomain.com
  ServerAlias www.mypersonaldomain.com

   DocumentRoot /var/www/mypersonaldomain.com/html

   ErrorLog ${APACHE_LOG_DIR}/error.log
  CustomLog ${APACHE_LOG_DIR}/access.log combined
</VirtualHost>
In each configuration, ServerAdmin refers to the sysadmin email, ServerName refers to the name of the Virtual Host, ServerAlias define how it is translated by the server when DocumentRoot identifies the path where its contents on the server disk are. Finally, ErrorLog and CustomLog contain the path of the system log files.
Save and close using the CTRL + X combination, then press Y and confirm by pressing ENTER.
Then, enable the new site and disable the default Apache configuration:
sudo a2ensite mypersonaldomain.com.conf
sudo a2dissite 000-default.conf
To verify that everything uses the syntax provided by Apache, use the integrated tool by typing:
sudo apache2ctl configtest
The answerSyntax OK should be returned. Then, restart Apache to apply the changes and have the web server use your configuration file.
sudo systemctl restart apache2
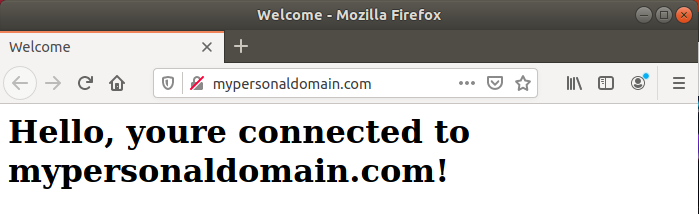
If the configuration of the Virtual Host was successful, the message contained in the HTML page previously created in the domain folder will be shown:
Creating the second Apache Virtual Host
The creation of the second Virtual Host with Apache is a very simple operation: you just need to repeat the operations previously carried out. For this second virtual host mypersonaldomain2.com is used as domain .
Create the folder of the second site:
sudo mkdir -p /var/www/mypersonaldomain2.com/html
Define the owner of the folder:
sudo chown -R $USER:$USER /var/www/mypersonaldomain2.com/html
Set permissions:
sudo chmod -R 755 /var/www/mypersonaldomain2.com
Create the index.html page:
nano /var/www/mypersonaldomain2.com/html/index.html
<html>
  <head>
    <title>Welcome_2</title>
  </head>
  <body>
    <h1>Hello, you’re connected to mypersonaldomain2.com!</h1>
  </body>
</html>
Generate the configuration file also for the second Virtual Host:
sudo nano /etc/apache2/sites-available/mypersonaldomain2.com.conf
<VirtualHost *:80>
ServerAdmin [email protected]
  ServerName mypersonaldomain2.com
  ServerAlias www.mypersonaldomain2.com
  DocumentRoot /var/www/mypersonaldomain2.com/html
  ErrorLog ${APACHE_LOG_DIR}/error.log
  CustomLog ${APACHE_LOG_DIR}/access.log combined
</VirtualHost>
Enable the configuration file of the second Virtual Host:
sudo a2ensite mypersonaldomain2.com.conf
Check that the syntax is correct:
sudo apache2ctl configtest
Restart Apache:
sudo systemctl restart apache2
If the configuration of the second virtual host was also successful, then the HTML page previously created will be displayed:

Conclusions
At this point, the Apache web server has been correctly installed on Ubuntu 20.04 and your first Virtual Hosts for associating the two websites with the single IP address of your machine has also been created.
Your domains have been mapped to port 80 of the Apache web server, which is associated by default with the browsers when visiting a website. Of course, multiple virtual hosts based on how many sites you need to host can be created.
Enabling the automatic execution of Apache so that the web server is running even after a server restart is recommended. To apply this change simply type:
sudo systemctl enable apache2