Introduction
If you are a system administrator, backing up the server you manage is vital to prevent the loss of important data. Configuring periodic backups allows you to restore the system, should an unexpected event arise, such as a malfunction of the hardware components, the incorrect configuration of the system or the presence of viruses.
If you use Windows Server, take advantage of the Windows Server Backup (WSB) solution provided by Microsoft to quickly and easily schedule backups of both the entire server and specific storage volumes, files or folders.
In this tutorial you will be shown the procedure required to perform an automatic backup of your Cloud Server with Windows Server 2019.
Installing Windows Server Backup
Windows Server Backup is a feature provided by Microsoft for creating a backup copy of your server.
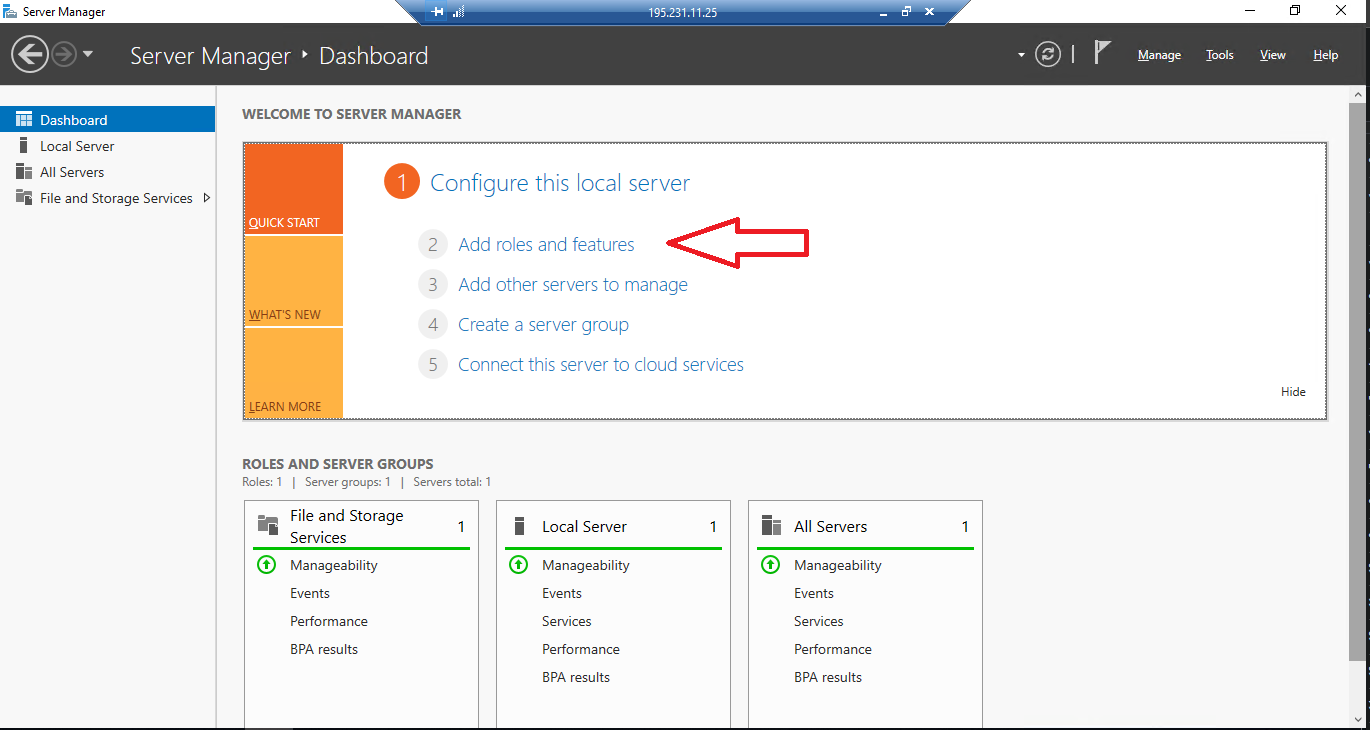
First, open the Windows Server Management Panel Dashboard, click on "Add roles and features" and proceed with the installation of this backup feature.
A window with several sections will be displayed on the left. Feel free to skip the information requested in the first section "Before You Begin" and go ahead. Then, in the second window "Installation Type", select the item "Role-based or feature-based installation" and go on.
In the "Server Selection" section, select the server where you want to install Windows Server Backup and go ahead. In the "Server Roles" section, continue by clicking on "Next".
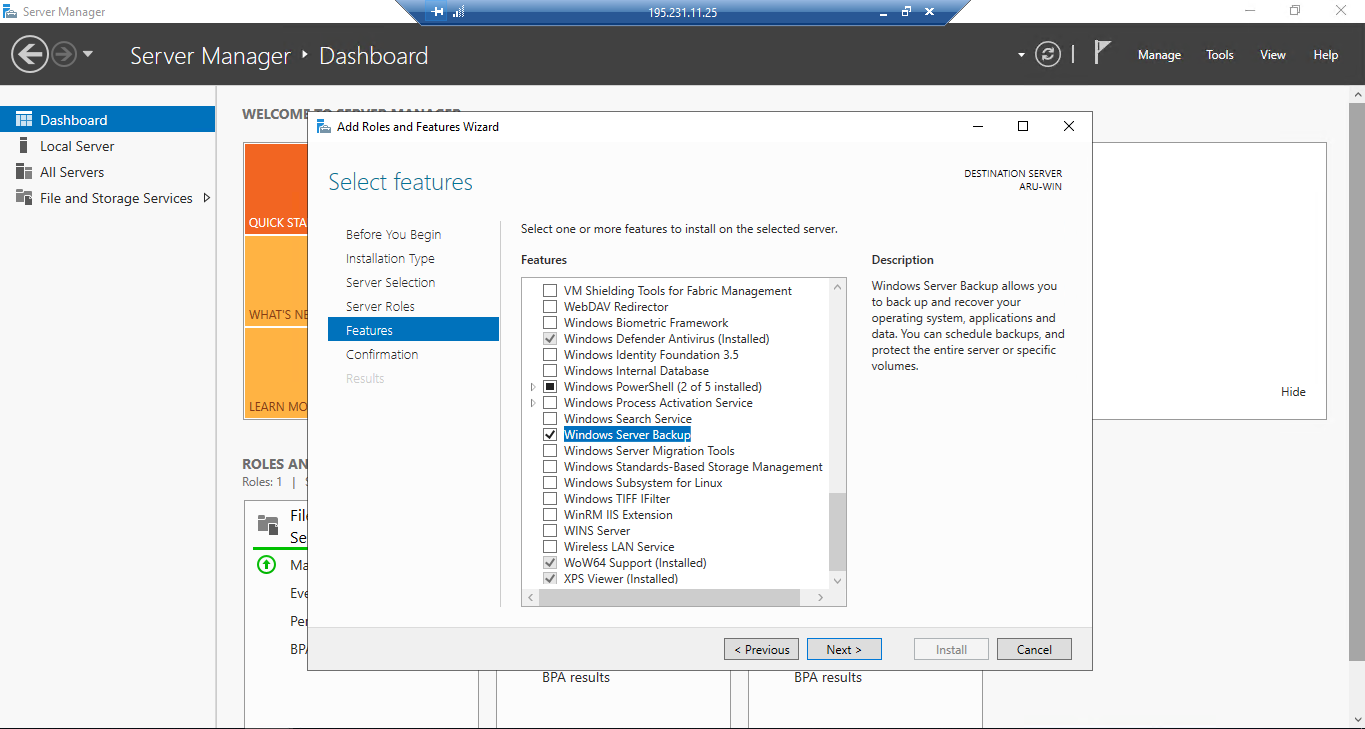
Select the "Features" window, then, scroll and choose the "Windows Server Backup" item and go ahead.
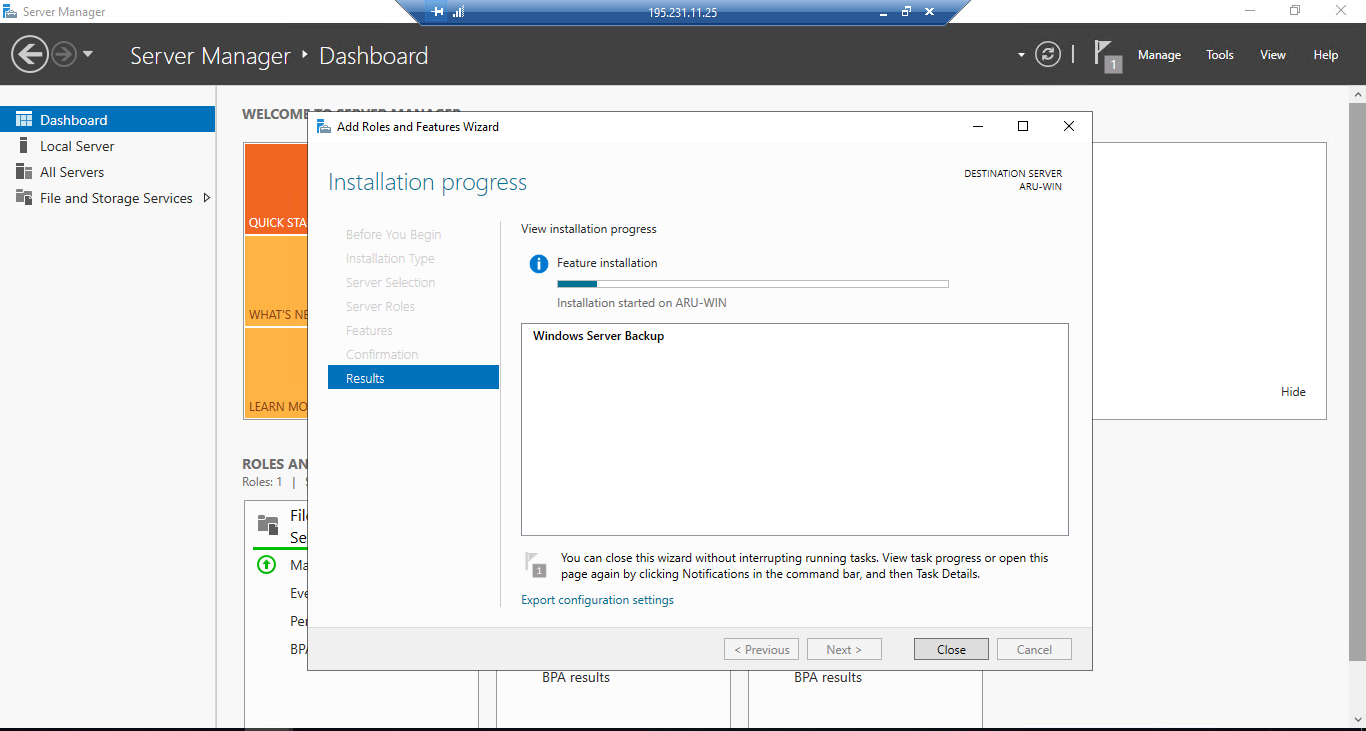
In the "Confirmation" section, select "Restart the destination server automatically if required" and click on "Install". Then, wait for the installation to finish and then click on "Close".
Windows Server Backup (WSB) is therefore correctly installed. Now, start it and configuring it. The tool can be viewed from the Server Manager's "Tools" menu.
Configuring automatic backup
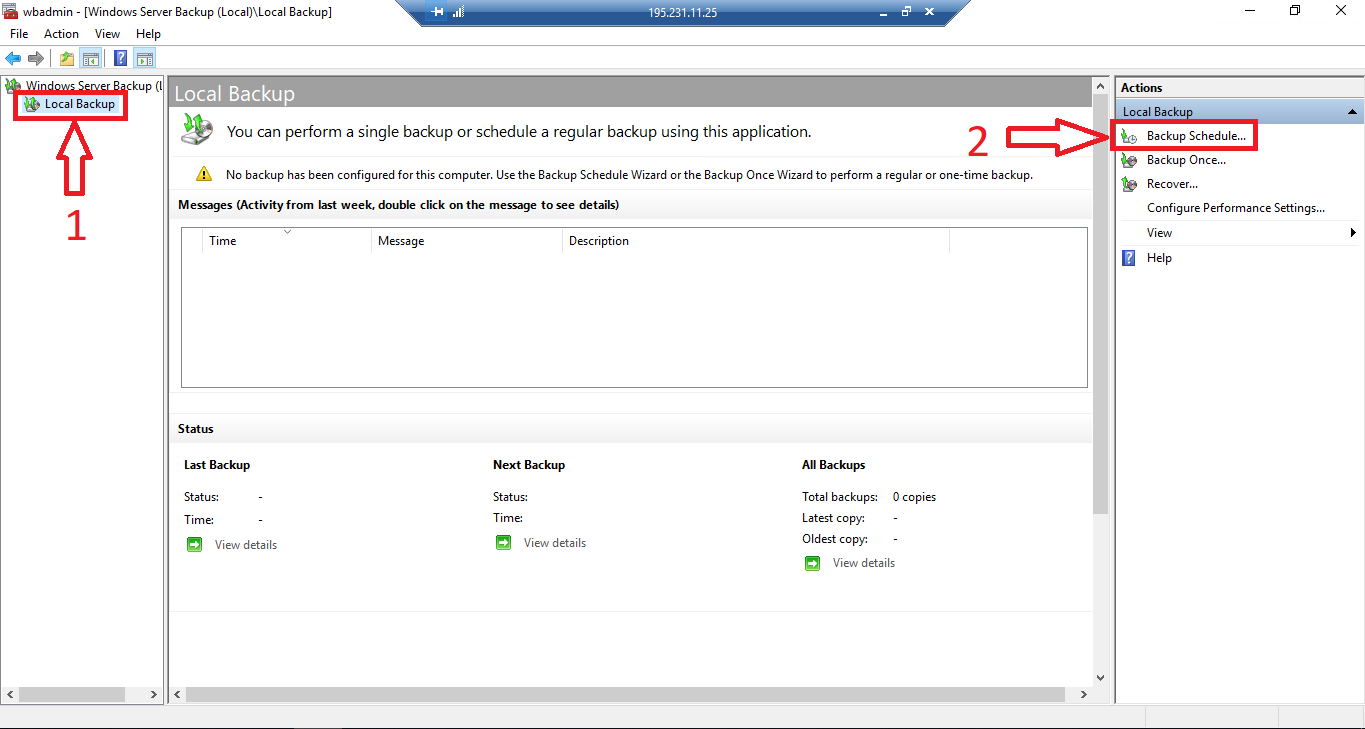
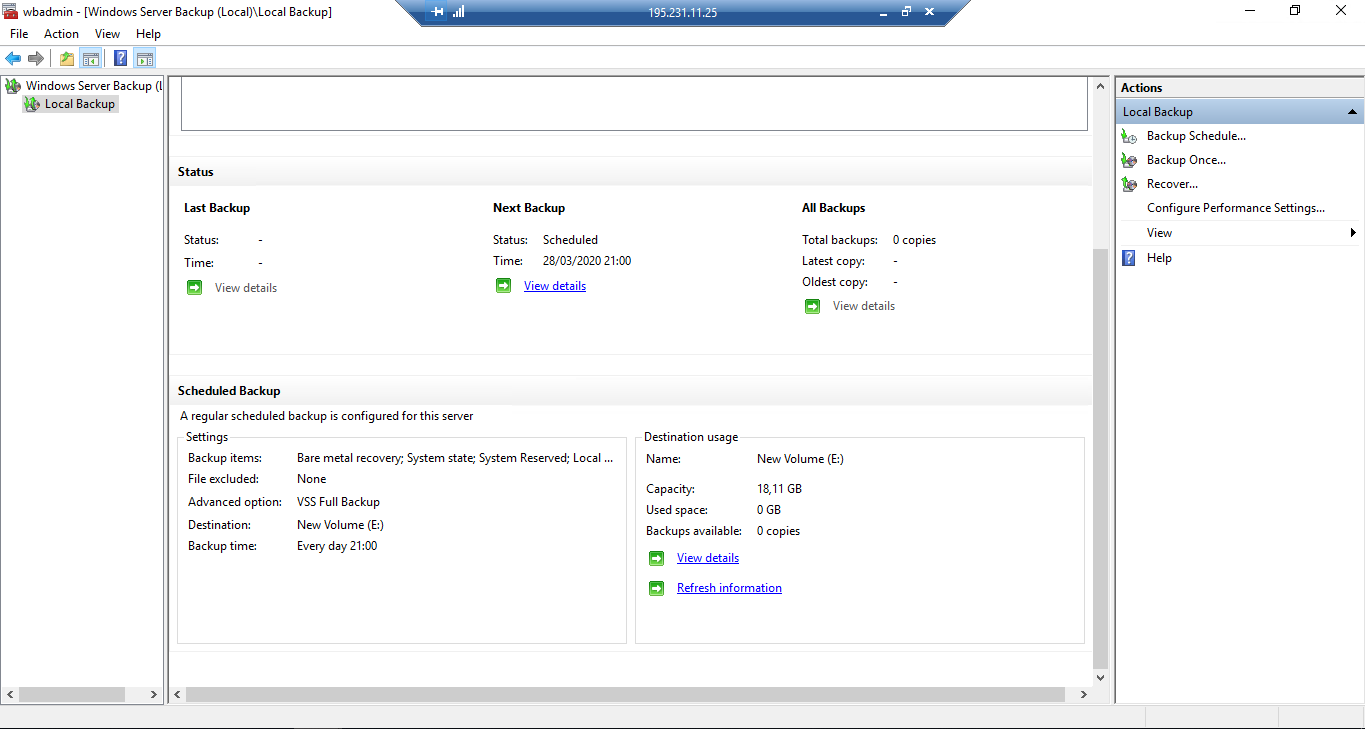
Once Windows Server Backup is open, select Local Backup on the left (1) and then click on Backup Schedule on the right (2) to configure the automatic backup rules.
A window with several sections will be displayed. In the "Getting Started" section, simply click on "Next" to get started.
Then, in "Select Backup Configuration", leave the entry "Full server" if you want to make a backup of the whole system. Otherwise, select " Custom " to specify only some specific volumes, files or folders for backup. Finally, click on "Next" to go to the next section.
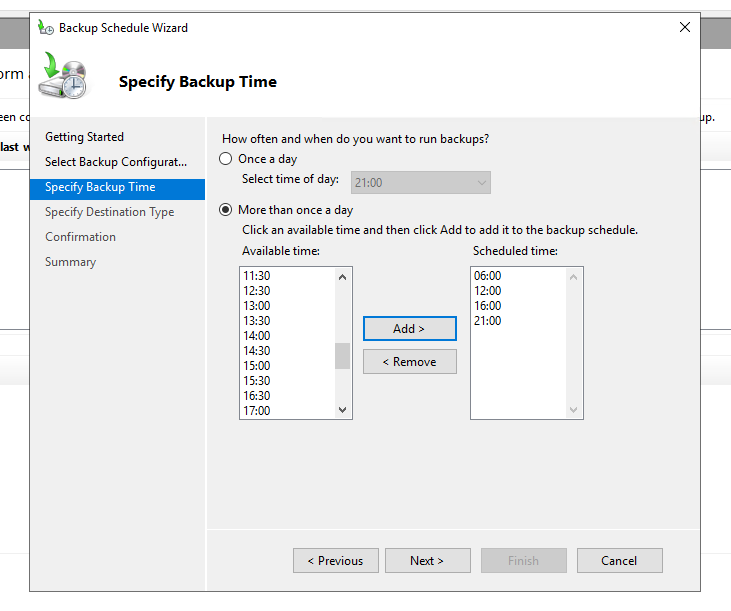
In the "Specify Backup Time" section, indicate whether to backup once a day at a specified time (first item) or whether to perform several backups at multiple times, always on the same day (second item).
In case you have selected the item "More than once a day" just select the desired time in the left column and click on "Add". To remove an incorrect time, just click on the time in the right column and click on “Remove”. Once the backup frequency is set, click on “Next”.
In the “Specify Destination Type” section, you will be requested where to store your backup file. Each storage option has its pros and cons, each listed in its respective item. So, consider carefully where to store your backup.
There are three options available:
- Saving to local hard disk : by selecting this item, the backup will be carried out on a local hard disk installed on the server itself. Please note that the hard disk in question will be formatted, once selected, so remember to move any existing data to another hard disk.
- Saving to volume: by selecting this item a part of the hard disk can be used as backup storage. However, keep in mind that, when choosing this option, the read / write speed on the hard disk may slow down considerably during the backup phase. If you plan to use this method, it may be a good strategy to schedule the backup at times when your server has fewer accesses.
- Saving to a folder on the network: by selecting this item your server can be backed up to a hard disk on the network. This will allow you to store your data on a NAS or another available Cloud Server. In this case, however, as it is overwritten each time, only one backup at a time can be saved.
After selecting the option that suits you, click on"Next". In this example, the option “Saving to volume” is selected.
At this point, the "Confirmation" section shows a summary of the backup settings you have chosen. Click on "Finish" to schedule the backup. When finished, click on "Close".
Conclusion
At this point, you have correctly scheduled your first automatic backup on Windows Server 2019. Depending on the frequency and storage options you set, Windows Server Backup will back up your data, preserving a copy of the files on your server.
Scheduling backups of your Windows server should be a good habit at all times, as it allows you to restore data and settings if something goes wrong, for example in case of defective hardware, incorrect system configuration or presence of malware.
Also, keep in mind the pros and cons of the different backup methods available, in order to avoid files unavailability or backup overwrites.