WordPress is one of the most well-known Content Management System based on PHP and MySQL, used for the creation of websites and blogs.
This tutorial shows all the necessary steps to install WordPress on a virtual environment created with Jelastic Cloud both through the automatic deployment of the instance, and manually, through the creation of an environment with Apache, PHP and MariaDB.
Automatic deployment of WordPress with Jelastic Cloud
In a few clicks, a WordPress instance can be automatically deployed through the Jelastic web interface.
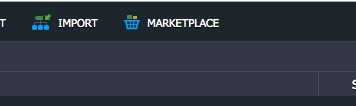
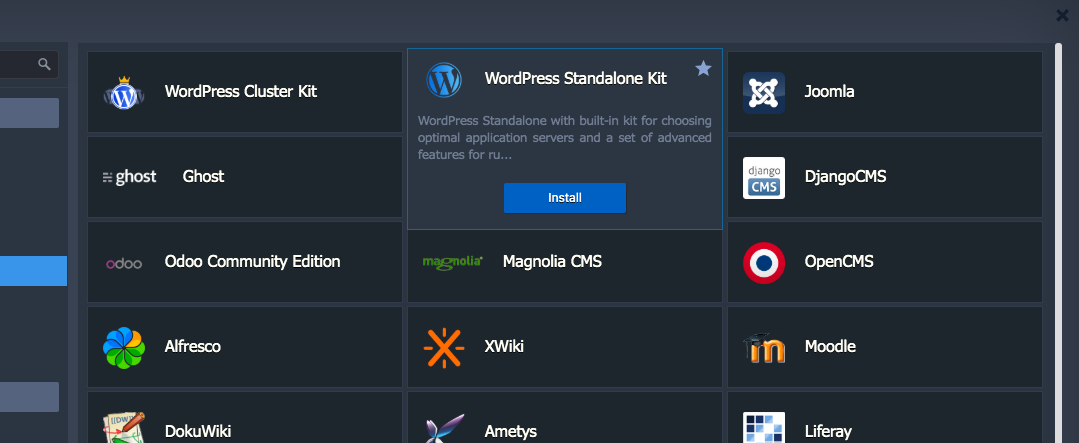
Click on "Marketplace" to see the list of applications that can be installed automatically.
Select the "WordPress Standalone" instance and click on "Install".
At this point, configure the name and address of your instance.
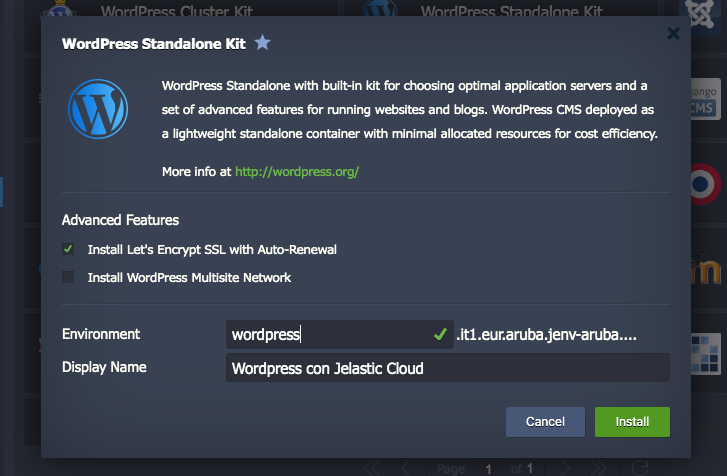
Then, start the automatic installation by clicking on "Install".
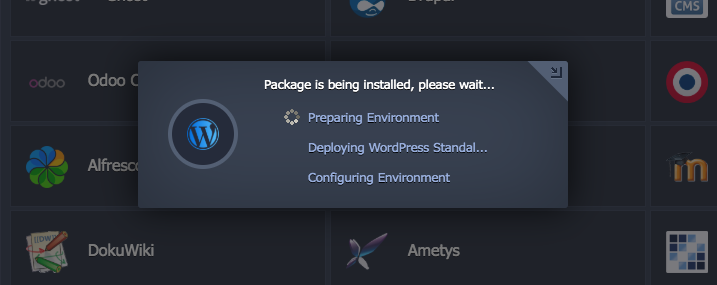
The installation and the deployment of your new instance will take a few minutes.
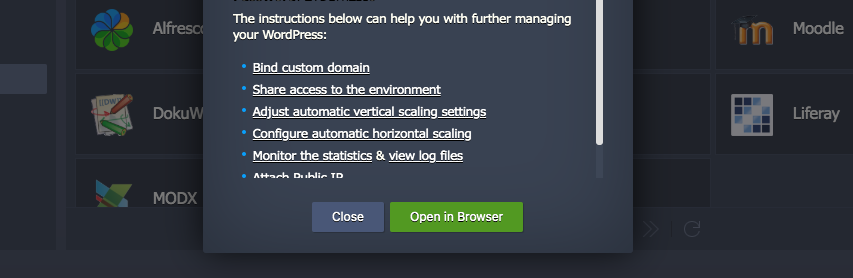
You will be notified by a confirmation message that the procedure has been carried out correctly. To see the application click on "Open in Browser".
Manual installation of WordPress with Jelastic Cloud
Proceed with the manual creation of a new environment on Jelastic to manually install WordPress and have more control over its configuration. .
To do so, after entering the Jelastic Cloud management panel, press the "NEW ENVIRONMENT" button located at the top left:
The new environment configuration tab will open.
Configure the new environment by choosing:
- Apache as Web Server with PHP 7.3.5
- MariaDB as Database
- The name of your environment, in this case it was called wordpress1
Finally, press the "Create" button to start creating the new virtual environment just configured.
Downloading WordPress
Visit the official WordPress official website and download the latest version available, in this case version 5.3 .
Uploading the archive
Open the Deployment manager, located at the bottom right:
Then, press "Upload" and upload the previously downloaded WordPress archive.
Start the upload by pressing "Upload".
After the end of the upload, press the "Deploy to" button located on the right next to the name of the archive just loaded.
Select the Application Server related to the environment just created, in this case wordpress1, and select a folder of your choice to host your WordPress instance.
Finally click on "Deploy" to install the loaded WordPress version.
Configuring the database
After completing the installation of WordPress continue with the database configuration.
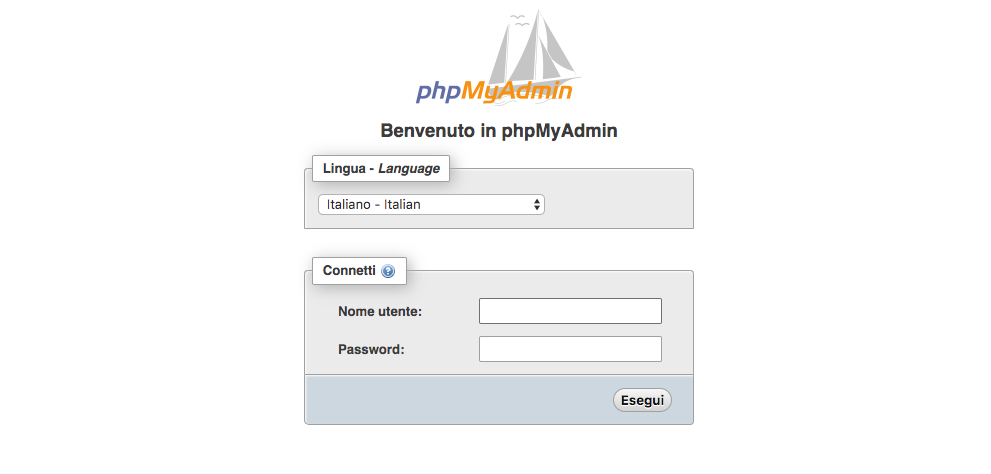
Click on the "Open in Browser" button located next to the previously created database instance.

The phpMyAdmin login interface will open.
To access, use the credentials you received by email from Aruba Cloud.
Access the User Accounts screen.
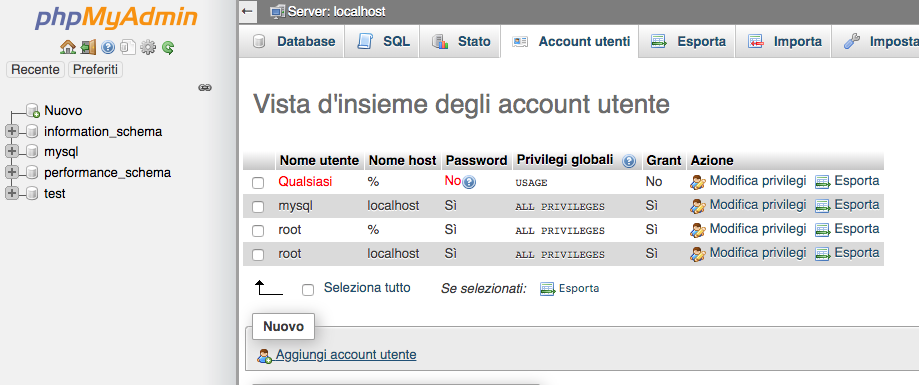
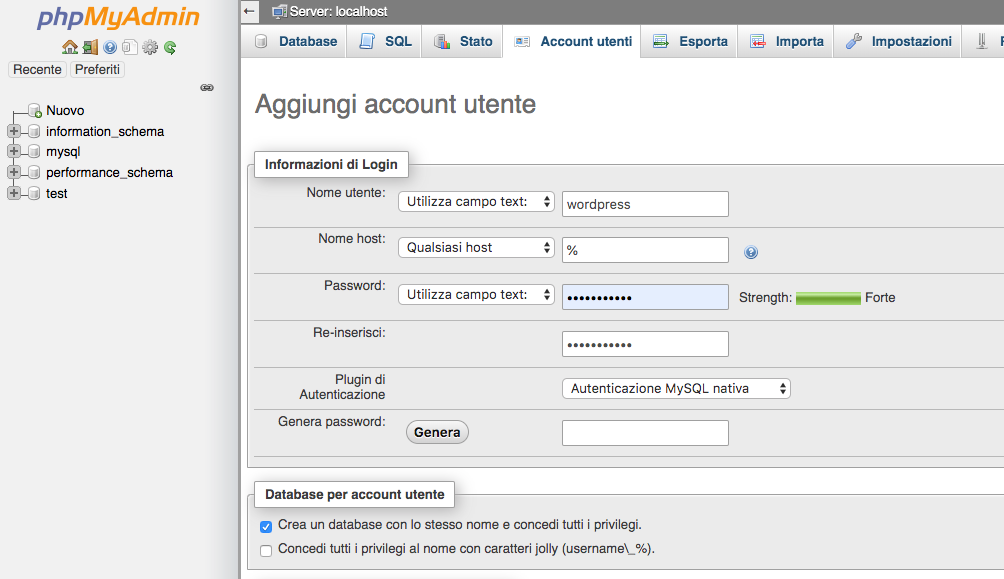
Continue by adding a new user and creating the related database for hosting the instance of Wordpress.
Installing WordPress
Click on the "Open in Browser" button located next to the previously created Application Server instance.

The WordPress installation wizard screen will appear.
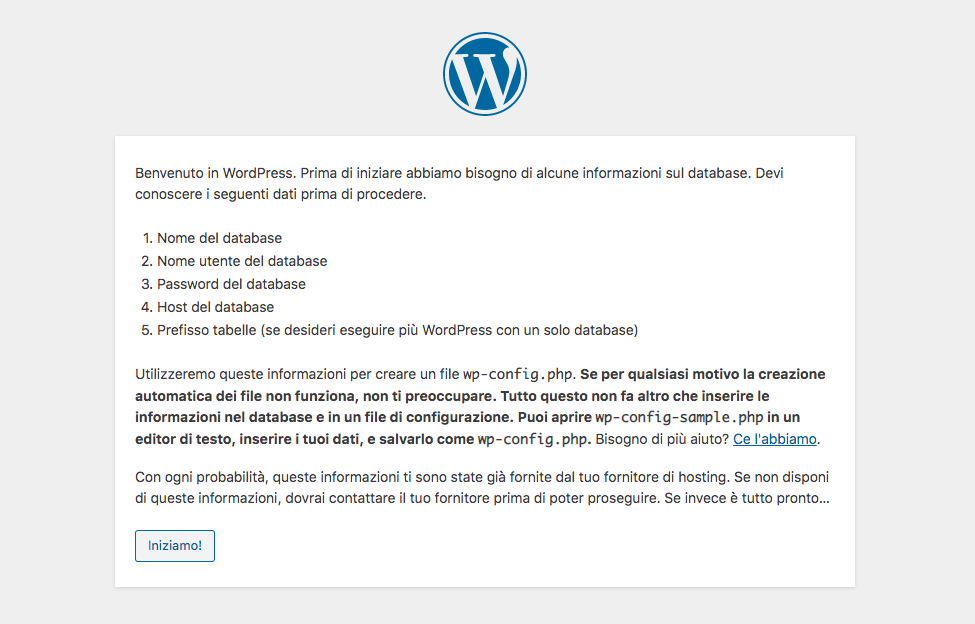
Complete the fields with the user and database information previously created.
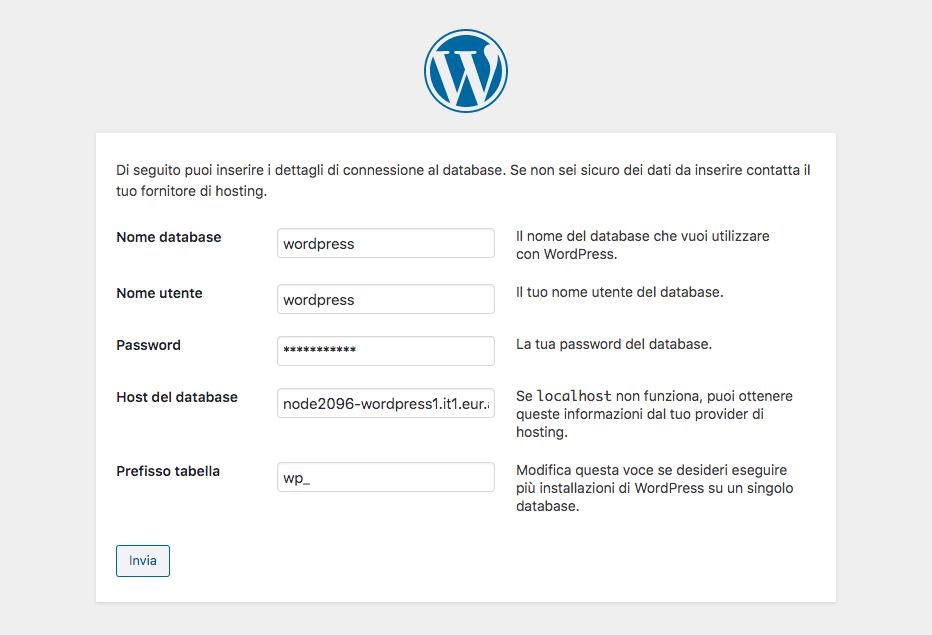
NB The host field must be filled with the host related to the database instance.
If the following screen is displayed, proceed by starting the installation of WordPress. If the screen is not displayed, one or more previously entered database connection information are incorrect. In this case,go back and enter the correct data.

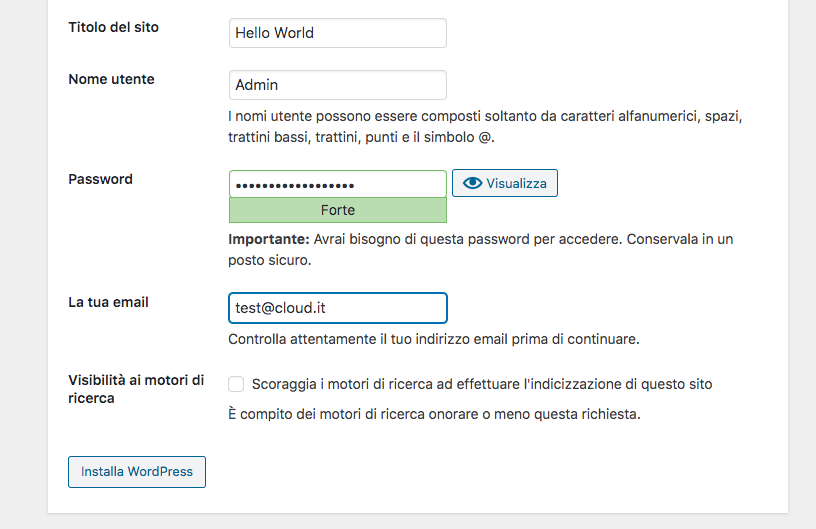
Complete the following fields with the required information and press the "Install WordPress" button.
At this point, the installation of your instance of WordPress is completed.