Introduction
On Plesk, the package of features offered by your web space can be expanded through applications installable on it. In fact, according to the hosting plan, Plesk offers a list of apps that will provide support in different ways in managing your web space or in part of its construction.
In this guide of the series, you will see what the main types of apps are, how to configure one and manage its permissions.
N.B. The example images in this tutorial are for an English language Plesk instance with a ‘Web Admin’ license, so they may differ from the instance you installed. The visualization of the domains is set to ‘Active List’ which differs, for some functionalities, from the other visualization modes.
The display mode of the domains list can be changed by clicking on the wrench icon on the right side of the view.

Types of applications
Web apps are classified primarily based on the type of installation:
The apps can then be divided into free or commercial : in the case of the latter, a license is needed to use them.
- Apps installed directly on your website (e.g. Wordpress, a well-known blogging platform)
- Apps installed on external servers (third party)
Installing and configuring applications
The installation of the apps is automatic and does not require any additional knowledge. The Plesk Client Panel can be used for the installation. Through Plesk apps can be updated or removed and new features can be used directly on the panel, thanks to particular services of those installed.
Installing the Apps
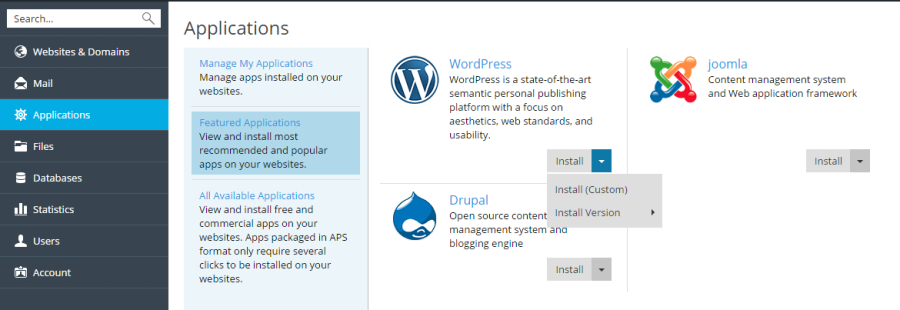
The methods to install the Apps are as follows:
- Quick, a quick walkthrough of the typical latest version of your chosen app. Of course, some apps will still need to have information specified in order to configure themselves properly.
- Personalization, a method that allows the freer choice of the configuration of the app to be installed, such as the installation path, credentials. Plesk also offers the ability to:
- Turn off automatic updates for that app
- Choose the version you want to install on your web space
An app for Plesk can be easily installed: just connect to the Applications section and, choosing the app to install, simply specify the type of installation and follow the wizard.
(Note: Many applications cannot work if the PHP safe_mode directive is enabled. To check if safe_mode is enabled on your account, go to Websites & Domains, click PHP Settings and search for safe_mode in the Common Settings section. If safe_mode is enabled, disable it. If changes to the PHP settings cannot be made, contact your provider.)
Managing Apps
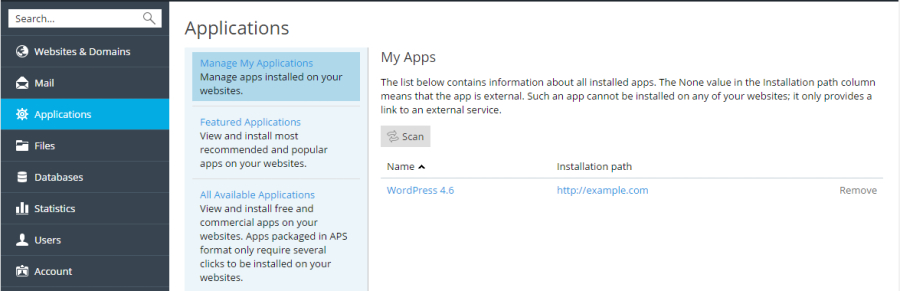
All apps allow their configuration directly from the Plesk client panel. To do so, simply search for the item Manage my applications in the Applications section.
An app can be configured on different types of settings:
- General settings, i.e. basic settings such as administrator credentials.
- Service settings, which allows you to change the features of the functions that the app offers to Plesk
Disabling automatic updates
To keep the compatibility between all the components installed on your web space, disabling the automatic update of the apps installed on your web space is recommended.
To do so, simply connect to the Application Management section and, by clicking on the name of the app, find the Change settings item . . Then, it will be possible to access different settings, including the one to disable the automatic update of the app.
At this point, Plesk will simply notify you of the possibility of updating the apps of which a more recent version isavailable, also providing the link to click to start this procedure.
Database app
There are apps that can interact with databases and, consequently, require their presence to function. Plesk usually manages the automatic creation of a database during the App installation phase. Obviously, the configuration of these databases can be changed by looking for the main configuration section during the installation phase.
The editable fields in the database configuration are:
- Database name
- Server where the database will be saved
- Database user credentials, used by Plesk to access data through the app.
Note, however, that each Plesk plan has a certain limit in the number of databases you can have at the same time. If an app needs a database but the plan does not make further creation possible, Plesk will insert the tables of that app in an already existing database, adding a prefix that acts as an index to easily distinguish them from the original ones of the database. (ex: wpress_ to indicate Wordpress tables)
Accessing an App
By default, apps are only available to users with the Owner role. To make apps available for additional users, their permissions should be changed.
Granting App permissions to additional users
To make the app accessible to other users, follow these steps:
- Grant permission to a group of users, from the Users - User Roles section
- Add the desired users to the user group with permissions
From now on, users belonging to groups with permissions will be able to see a link to the relevant app from the Websites and Domains section, under the name of the website they belong to.
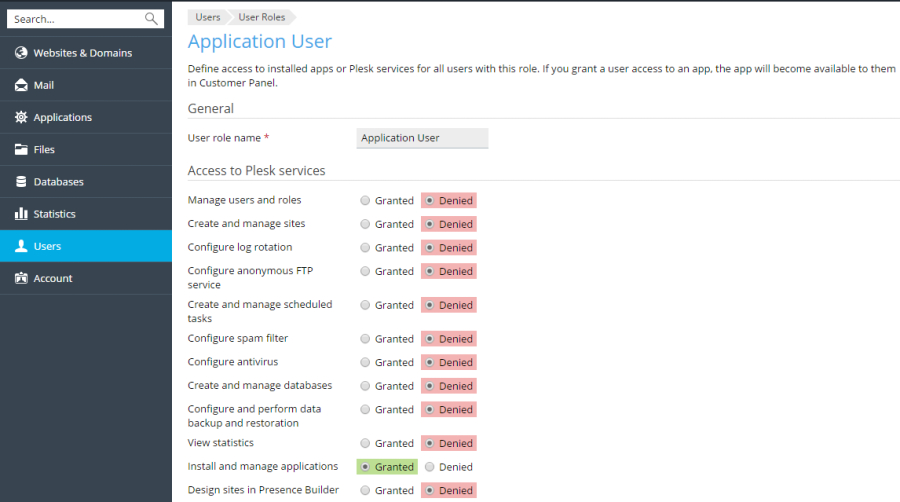
Note that, if the user wishes to grant administrator privileges to a user group of your choice, Plesk offers this setting from the User Roles section. As administrators, users will be able to install, configure, update and remove apps from their Customer Panel.
In assigning privileges, choosing to distribute the ability to access users through Plesk access, via public link, or by creating an account app made is also possible < em > specifically for Plesk users.
To make this association:
- Organize users into a group from the User Roles section
- Grant one of these permissions to the group:
- Public access, which will allow users of the group to access via a link on Websites and Domains.
- Personal access, which will allow users to access an account created specifically for them by the app. When the privileges are removed, however, all these accounts will be automatically deleted.
Managing the dependencies of a PHP project using Composer
Composer is a tool that allows you to install or update the packages of the library associated with your PHP project. The libraries are, in fact, installed in the root directory of your project.
Composer is presented as a utility already included in Plesk and, for this, it will also be updated every week automatically.
Composer uses two files to keep track of the modules necessary for the operation of the project:
- composer.json, a list of libraries your project directly depends on. The command to create the composer.json file inside the project root directory is needed:
$ composer init
- composer.lock, a file that lists all the libraries on which the composer.json libraries depend directly and indirectly.
The combination of these two files creates the complete list of libraries that your project needs to function correctly in all its modules.
Composer can be used both from the command console and through the Applications section of Plesk. To learn more about Composer, refer to the Composer Documentation
Project dependency management through the UI dedicated to Composer
The first step in identifying dependencies in all applications that include the composer.json file is to go to the Applications section and search for the Analyze command. When the analysis is complete, the list of applications will appear in the appropriate section.
From the Applications section, connect to the side dedicated to their management.
Installing dependencies
To install all the modules necessary for the project, go to the item Install dependencies by clicking on the name of the app concerned.
Updating dependencies
As in the previous case, but with f Update Dependencies item.
Changing dependencies
Through the Modify configuration button, the access to the manual modification of the composer.json file through the Plesk Code editor will be possible.
Removing dependency management from your app
By clicking on the Remove item, the selected app will disappear from the list of your apps. However, by keeping the relative composer.json and composer.lock files preserved, the app can be added back to the list by performing an analysis again, as previously shown.
Conclusions
You now know everything about how to install new apps for your web space, how to manually configure and update a custom installation, how to manage app privileges for user groups, and how to check and manipulate dependencies with a PHP project through Composer.