Jelastic Cloud is a cloud solution that combines the PaaS (Platform as a Service) model and the CaaS (Container as a Service) model. Jelastic Cloud was designed to allow DevOps to build complex infrastructures in just a few clicks, by using the Jelastic web interface.
This tutorial shows all the necessary steps to create a virtual environment with Jelastic Cloud and configure it to host a PHP application on Apache.
Creating a new environment
Enter the Jelastic Cloud management panel and press the "NEW ENVIRONMENT" button located at the top left.
The new environment configuration tab will open.
Select Apache as Web Server and PHP, in this tutorial Apache versions 2.4.39 and PHP 7.3.5 .
versions will be used. Define the number of Cloudlets to reserve and the maximum number of available Cloudlets to increase the power of your web server.
Container technology is precisely based on Cloudlets, micro instances that can be directly selected inside Jelastic: each Cloudlet has 128 MB of RAM and 400 MHz of vCPU. By increasing the number of reserved Cloudlets the overall cost of the environment will increase as well.
Enter the disk space limit, enable or disable the public IP address according to your needs and enter the name of the new environment. In the following example it is named "apache".

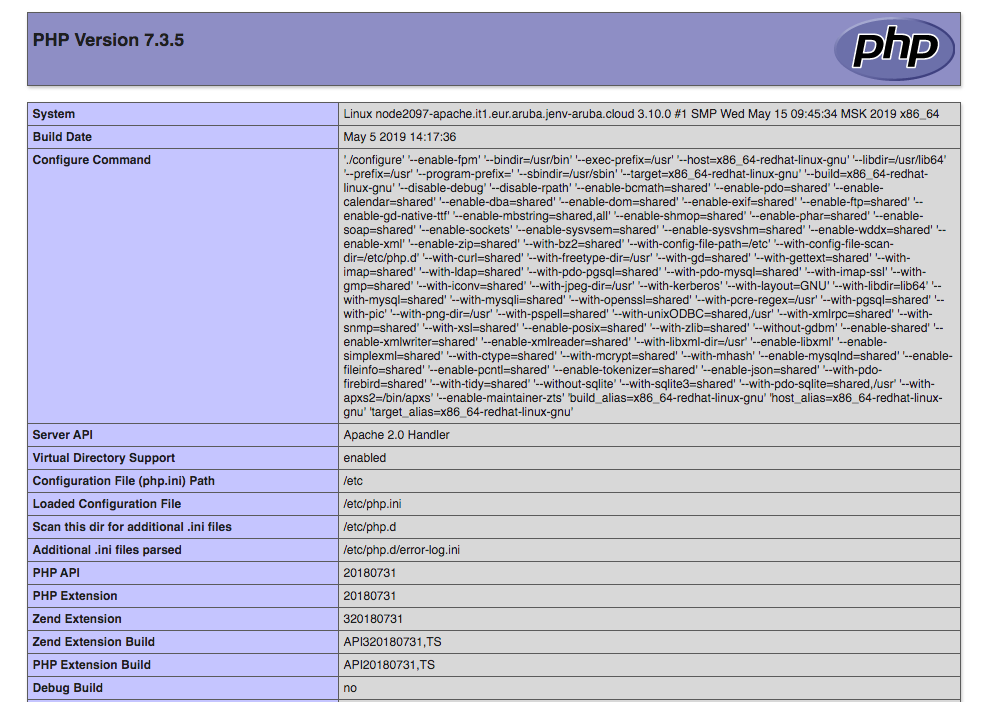
After creating the environment, press the "Open in Browser" button of the instance you just created:

The default page will open and will show information on the PHP version installed.
Configuring Apache and PHP
Press the "Config" button of the just created instance :

The File Browser will open and allow you to modify the configuration files of the instance.
Then, move to the conf folder and click twice on the httpd.conf file. In this way the Apache configuration can be modified.
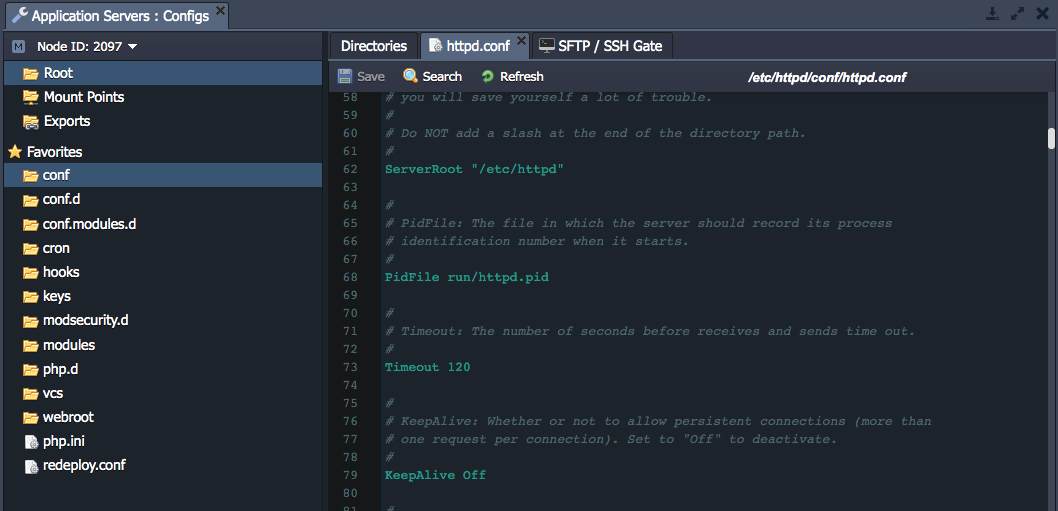
Some of the settings that can be changed are:
- Timeout: indicates the maximum duration in seconds of the requests managed by Apache
- KeepAlive: if set on ‘On’, forces Apache to use the same TCP connection for sending multiple resources, otherwise a TCP connection will be opened for each resource
- MaxKeepAliveRequests: if KeepAlive is set on ‘On’, it refers to the maximum number of requests that can be managed by a connection
- MaxClients: refers to the number of simultaneous requests that can be managed by Apache
- MaxRequestPerChild: refers to the maximum number of requests that can be handled by a child process.
After making the changes, press ‘Save’ to save the configuration file.
At this point, to modify the PHP configuration select the php.ini file:
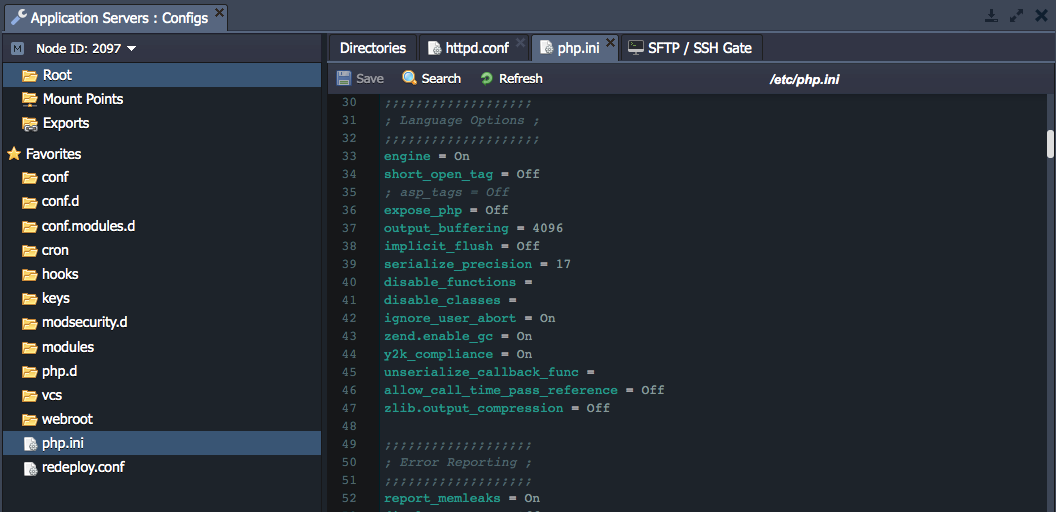
Some of the settings that can be modified are:
- upload_max_filesize : maximum size of files that can be uploaded to the server
- post_max_size : maximum size of a POST request
- short_open_tag : if set on ‘On’, it enables short tags in PHP scripts
- display_errors : if set on ‘On’, enables the display of errors during the execution of the PHP code
- max_execution_time : refers to the maximum duration of execution of a PHP script
- memory_limit : refers to the maximum memory usable by a PHP script.
After making the changes, click on ‘Save’ to save the configuration file.
To apply the changes you just made, press the "Restart Nodes" button for the related instance:
