Introduction
A VPN (Virtual Private Network) is a virtual private network that allows you to securely connect to the Internet to remotely access your company's IT network. Through a VPN it is therefore possible to access company services and resources, even from an untrusted network, as if you were physically present on site.
VPNs can be implemented through common operating systems, including Windows, and a service like OpenVPN. It is an open source software that allows you to create an encrypted virtual tunnel based on the TLS / SSL (Transport Layer Security / Secure Sockets Layer) protocols, using certificates to allow traffic to securely pass between the server and one or more clients.
In this tutorial you will learn how to implement a VPN on your Cloud Server by installing and configuring OpenVPN connect client software on Windows Server 2019.
Prerequisites
In order to connect to the same network, the two or more devices (client and server) connected to the VPN must have access to port 1194.
This can be done by allowing UDP traffic on that port by adding a rule to your firewall.
Installing OpenVPN
The first step is to download the OpenVPN installer for Windows Server 2019 directly from the official website .
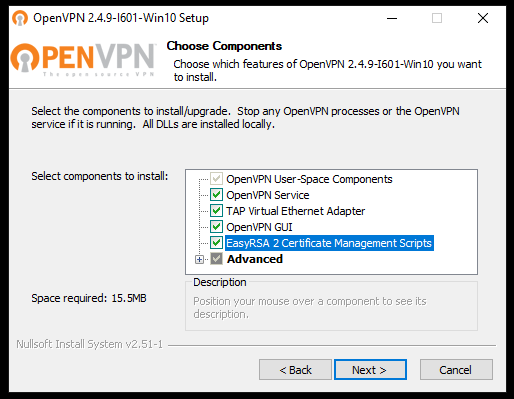
Once the file is downloaded, open it and start the installation procedure. Make sure you put the check mark under "EasyRSA 2 Certificate Management Scripts" and then click on "Next".
Continue with the installation, by going on every time you are required to do so .
Generating Certificates and Keys for the Server
Once the preliminary installation phase of OpenVPN is completed, generate the certificates and keys for accessing the VPN .
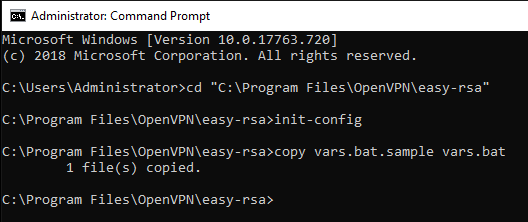
First, open the terminal of your Windows Server. To do so, click on Start, type "cmd" and right-click on the Command Prompt icon, then, select "Run as administrator".

Go to the folder where OpenVPN was installed and start the "init-config" script.
cd "C:\Program Files\OpenVPN\easy-rsa"
init-config
An output similar to that in the figure below should be shown.
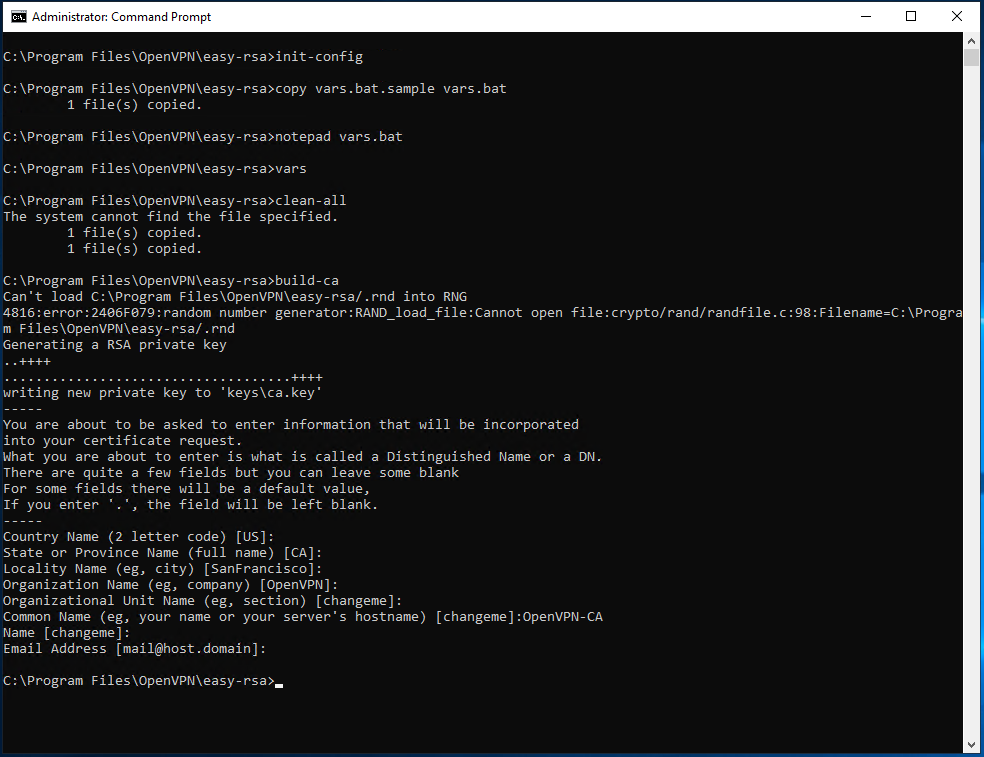
At this point, apply the changes to the "vars.bat" file in the "C: \ Program Files \ OpenVPN \ easy-rsa" folder:
notepad vars.bat
Almost at the end of the document there will be a series of items beginning with "set" and used to set some information between the environment variables. Edit these fields with your information to generate the certificate.

This step is not essential as you will be required to enter this information later on as well. However, by setting the values in this file now, these values will be used as default parameters later.
Once this information has been entered, save the file and close the text editor. Then, type the following commands to apply these changes :
vars
clean-all
Then, start creating the Certificate. From the terminal (started as administrator and always in the "C: \ Program Files \ OpenVPN \ easy-rsa" folder) type:
build-ca
If the "vars" file was already edited with your information, this will already be present in the square brackets of each required field. In this case, just press "Enter" to select this value as the default parameter.
On the other hand, the item "Common name" has to be given an easy- to- remember name r: in this case "OpenVPN-CA" will be used.
To verify that the operation of certificate generation was successful, the two files "ca.crt" and "ca.key" will be created in the "easy-rsa \ keys" folder.
At this point, create the server keys. To start the procedure use the command:
build-key-server server_name
In this case, assign to the server the generic name by specifying it under "Common Name". As shown in the following image, the name "server" was here used.
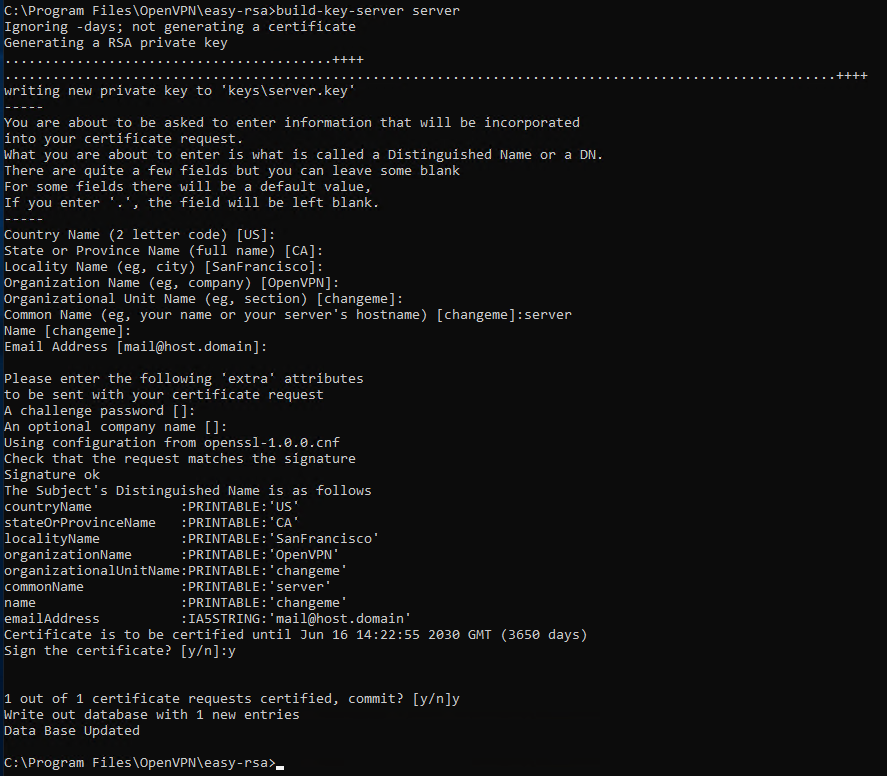
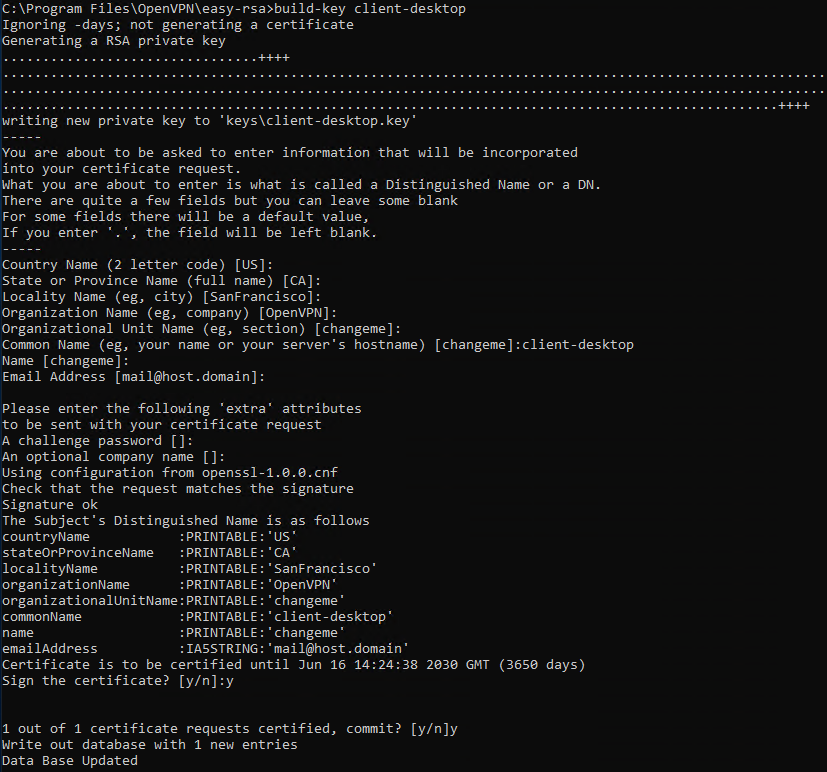
Towards the end of the procedure you will be requested to confirm the saving of the data set twice. In both cases, type y and press "Enter".
Generating Key for the Client
Since in a VPN all connected devices must be recognizable, Clients also need a pair of keys for communicating. Still inside your Server, from the terminal and in the folder "C: \ Program Files \ OpenVPN \ easy-rsa") type:
build-key client_name
In this case, specify the generic name to assign to the Client (as in the image, in this case "client-desktop" was used) under the "Common Name" item .
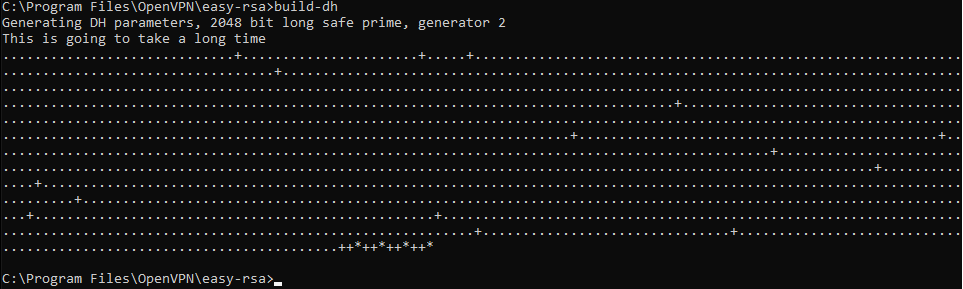
Now it is necessary to start the Diffie-Hellman cryptographic protocol allowing the two interlocutors (Server and Client) to agree on which "common" key they will use as an authentication key to identify each other. Then, type:
build-dh
This operation may take long, depending on the hardware the server has, and requires no user interaction.
Finally, generate the "ta.key" key, to further increase the VPN security. More precisely, define a TLS authentication that verifies the integrity of the packets moving through the network. Then, type:
"C:\Program Files\OpenVPN\bin\openvpn.exe" --genkey --secret "C:\Program Files\OpenVPN\easy-rsa\keys\ta.key"
Server configuration file
OpenVPN already provides sample configuration files that can be used to generate the configuration needed for the correct functioning of the VPN.
Open Start -> All Programs -> OpenVPN -> OpenVPN Sample Configuration Files and copy the file "server.ovpn" to the folder "" C: \ Program Files \ OpenVPN \ easy-rsa \ keys ". Once copied, open it with the Notepad:
notepad "C:\Program Files\OpenVPN\easy-rsa\keys\server.ovpn"
Then identify the items:
- approx .crt
- cert server.crt
- key server.key
- dh dh2048.pem
and replace them with:
- ca "C: \\ Program Files \\ OpenVPN \\ config \\ ca.crt"
- cert "C: \\ Program Files \\ OpenVPN \\ config \\ server.crt"
- key "C: \\ Program Files \\ OpenVPN \\ config \\ server.key"
- dh "C: \\ Program Files \\ OpenVPN \\ config \\ dh2048.pem"
Apply these changes, save and close the file.
Client Configuration File
The changes to be made to the Client configuration file are very similar to those made for the Server.
Open Start -> All Programs -> OpenVPN -> OpenVPN Sample Configuration Files and copy the file "client.ovpn" to the folder "" C: \ Program Files \ OpenVPN \ easy-rsa \ keys ". Once copied, rename it giving it the same "Common Name" name used in the key generation phase (in this case "client-desktop") and open it with the Notepad.
notepad "C:\Program Files\OpenVPN\easy-rsa\keys\client-desktop.ovpn"
Then identify the items:
- approx .crt
- cert server.crt
- key server.key
and replace them with:
- ca "C: \\ Program Files \\ OpenVPN \\ config \\ ca.crt"
- cert "C: \\ Program Files \\ OpenVPN \\ config \\ client-desktop.crt"
- key "C: \\ Program Files \\ OpenVPN \\ config \\ client-desktop.key"
Also identify the remote entry my-server-1 1194 and replace “my-server-1” with the IP address of your Server. Apply these changes, save and close the file.
At this point, copy the following files:
- ca.crt
- ta.key
- dh2048.pem
- server.crt
- server.key
- server.ovpn
Inside the folder "C: \ Program Files \ OpenVPN \ config", an operation that can be performed directly with the robocopy tool .
robocopy "C:\Program Files\OpenVPN\easy-rsa\keys\ " "C:\Program Files\OpenVPN\config\ " ca.crt ta.key dh2048.pem server.crt server.key server.ovpn
Just copy the following files:
- ca.crt
- ta.key
- client-desktop.crt
- client-desktop.key
- client-desktop.ovpn
Within your Client in the folder "C: \ Program Files \ OpenVPN \ config \".
NB the OpenVPN GUI must have already been installed on the Client as well, as explained at the beginning of the tutorial for the Server.
At this point, click on Start -> All Programs -> OpenVPN -> OpenVPN GUI both on the Server and on the Client.
The graphical interface of OpenVPN will open in the tray system, at the bottom right. Right click on the respective OpenVPN icon, then click "Connect".
When the icon turns green, the connection to the virtual private network has been correctly established and, therefore, the two devices, client and server, will be communicating through the newly created VPN.