Introduction
The SSL ( Secure Socket Layer ) certificate is a must-have of any third-party web service. Through an SSL certificate, users who connect to your web space will the protection of their sensitive data while exchanging information with your server. This happens precisely through the homonymous connection, SSL, which allows an exchange of encrypted information.
The HTTPS protocol is based on SSL, an index of reliability of many web spaces on which sensitive user information must travel ( ecommerce, social, etc... ).
Plesk helps you manage SSL / TLS certificates for your web domains, through the SSL It! . The extension also offers the ability to force connections to the HTTPS protocol, by redirecting or blocking HTTP connections.
In this guide, you will be shown some basic features of this extension for Plesk. This is the second episode of a series on Plesk. If you haven't installed Plesk on your server yet, first, follow the tutorial on How to install Plesk on CentOS 7.
N.B. The example images in this tutorial are for an English language Plesk instance with a ‘Web Admin’ license, so they may differ from the instance you installed. The visualization of the domains is set to ‘Active List’ which differs, for some functionalities, from the other visualization modes.
The display mode of the domains list can be changed by clicking on the wrench icon on the right side of the view.

Using SSL It!
Checking your domain security
A first step is to check the security status of your web space. To do so, simply search for ‘Websites and domains’ in the menu and click on ‘Your domain’.
On the interface, verify that your site is protected or not, as in the image.
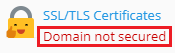
In the example, your web space is not protected due to lack of SSL / TLS certificates. You will now be explained how to secure your domain by updating certificates.
Obtaining an SSL / TLS certificate
The extension for Plesk allows you to use free or paid SSL certificates or, directly, upload a certificate you already own.
Getting a free Let's Encrypt certificate
Going step by step, let's start by analyzing the case of free certificates. To make use of them, just follow these steps:
- Go to the Websites and Domains - Your Domain - SSL / TLS Certificates section
- Click on ‘Get Free’
- Enter an email that can be used to receive notifications or to retrieve credentials
- Security choices can now be selected:
- Secure the domain and its aliases or subdomains
- Protect the webmail belonging to the domain
- Include all protections with wildcard domain protection
- Click on ‘Get Free’
N.B. In this guide the Plesk server has been used as domain Name Server, so the DNS zone update will be done automatically by Plesk. If this is not your case, the TXT record shown by Let's Encrypt will have to be inserted manually in the DNS zone control panel of your domain.
At this point, you will have a Let's Encrypt SSL / TLS certificate for your web space.
Let's Encrypt SSL certificates are valid for a maximum of 3 months and therefore have to be renewed before that deadline. Luckily, the procedure in Plesk is automated and the system automatically renews the certificate within 30 days of the expiration, as will be shown later.
Getting a paid certificate
Another way to obtain an SSL / TLS certificate is to purchase one.
You can purchase a certificate from Actalis, the Aruba Certification Authority, simply by navigating to shop.actalis.com/store/?site=aruba and purchasing the certificate of your choice.
While with Let's Encrypt only a DV (Domain Validation) SSL certificate can be obtained, through Actalis it is also possible to buy OV (Organization Validation) or EV (Extended Validation) SSL certificates, which allow to certify the company's trustworthiness, while offering a higher guarantee of reliability.
Moreover, with the purchase on Actalis a certificate valid for 1 year, which doesn’t have to be renewed every 90 days, will be provided. Luckily, the procedure in Plesk is automated and the system automatically renews the certificate within 30 days of the expiration, as shown later.
Uploading the SSL / TLS certificates
In case you have obtained a certificate through a means external to SSL It! , the certificate in your possession can be uploaded through the following procedure:
- Go to the Websites and Domains - Your Domain - SSL / TLS Certificates section
- Click on ‘Upload’
- Upload the .pem file that contains the SSL / TLS certificate
At this point, the upload of your certificate will have completed.
Renewing SSL / TLS certificates
Obviously, security certificates expire and need to be renewed to continue to guarantee the reliability of your domain.
The Plesk extension helps you in this operation, guaranteeing the renewal of an SSL / TLS certificate 30 days in advance of the expiration date. However, this only applies to free certificates installed on your domain, as paid certificates must be purchased again.
In the case of free certificates, simply connect to the section dedicated to certificates, as seen above, and click on the item ‘Keep websites safe’. With this feature enabled, SSL It! will manage the renewal of free certificates.
In the case of paid certificates, by connecting to the dedicated section, look for the ‘Reissue certificate’ item, which will be located near your paid certificate. From here, follow a purchase procedure, similar to the one previously shown, to install a new paid certificate.
Cancelling SSL / TLS certificates
It is, of course, possible to revoke a certificate from your domain. To do so, simply connect to the section dedicated to certificates and click on ‘Unassign certificate’, next to the certificate you want to revoke.
Strengthening the security of websites
In addition to obtaining certificates, there are many other things that may be done to improve security on your web domain. This will not only guarantee user reliability when using your services but will allow your site to better respond to the evaluation of your site's ranking in search engine rankings. (A more secure site is a more chosen site).
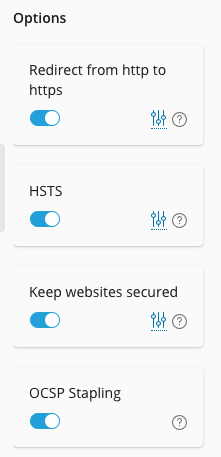
Basically, with Plesk you can interact with three features:
- Redirect to HTTPS, a secure version of the HTTP protocol
- HSTS, a protocol that will block all incoming HTTP connections
- OSCP, a feature to force certificate validity verification by the certificate authority for your website
These three features can be activated or deactivated from the usual ‘certificate’ section, by identifying the dedicated items.
Please note that there are some precautions on the interactions between the features that can be activated. Also, note that the digital certificate is installed on your domain:
- The application of the HTTPS protocol will also affect the mail server
- HSTS does not allow HTTP connections: consequently, if your certificate expires or is not valid for the subdomains or the webmail of your web space, HSTS will not allow users to connect, as the HTTPS protocol is missing.
- OCSP does not work with all certificate providers. Consequently, it is advisable to search the web if the certificate you are about to acquire is compatible with this functionality.
How safe is your site?
SSL It! provides a tool, called Qualys SSL Labs, which will allow you to evaluate the security of your site and find out what security holes you could improve.
To use the tool, simply connect to the section dedicated to the certificates of your domain and locate the item ‘Run SSL laboratory test’.
The test will last a few minutes and the maximum rank that can be obtained is A +.
Conclusions
Well done! At the end of this guide, your web space should be fairly secure and you should be able to provide reliability to your users, as well as being able to constantly monitor the security of your site and the validity of your SSL / TLS certificates.
In the next episode of this series we will see how to install and configure an application on your web space with Plesk.