In the following tutorial you will learn how to create a simple web app in Node.js and how to publish it online using Jelastic Cloud.
The sample application used in this guide will answer REST calls, allowing the client to save and read a book archive.
Express will be used as a framework for managing web requests, and the SQLite library for saving information.
Creating a server application
To create an application compatible with the standards provided by Node.js, first, initialize a basic configuration of npm. Create a folder for the project, here called 'books'.
Then, run the following console command, in the newly created folder:
npm init
A wizard will start to create a package.json file with all the basic information on the project and on its dependencies.
Use the suggested values to move forward, as shown below:
This utility will walk you through creating a package.json file.
It only covers the most common items, and tries to guess sensible defaults.

See `npm help json` for definitive documentation on these fields
and what exactly they do.

Use `npm install ` afterwards to install a package and
save it as a dependency in the package.json file.

Press ^C at any time to quit.
package name: (books)
version: (1.0.0)
description:
entry point: (index.js)
test command:
git repository:
keywords:
author:
license: (ISC)
About to write to package.json:

{
 "name": "books",
 "version": "1.0.0",
 "description": "",
 "main": "index.js",
 "scripts": {
   "test": "echo \"Error: no test specified\" && exit 1"
 },
 "author": "",
 "license": "ISC"
}


Is this OK? (yes) yes
Answer ‘Yes’ to complete the procedure.
Then, continue by installing the two main modules:
npm install --save express sqlite3
- express: a framework that handles incoming HTTP requests;
- sqlite3: a client module for managing small databases, where to save your books.
By adding the --save parameter,npm is requested to update our package.json, and adds these two dependencies to the project.
Then, create the entry point for the application by creating the index.js file in the same directory as package.json.
Use your favorite text editor to paste the following content into the newly created file:
/**
* Per prima cosa, includiamo i due moduli installati
* precedentemente
*/
var express = require('express');

var sqlite3 = require('sqlite3').verbose();

/**
*  At this point, create a database in the memory
* (i.e. without saving it on the disk)
* where to save your data
*/
var db = new sqlite3.Database(':memory:');

/**
* So, create a new chart with just two fields
* - title : Il titolo del libro
* - author : Il nome completo dell'autore
*/
db.run("CREATE TABLE books (title TEXT, author TEXT)");

/**
* Initialize a new express application
*/
var app = express();

/**
* Use the main server root to
* list all the books available
*/
app.get('/', function (req, res) {

   db.all(`SELECT * FROM books` , (err,rows) => {

       /**
        * Send all the lines found to the “books” chart
        */
       res.send( rows );
   });

});

/**
* For saving, instead, use
*  /save/ followed by the title and the author
*/
app.get('/save/:title/:author', function (req, res) {

   /**
    * Prepare INSERT instruction in your chart
    */
   var stmt = db.prepare("INSERT INTO books VALUES (?, ?)");

   /**
    * And run the query above, by transferring all the data
    * to the url
    */
   stmt.run( req.params.title, req.params.author , (err,rows) =>{

       /**
        * Finally, send a ‘true’ status to show that
        * the saving was successful
        */
       res.send(true);
   });

   stmt.finalize();

});

/**
* Therefore, run the server which listens on 8001 port.
*/

app.listen( 8001 , function () {
   console.log('Books server ready');
});
Creating a new Jelastic environment
Enter the Jelastic Cloud management panel and then press the "NEW ENVIRONMENT" button located at the top left.

The configuration tab of the new environment will be opened.
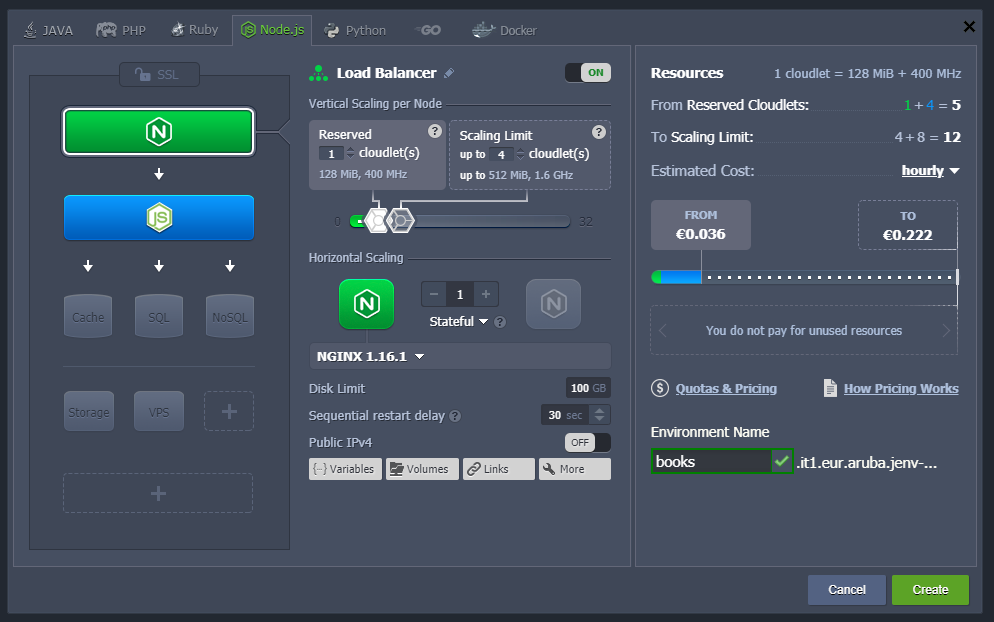
Select "Node.js" from the Tabs above and prepare your environment as indicated above.
Complete the installation by clicking on the ‘Create’ button.
Deployment of Node.js application
Before making the actual deployment, create a zip or tar archive with the previously created files as follows:
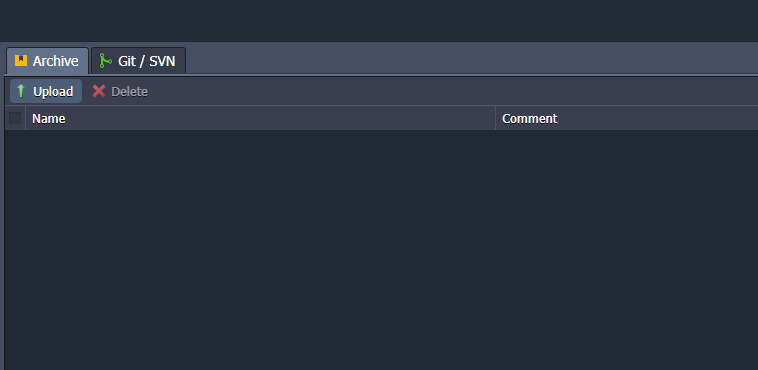
Once the archive is created, upload the package within your instance. Use the Deployment Manager by clicking on the ‘Upload’button.
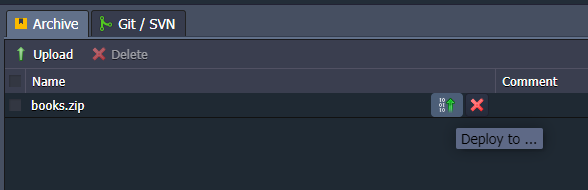
Select the archive created before and complete the upload.
Once finished, use the "Deploy to" button as shown in the figure:
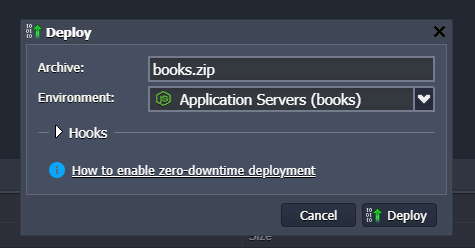
Select the Environment created for the application and click on the ‘Deploy’ button:
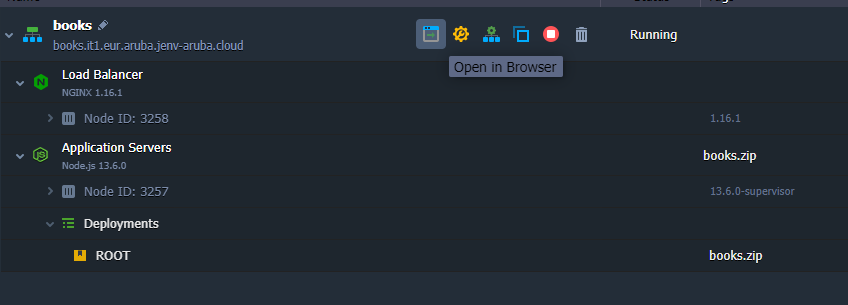
When the procedure is completed, access your instance by clicking on the "Open in browser" button:
If everything works correctly, your instance will reply with:
[]
Then, use the browser to save the first 3 books by visiting the following URLs. Remember to replace the address with that of your instance:
http://books.it1.eur.aruba.jenv-aruba.cloud/save/Il%20Decamerone/Giovanni%20Boccaccio

http://books.it1.eur.aruba.jenv-aruba.cloud/save/Il%20fu%20Mattia%20Pascal/Luigi%20Pirandello

http://books.it1.eur.aruba.jenv-aruba.cloud/save/Il%20barone%20rampante/Italo%20Calvino
So, make sure that the books have been saved by navigating to the main URL of your instance:
http://books.it1.eur.aruba.jenv-aruba.cloud/
The server should reply with the following content:
[{"title":"Il Decamerone","author":"Giovanni Boccaccio"},{"title":"Il fu Mattia Pascal","author":"Luigi Pirandello"},{"title":"Il barone rampante","author":"Italo Calvino"}]