All virtual environments created with Jelastic Cloud are set up with a default firewall configuration, already operational and active.
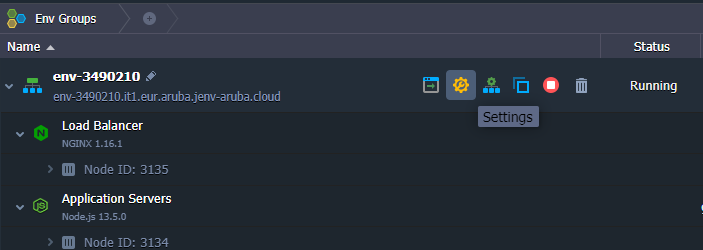
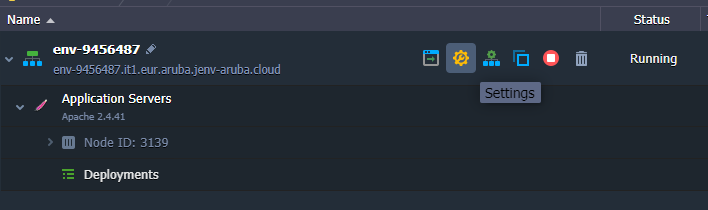
To check the status of the firewall, just click on the "Settings" button next to your "environment".
Once inside the "Settings" panel, a "Firewall" item that allows you to check the firewall settings will be shown.

Let's take a closer look at the items inside:
- Firewall State: allows you to enable or disable its status;
- Inbound Connections: manages all incoming connections to your Environment, such as web services or databases;
- Outbound Connections: manages all outgoing connections, such as connecting to an external database.
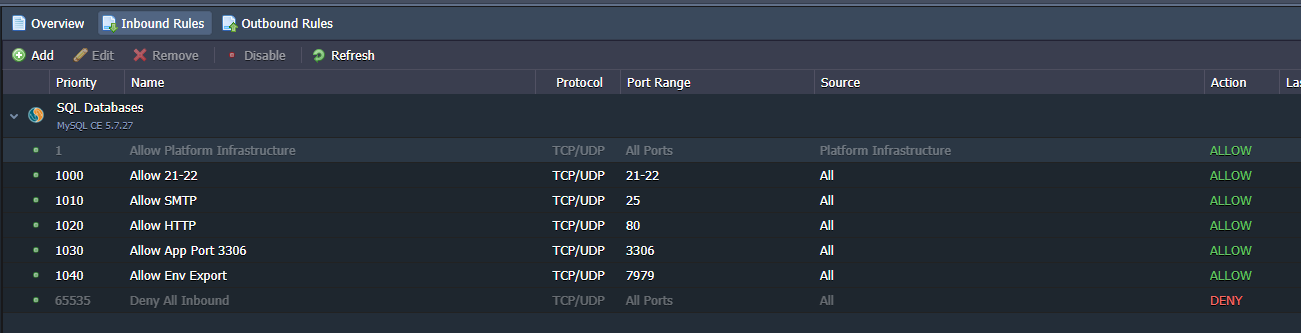
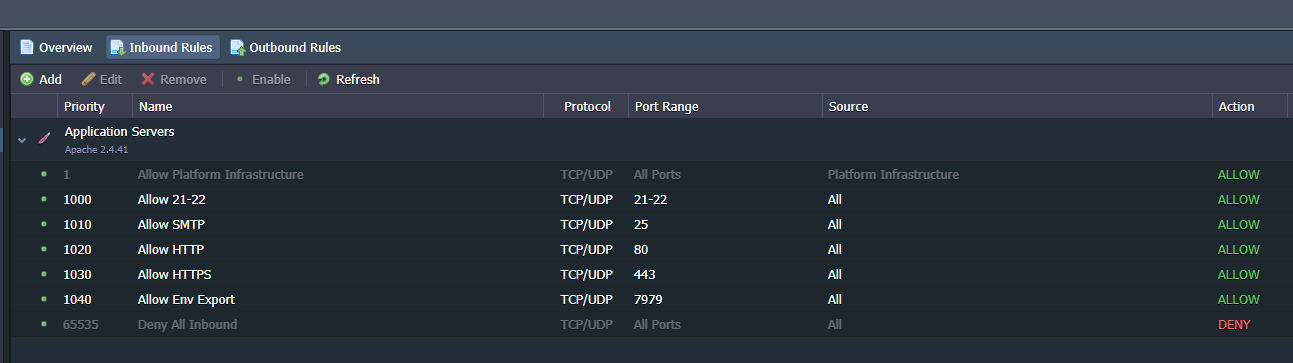
The "Inbound Rules" item allows you to configure the rules for incoming connections. The first and the last item in gray represent system rules and cannot be changed. The first allows the whole Jelastic infrastructure and its Containers to access the environment while the last item blocks all traffic other than that specified in the rules above.
Adding new rules to the firewall
By clicking on the "Add" button you can insert a new rule inside the Firewall:
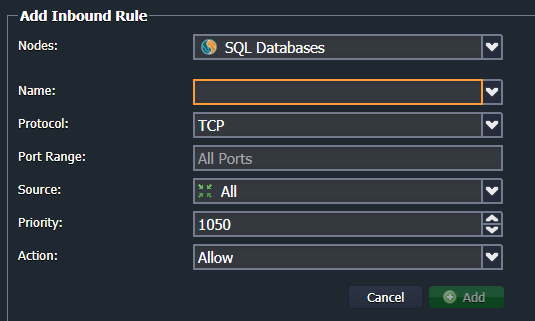
The fields required to add a new rule are:
- Name: the name to be displayed in the list of rules;
- Protocol: the type of protocol to be filtered (TCP / UDP / Both);
- Port Range: the door or set of doors to work on For example "80" or "50-100" to filter from port 50 to 100 (by leaving this field blank, the rule will apply to all ports);
- Source: the source to be filtered. For example a set of IP addresses or a network interface;
- Priority: the order by which the rule is executed;
- Action: when the above filters have to allow the connection (Allow) or deny it (Deny).
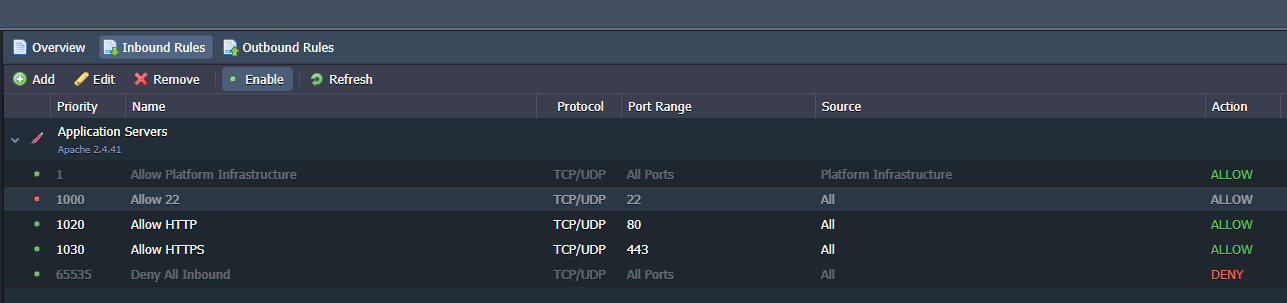
Configuring the firewall for web services
This section will show you how to optimize the firewall configuration for a basic web service, using an Apache-based configuration as an example.
From your Enviroment click on the "Settings" button:
From the setting screen, open the Firewall / Inbound Rules configuration:

Some of the rules set by default are not necessary for the correct functioning of a simple web service. Therefore, proceed by eliminating "SMTP" and "Allow Env Export":
At this point, the scenario is the following:
.png.aspx;)
When not using any FTP service, proceed by opening the edit screen for rule "21-22", and then change the fields as shown below:
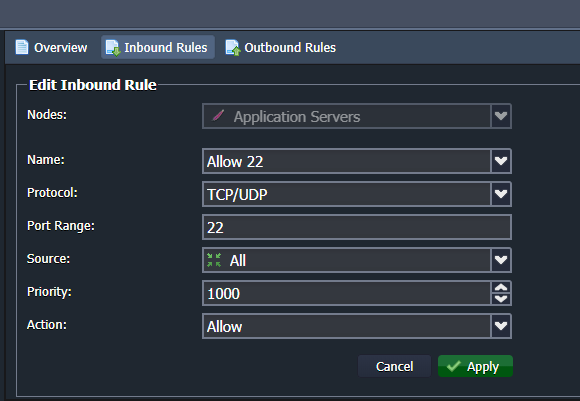
In this way, the access to the FTP service is eliminated, the SSH connection active is the only one left. Finally, apply the changes using the "Apply" button.
Disabling a firewall rule
Sometimes, it’s better to disable the rule only temporarily, instead of completely deleting it, so that it can be re-enabled, when needed.
For example, in order to avoid possible brute force attacks on our cloud server, the SSH rule, modified in the previous paragraph could be only temporarily disabled.
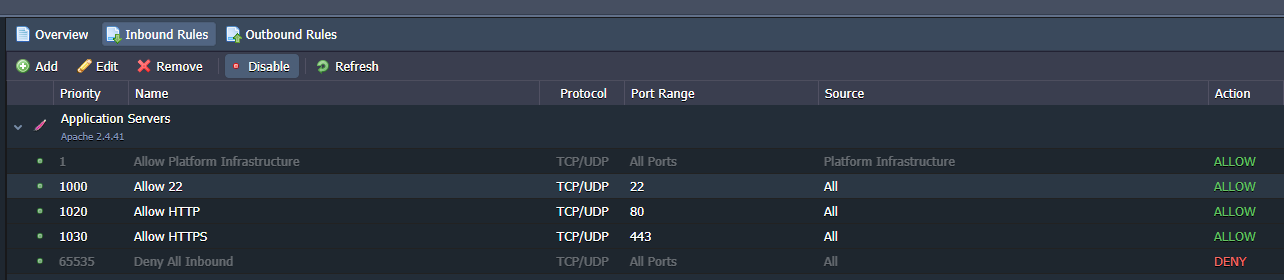
Select the rule to be disabled, and use the "Disable" button to apply the change.
To re-enable the rule, and allow SSH access, use the "Enable" button: