The company
3BMeteo has been in the professional meteorology business for 15 years. 3BMeteo services are designed to meet the demands of its high-tech clientele. The team is made up of professional meteorologists and developers working 7 days a week to develop new updates for apps and services, as well as modelers responsible for optimizing forecasting systems and creating new physical and mathematical scenarios.
One of the company's main priorities is its relationship with the public, thanks to a dedicated media department working day in, day out, with Italy's main radio stations, television channels and newspapers. The control room team provides professional advice for different industrial sectors, and currently represents Italy's largest operating hub.
 Watch the video
The benefits
The solution involved a series of improvements, starting with increased resilience implicit in an active/active infrastructure, like the one implemented. The service uptime is guaranteed by state-of-the-art technology used in the Data Centers and SLAs guaranteeing continuity of service when faced with any kind of adverse event.
Alongside the Dedicated Cloud solution, a total application refactory specifically for 3BMeteo was also provided, with a view to making the most of the distributed infrastructure, active on several nodes at the same time, thereby offering maximum computing power as well as the aforementioned fault tolerance.
Thanks to the type of Dedicated Cloud used, the old (monolithic) application architecture actually became a more agile, efficient microservice architecture, facilitating:
- faster development of all internal and external services;
- the migration of key parts of these services, such as Load Balancing, Authentication (Zero Trust) and Application Logic in Edge, which are now essential as they offer greater flexibility, scalability and security to a system and a growing business like 3BMeteo.
Another important element is the considerable attention paid to green issues: first of all, the proximity of 3BMeteo's headquarters to the Aruba Global Cloud Data Center, one of the three sites housing 3Bmeteo infrastructure, has allowed a more efficient and successful direct relationship, making the two organizations a marriage made in heaven.
Using a provider that uses renewable energy to offer its services also offers huge benefits: Aruba is GO certified – meaning that it uses energy from renewable sources, as well as being able to produce more energy thanks to its hydroelectric plant and photovoltaic systems within the technological campus.
Future plans
3BMeteo strives to break out of its comfort zone and try new services and technologies, with a team that is always searching for new ways to maximize the opportunities for technological evolution. Having reached the highest level in Cloud modelling on distributed clusters, the next challenge is to take the parallelization of modelling aspects to the next level.
The development of certain parts of the infrastructure towards dedicated graphic processors (GPUs, Graphic Processor Units) is currently being assessed.
2. Scarica il kubeconfig file per interagire con il cluster tramite kubectl.
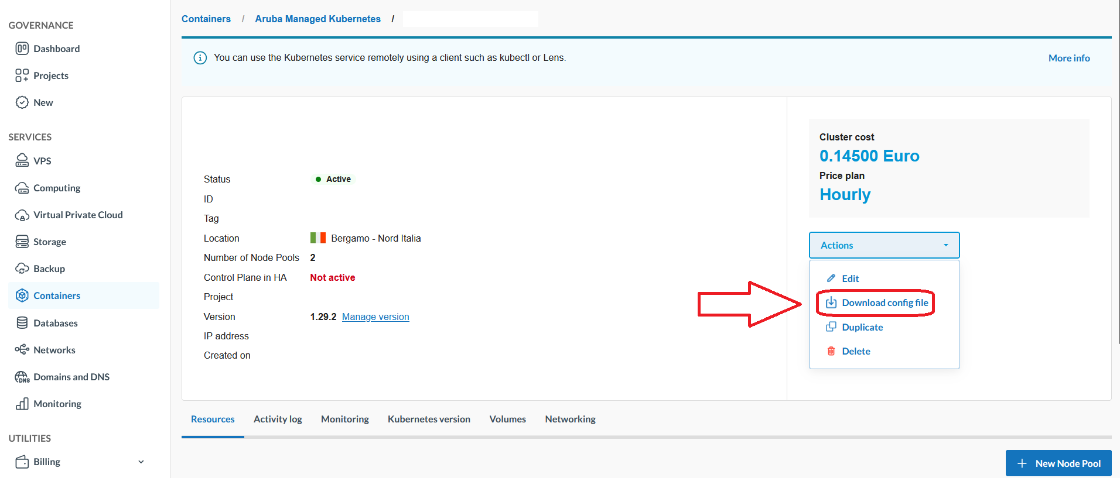
3. Imposta il contesto kubectl per utilizzare il cluster.
Setup Bucket S3 su Aruba Cloud Object Storage
1. Inizializzazione Storage Account
Per la demo è stato creato un account demo-backup all'interno della regione IT3 di Aruba Cloud.
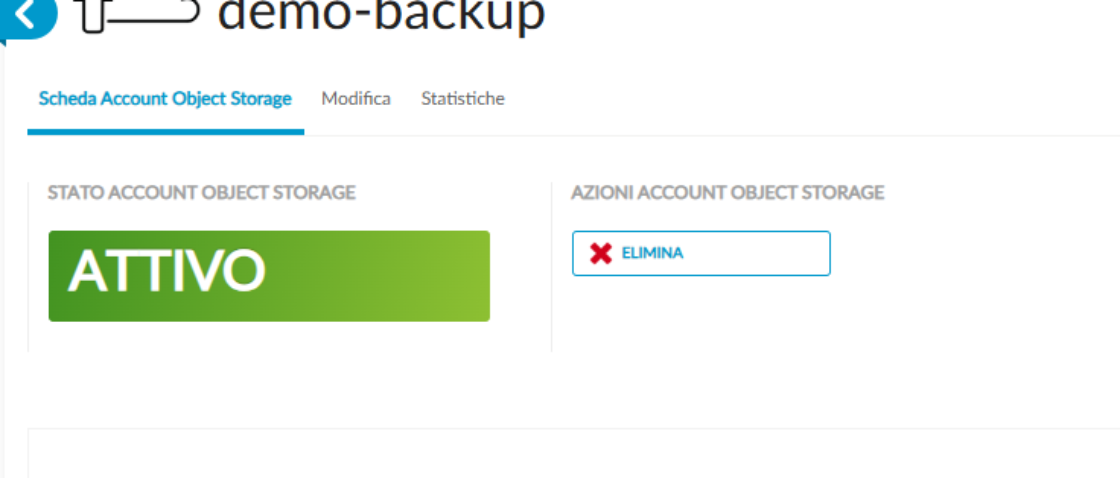
Dall'interfaccia utente recupera le seguenti informazioni:
- Endpoint URL;
- Secret Key.
2. Test Connessione S3 con Cloud Object Storage
export AWS_ACCESS_KEY_ID=demo-backup
export AWS_SECRET_ACCESS_KEY=
export AWS_DEFAULT_REGION=R3-IT
aws s3 ls --endpoint-url http://r3-it.storage.cloud.it
3. Crea un S3 Bucket su Aruba Cloud Object Storage
aws s3api create-bucket --bucket demo-backup --endpoint-url http://r3-it.storage.cloud.it
Deploy Velero
Configurazione Helm chart Values
Al momento della compilazione di questo tutorial il servizio Aruba Managed Kubernetes non supporta nativamente CSI Snapshot.
Assicurati che nell'installazione di Velero siano configurate correttamente le seguenti opzioni:
- snapshotsEnabled: false
- deployNodeAgent: true
Crea un file values yaml per inizializzare le variabili del Velero Helm chart:
---
credentials:
useSecret: true
secretContents:
cloud: |
[default]
aws_access_key_id=demo-backup
aws_secret_access_key=
snapshotsEnabled: false
deployNodeAgent: true
configuration:
defaultVolumesToFsBackup: true
backupStorageLocation:
- name: default
provider: aws
bucket: demo-backup
config:
region: R3-IT
s3ForcePathStyle: "true"
s3Url: http://r3-it.storage.cloud.it
volumeSnapshotLocation: []
initContainers:
- name: velero-plugin-for-aws
image: velero/velero-plugin-for-aws:v1.6.0
volumeMounts:
- mountPath: /target
name: plugins
metrics:
enabled: true
tolerations:
- key: node-role.kubernetes.io/master
effect: NoSchedule
Velero Deploy in Aruba Managed Kubernetes
helm repo add vmware-tanzu https://vmware-tanzu.github.io/helm-charts
helm repo update
helm upgrade --install velero vmware-tanzu/velero --version 5.1.3 --namespace velero --create-namespace -f helm/velero-values.yaml
Verifica Deployment
velero get backup-locations
Risultato atteso per verificare che l'inizializzazione è avvenuta con successo è Phase = Available
| PROVIDER |
BUCKET/PREFIX |
PHASE |
LAST VALIDATED |
ACCESS MODE |
ACCESS MODE |
DEFAULT |
| default |
aws |
demo-backup |
Available |
2025-04-09 10:32:55 +0200 CEST |
ReadWrite |
true |
Deploy Jupyterhub
Configurazione Helm chart Values
Crea un file values yaml per inizializzare le variabili del Jupyterhub Helm chart:
hub:
db:
type: sqlite-memory
singleuser:
storage:
capacity: 10Gi
type: dynamic
dynamic:
storageClass: "cinder"
pvcNameTemplate: claim-{username}
volumeNameTemplate: volume-{username}
storageAccessModes: [ReadWriteOnce]
extraVolumes: []
extraVolumeMounts: []
Viene utilizzata la storageClass cinder per salvare in modo persistente i dati memorizzati nella workspace di ciascun utente attraverso la definizione singleuser.storage.type = dynamic.
Si utilizza una configurazione di hub con db in-memory, poiché ci interessa salvare lo stato solo delle workspace di ogni utente, e non le configurazioni del hub.
Jupyterhub Deploy in Aruba Managed Kubernetes
helm repo add jupyterhub https://jupyterhub.github.io/helm-chart/
helm repo update
helm upgrade --install jupyterhub -n jupyterhub --create-namespace jupyterhub/jupyterhub --version 4.1.1-0.dev.git.6981.ha6872850 -f helm/jupyterhub-values.yaml
Verifica Deployment
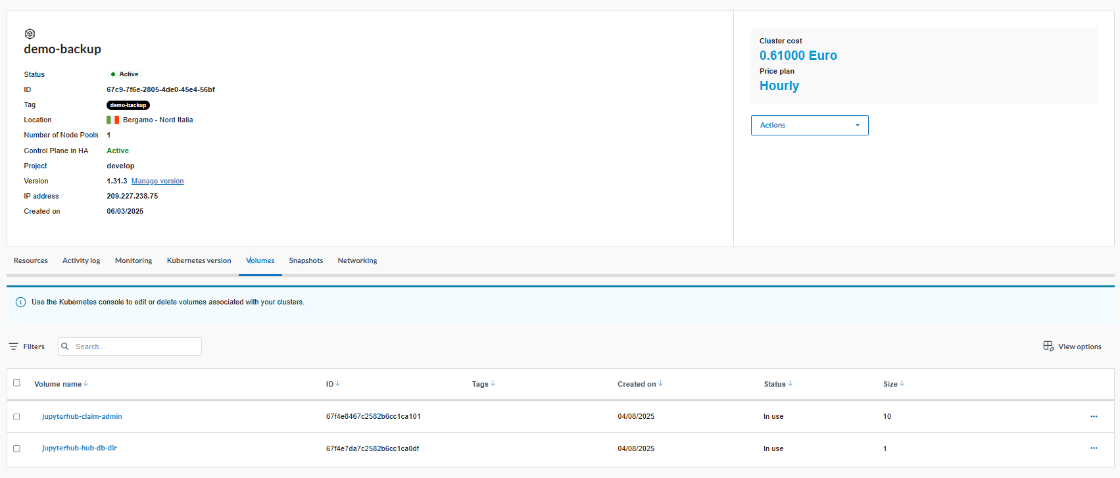
Verifica che i pod dell'applicazione Jupyterhub siano in stato Running: Il deploy di Jupyterhub con StorageClass "cinder" aggancia dinamicamente due volumi su Aruba Managed Kubernetes, come dimostrato nell'immagine sottostante.
kubectl get pods -n jupyterhub
Risultato atteso:
```bash
NAME READY STATUS RESTARTS AGE
continuous-image-puller-6cbpd 1/1 Running 0 100s
continuous-image-puller-fq4qm 1/1 Running 0 100s
continuous-image-puller-gf2kx 1/1 Running 0 100s
continuous-image-puller-gj9xc 1/1 Running 0 100s
hub-89fb546c8-hmbqx 1/1 Running 0 100s
proxy-655b7b4cc5-c9xzz 1/1 Running 0 100s
user-scheduler-7f44675fdb-5v6tf 1/1 Running 0 99s
user-scheduler-7f44675fdb-s8gww 1/1 Running 0 100s
Per accedere alla console Jupyterhub apri una connessione locale mediante il seguente comando
kubectl port-forward svc/proxy-public 8080:80 --namespace jupyterhub
Tutti gli script o dati che hai nella home utente sono persistenti grazie ad Aruba Cloud Block Storage integrato con Aruba Managed Kubernetes.
Test sull'ambiente
pip install pandas
pip install matplotlib
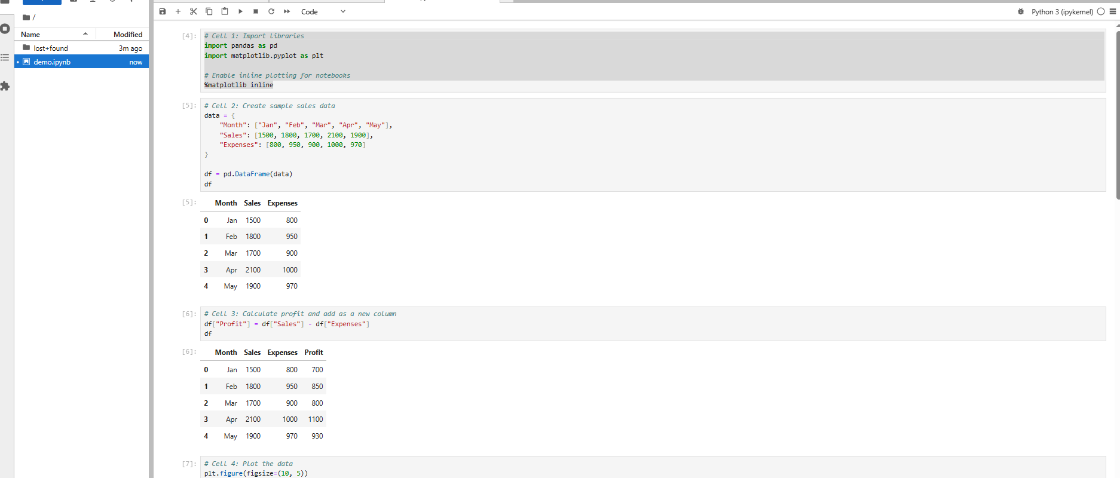
- Entra nel workspace utente in Jupyterhub ed installa le seguenti dipendenze:
- Carica lo script nel workspace ed eseguilo.
Backup dei volumi Jupyterhub
1. Creazione dell'oggetto Velero Backup
apiVersion: velero.io/v1
kind: Backup
metadata:
name: jupyterhub-backup
namespace: velero
spec:
includedNamespaces:
- jupyterhub
includedResources:
- "*"
defaultVolumesToFsBackup: true
storageLocation: default
ttl: 168h # Retain backup for 7 days
Deploy dell'oggetto Velero Backup
kubectl apply -f k8s/VeleroBackup.yml
Verifica lo stato del Backup
velero get backup
Risultato atteso
NAME STATUS ERRORS WARNINGS CREATED EXPIRES STORAGE LOCATION SELECTOR
jupyterhub-backup Completed 0 0 2025-04-08 12:53:33 +0200 CEST 6d default
Effettua un restore dei volumi Jupyterhub
1. Creazione dell'oggetto Velero Restore
apiVersion: velero.io/v1
kind: Restore
metadata:
name: jupyterhub-restore
namespace: velero
spec:
backupName: jupyterhub-backup
restorePVs: true
2. Deploy dell'oggetto Velero Restore
kubectl apply -f k8s/VeleroRestore.yml
3. Verifica lo stato del Restore
velero get restore
Risultato atteso
NAME STATUS ERRORS WARNINGS CREATED EXPIRES BACKUP NAME SELECTOR
jupyterhub-restore Completed 0 0 2025-04-09 11:20:45 +0200 CEST 29d jupyterhub-backup