Moodle is an open source platform of LMS (Learning Management System) or an online learning management system, free and widespread, both in schools and universities and for professional training sessions in companies.
The Moodle online learning platform is highly customizable and allows teachers to create virtual classrooms or classrooms, provide content, such as courses, lessons, multimedia materials and give assessments, while students can only access lessons and spaces for discussion.
In this guide you will learn how to install the Moodle online learning platform on your Ubuntu 18.04 server, provided that it has a LAMP configuration or that the Apache, MySQL and PHP components are already installed.
Prerequisites
If the server server has not been configured with the LAMP architecture yet, please follow our guide on how to install and configure a LAMP server on Ubuntu 18.04 first.
To get started, connect to your server via an SSH connection. If you haven’t done so yet, following our guide is recommended to connect securely with the SSH protocol. In case of a local server, go to the next step and open the terminal of your server.
Moodle requires the installation of several components before it can be used. If not yet installed on your machine, to install them run the following command:
sudo apt-get install aspell graphviz ghostscript clamav php7.2-soap php7.2-curl php7.2-gd php7.2-intl php7.2-ldap php7.2-mysql php7.2-pspell php7.2-xml php7.2-xmlrpc php7.2-zip php7.2-mbstring
At this point, restart the Apache server to reload the newly installed modules.
sudo systemctl restart apache2
Installing Moodle
Now, download the latest stable version available on the official website, using use wget. Then, to download the archive, execute the following command,:
sudo apt-get install wget -y && wget https://download.moodle.org/download.php/direct/stable38/moodle-latest-38.tgz
Extract the downloaded archive and copy the contents to the / var / www / html directory:
sudo tar -xvzf moodle-latest-38.tgz -C var/www/html
Now, create a folder where all the Moodle data will be saved. However, these Moodle data cannot be saved in the database and allow access by the users of the service.
In the command shown below the folder is named called 'moodle_data', but on your server the folder can be renamed as you wish. However, remember that in case a folder is renamed, the name will have to be replace every time 'moodle_data' will be shown in the following commands.
sudo mkdir /var/moodle_data
sudo chown -R www-data /var/moodle_data
sudo chmod -R 0770 /var/moodle_data
Configuring the Database for Moodle
To make the database compatible with Moodle, some changes to the MySQL configuration file will have to be applied. Execute the following command:
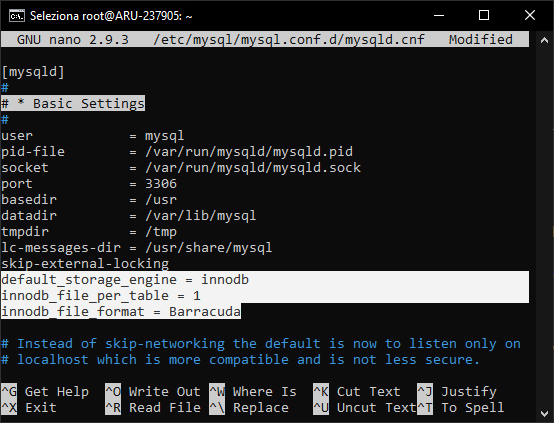
sudo nano /etc/mysql/mysql.conf.d/mysqld.cnf
A text editor will be shown with the contents of the MySQL configuration file. Add the 3 lines highlighted in the screen below in the "Basic Settings" section:
default_storage_engine = innodb
innodb_file_per_table = 1
innodb_file_format = Barracuda
Save and exit (CTRL + X - Y - Enter) and restart the 'mysql' service to apply the changes.
sudo systemctl restart mysql
Creating Database and Tables for Moodle
Now that the MySQL service has been restarted with the right configuration parameters, access the MySQL shell and create the database for Moodle:
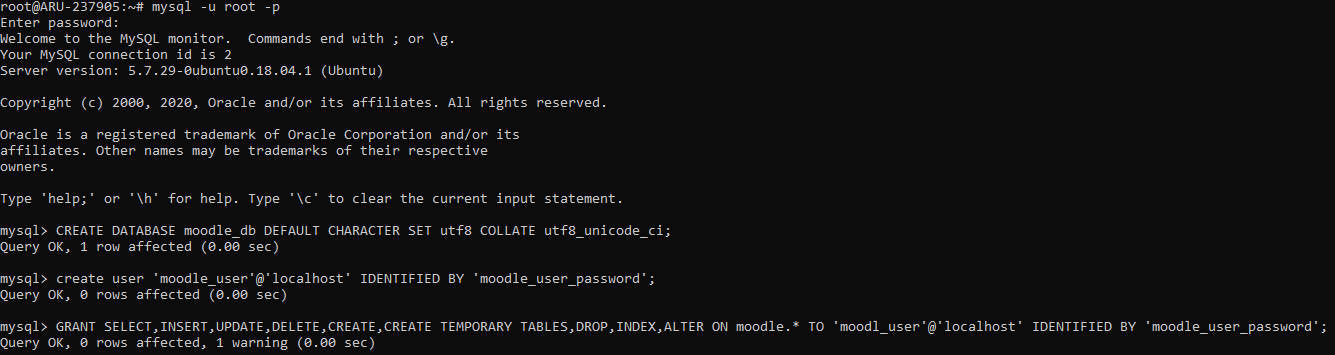
mysql -u root -p
CREATE DATABASE moodle DEFAULT CHARACTER SET utf8 COLLATE utf8_unicode_ci;
Then, create a user to access that database, so that your login password won’t be used as web root to Moodle.
NB Replace 'moodle_user_name' and 'moodle_user_password' respectively with the username and password for Moodle to access the database.
create user 'moodle_user_name'@'localhost' IDENTIFIED BY 'moodle_user_password';
GRANT SELECT,INSERT,UPDATE,DELETE,CREATE,CREATE TEMPORARY TABLES,DROP,INDEX,ALTER ON moodle.* TO 'moodle_user_name'@'localhost' IDENTIFIED BY 'moodle_user_password';
Finally, execute the following command to exit the MySQL shell:
exit
Configuring Moodle
To fully configure Moodle, use your web browser, by connecting directly to the directory of your web server. However, before doing so grant permissions to access the folder using the following command:
sudo chmod -R 777 /var/www/html/moodle
Then go to http://IP_SERVER/moodle with your browser, clearly replacing "IP_SERVER" with the IP of your server.
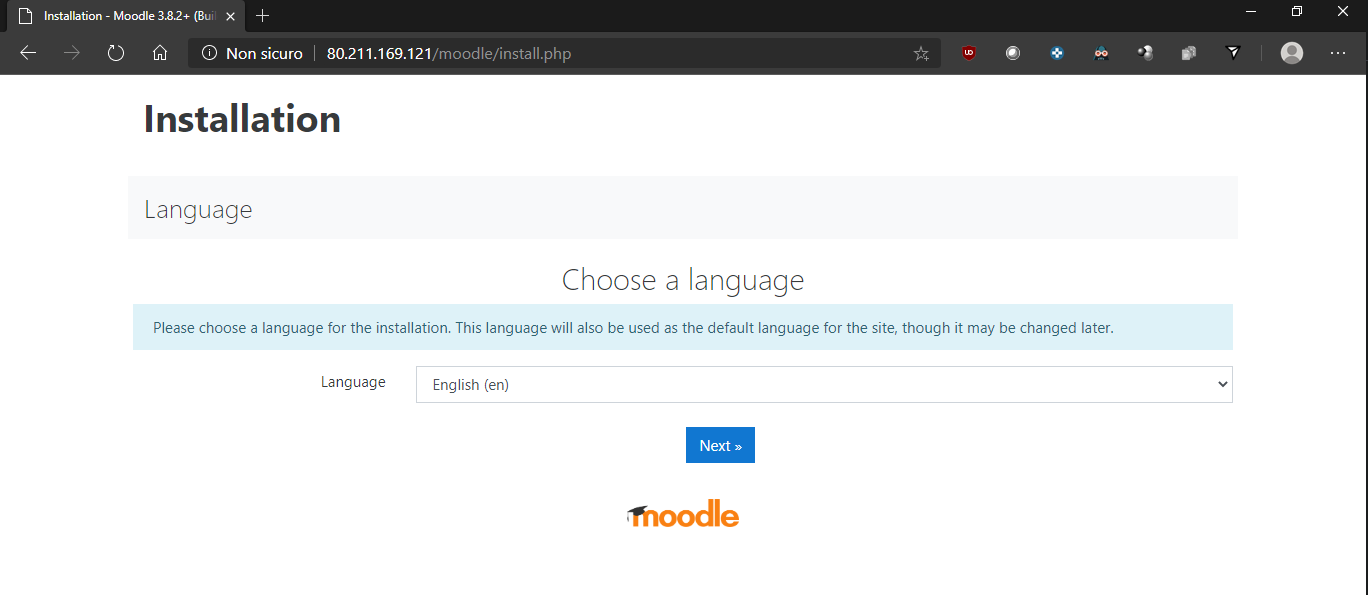
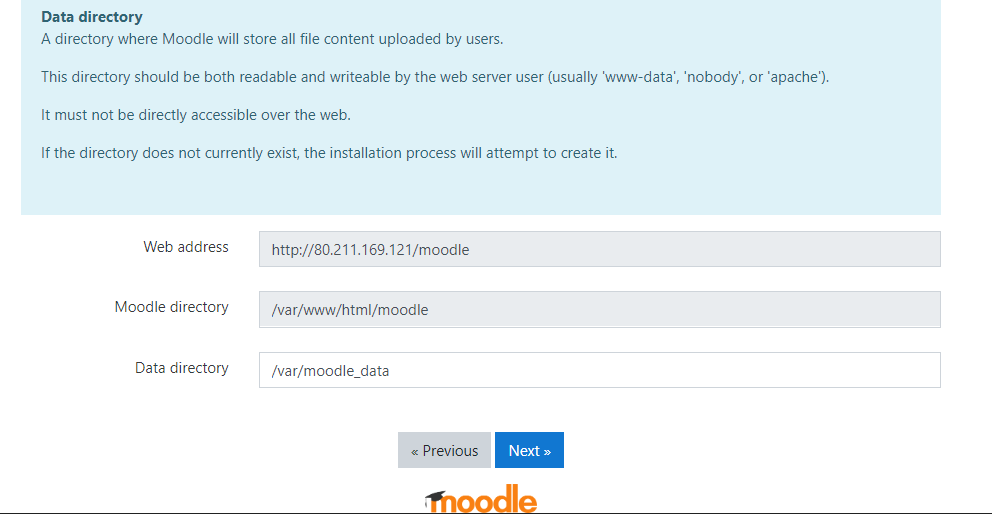
Select a language and click on Next. Under "Data Directory" specify the path of the folder created for the storage of the files uploaded to Moodle, ie "/var/moodle_data" and click on Next.
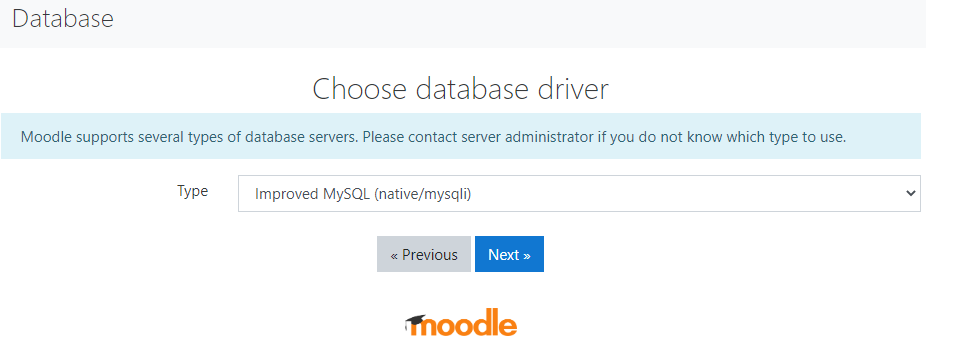
On the next page leave "Improved MySQL (native/mysqli)" and click on Next.
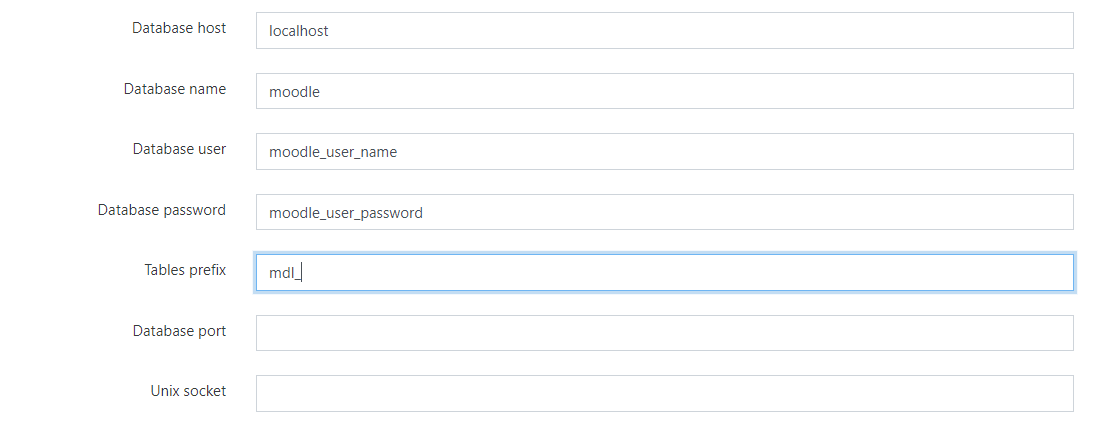
In the Database settings page enter the database name, username and access database password chosen, without modifying the other fields..
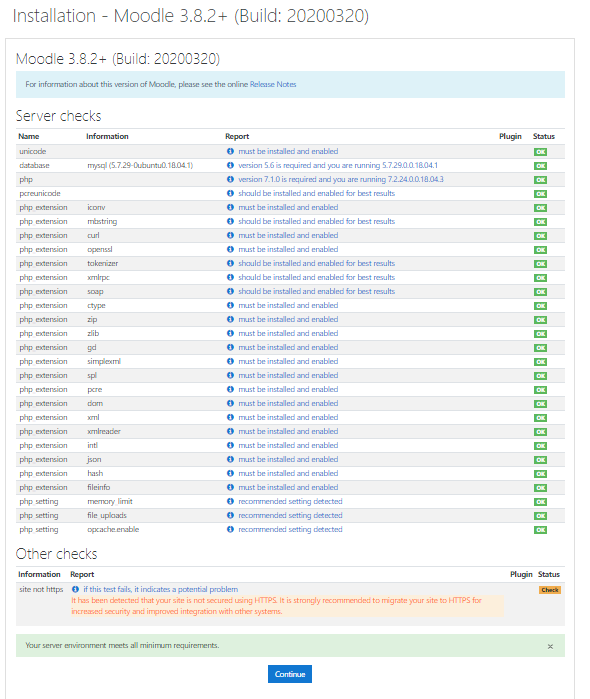
Finally, press ‘Next’ and then click on ‘Continue’ to confirm the terms and conditions of service.
At this point, any missing add-ons will be installed. At the bottom of the page click on ‘Continue’ to complete the installation of Moodle on your web server.
Before being able to access the service, some values will have to be specified. In the first section shown define the administrator user attributes.
A page like the one shown in the screen below will be displayed. Fill out the fields with the administrator’s data.
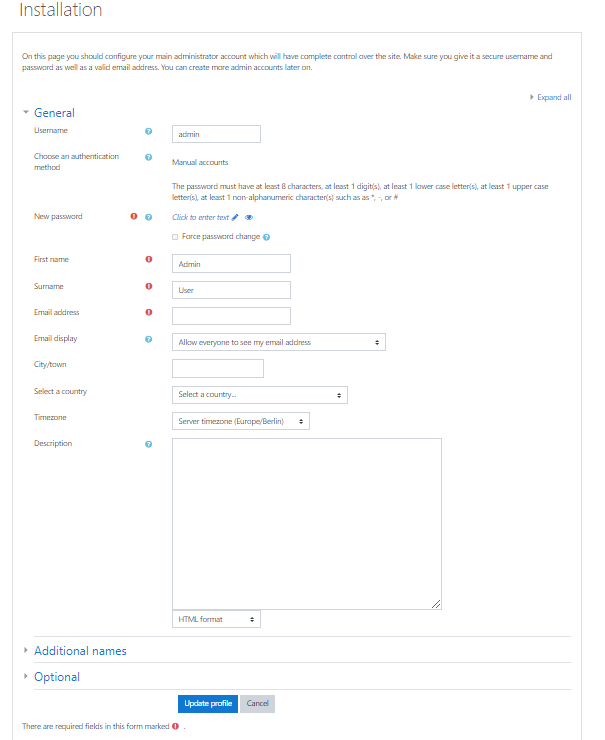
After clicking on "Update profile", define some parameters of your Moodle site.
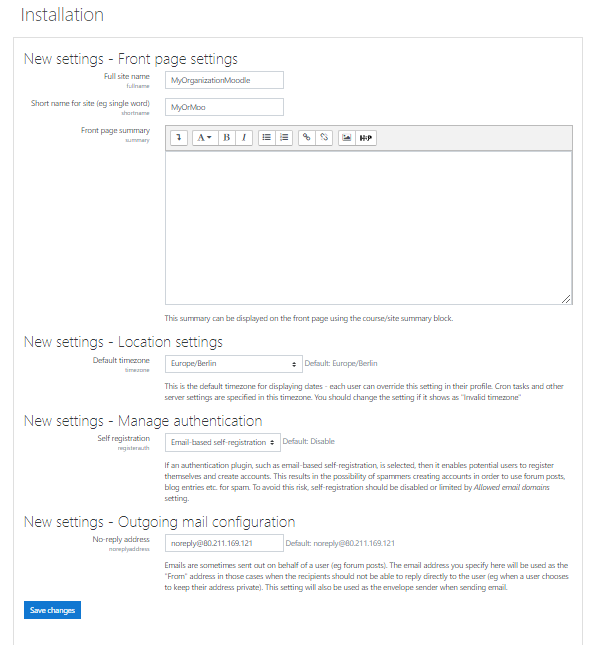
Complete the registration process by entering the required data (i.e. site name, language, region, email address of the administrator) and tick the last item on privacy list.
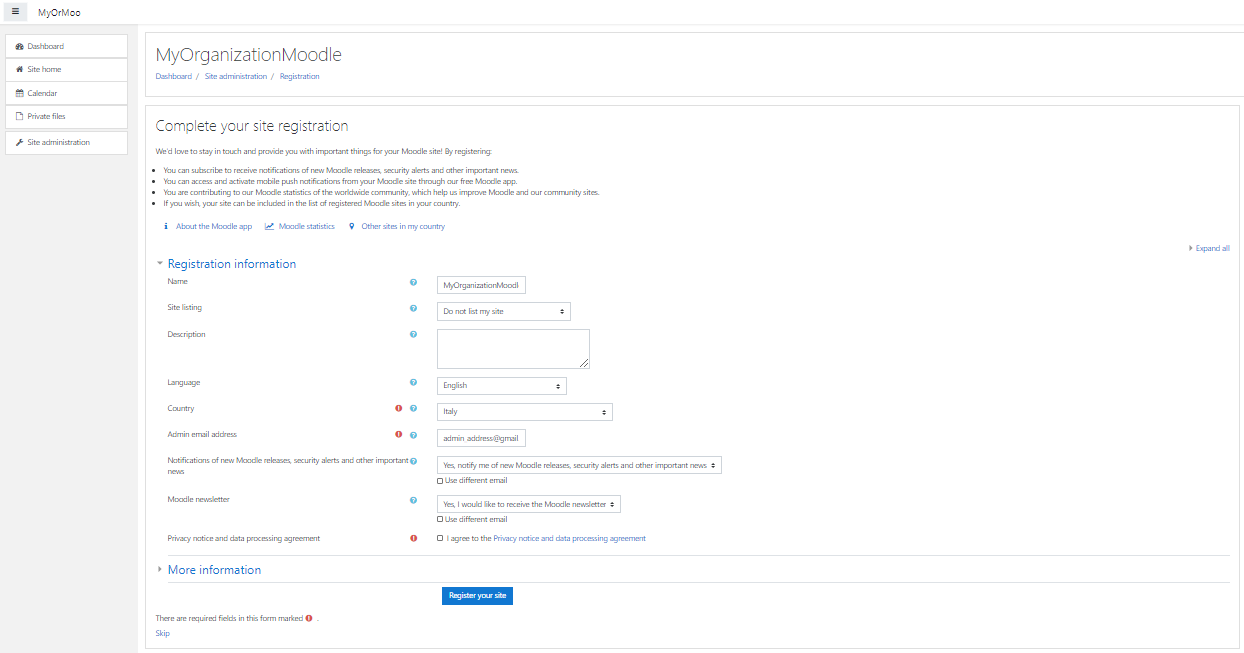
At this point, Moodle is installed and registered correctly!
A guided tour will begin due to which you will learn how to make the best use of the e-learning platform and create your first virtual classroom for distance learning.
Then, start creating new users to allow teachers to create courses and lessons, and create an alert for these operations and many other types of features available on the platform.