Today, accessing your files at any time and from any device is easy-peasy, thanks to the numerous online storage and collaboration services. However, special attention should be paid to the protection of your personal data.
To avoid the loss of control over data to third-party storage services, set up a private Cloud Storage where to store your personal files autonomously and securely, through the use of an open source platform such as Nextcloud.
In this tutorial you will learn how to install Nextcloud on a central Linux based Ubuntu 18.04 server and to configure it to create a file hosting service to remotely access your files stored on the cloud. The data uploaded to Nextcloud are encrypted during the transfer to guarantee maximum privacy and security and are automatically synchronized with all your devices, regardless of the operating system.
To operate, Nextcloud requires a server configured with the LAMP architecture, which is based on Linux, Apache, MySQL and PHP. In case of no server, follow our guide How to install and configure a LAMP server on Ubuntu 18.04 first.
To get started, connect to your server via an SSH connection. If you haven’t done so yet, following our guide is recommended to connect securely with the SSH protocol. In case of a local server, go to the next step and open the terminal of your server.
Installing Nextcloud
To install and use Nextcloud, some additional PHP modules have be installed using the following command:
sudo apt install php7.2 libapache2-mod-php7.2 php7.2-common php7.2-gmp php7.2-curl php7.2-intl php7.2-mbstring php7.2-xmlrpc php7.2-mysql php7.2-gd php7.2-xml php7.2-cli php7.2-zip
After installing PHP 7.2, apply the changes to the Apache configuration file.
sudo nano /etc/php/7.2/apache2/php.ini
Search within the file for the following items and set the values of each of them as shown below.
file_uploads = On
allow_url_fopen = On
short_open_tag = On
memory_limit = 256M
upload_max_filesize = 100M
max_execution_time = 360
Then, restart Apache to reload the new settings.
sudo systemctl restart apache2.service
At this point the server is ready. So, proceed with the installation of Nextcloud.
To install the Nextcloud, first download the archive with the software. Then, to start the download, type the following command:
wget https://download.nextcloud.com/server/releases/latest-18.zip
If you don't have the Unzip software to extract the archive content, install it by typing:
sudo apt -y install unzip
After the installation, extract the archive downloaded by typing:
sudo unzip latest-18.zip
Once the archive extraction is over, move the newly created folder to the path provided to make it accessible on the web server:
sudo mv ./nextcloud/ /var/www/html
Then, grant full access to the folder by typing the following command:
sudo chown -R www-data:www-data /var/www/html
Creating a Database for Nextcloud
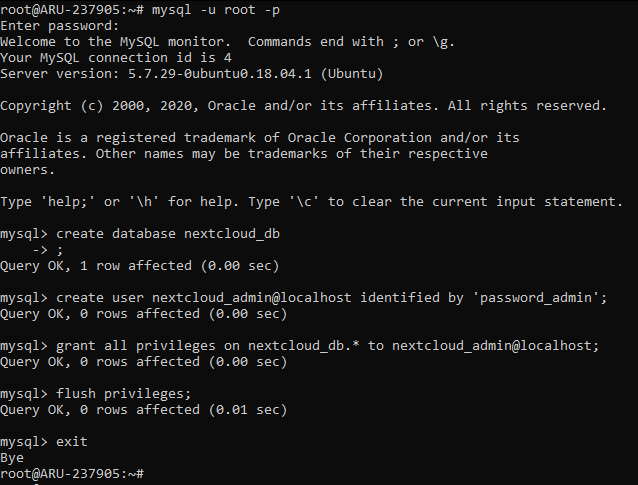
To create a database for Nextcloud, access the MySQL shell. Then type:
sudo mysql -u root -p
Enter the password you set for the root user when you installed MySQL. Then, create a database and call it 'nextcloud_db' by typing:
create database nextcloud_db;
At this point, create a user to access the database and enable correct access by typing the following commands:
create user your_user@localhost identified by ‘password_admin’;
grant all privileges on nextcloud_db.* to @localhost;
flush privileges;
exit
N.B. Replace the parameters 'user_name' and 'password_admin' with data of your choice, respectively indicating the name and password of the user for accessing the database.
Configurazione Apache
To use Nextcloud, configure Apache by creating a configuration file that will be used for hosting Nextcloud. Then, create the 'nextcloud.conf' file in the appropriate directory.
sudo nano /etc/apache2/sites-available/nextcloud.conf
Copy and paste the following code into the file. Make sure you replace "example.com" and "www.example.com" with your domain name and address respectively.
     ServerAdmin [email protected]
     DocumentRoot /var/www/html/nextcloud/
     ServerName example.com
     ServerAlias www.example.com

     Alias /nextcloud "/var/www/html/nextcloud/"


        Options +FollowSymlinks
        AllowOverride All
        Require all granted

            Dav off

        SetEnv HOME /var/www/html/nextcloud
        SetEnv HTTP_HOME /var/www/html/nextcloud


     ErrorLog ${APACHE_LOG_DIR}/error.log
     CustomLog ${APACHE_LOG_DIR}/access.log combined
Now that the configuration file for the Virtual Host for Nextcloud has been generated, enable it by typing the following commands:
sudo a2ensite nextcloud.conf
sudo a2enmod rewrite
sudo a2enmod headers
sudo a2enmod env
sudo a2enmod dir
sudo a2enmod mime
sudo systemctl restart apache2.service
Open your browser and enter the IP address of your server in the URL. If everything worked as planned, the Nextcloud configuration page will open.
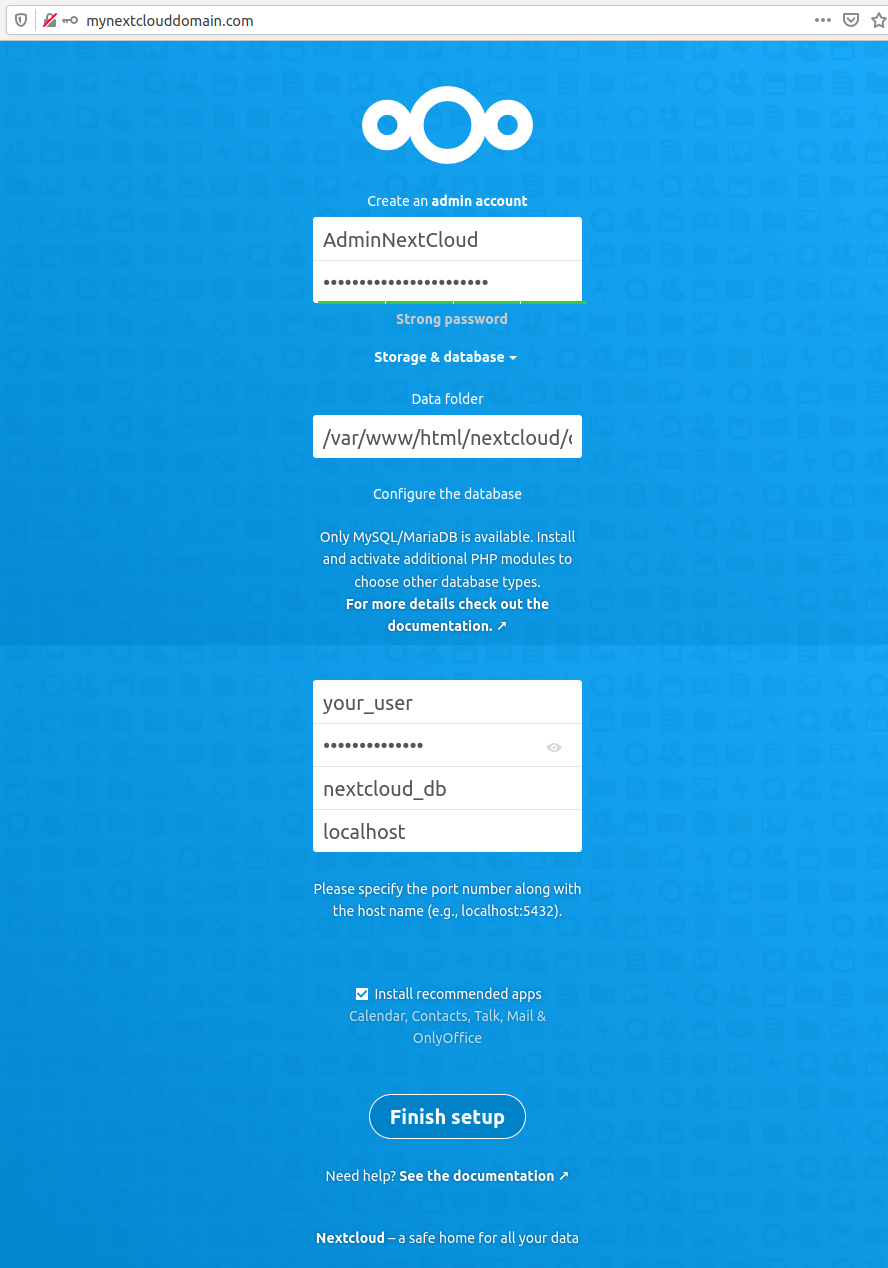
Enter the login data of the Admin user you wish to create and the credentials of the database. Once inserted, press ‘Enter’ and Nextcloud will be ready to use.
Personal file storage on Nextcloud
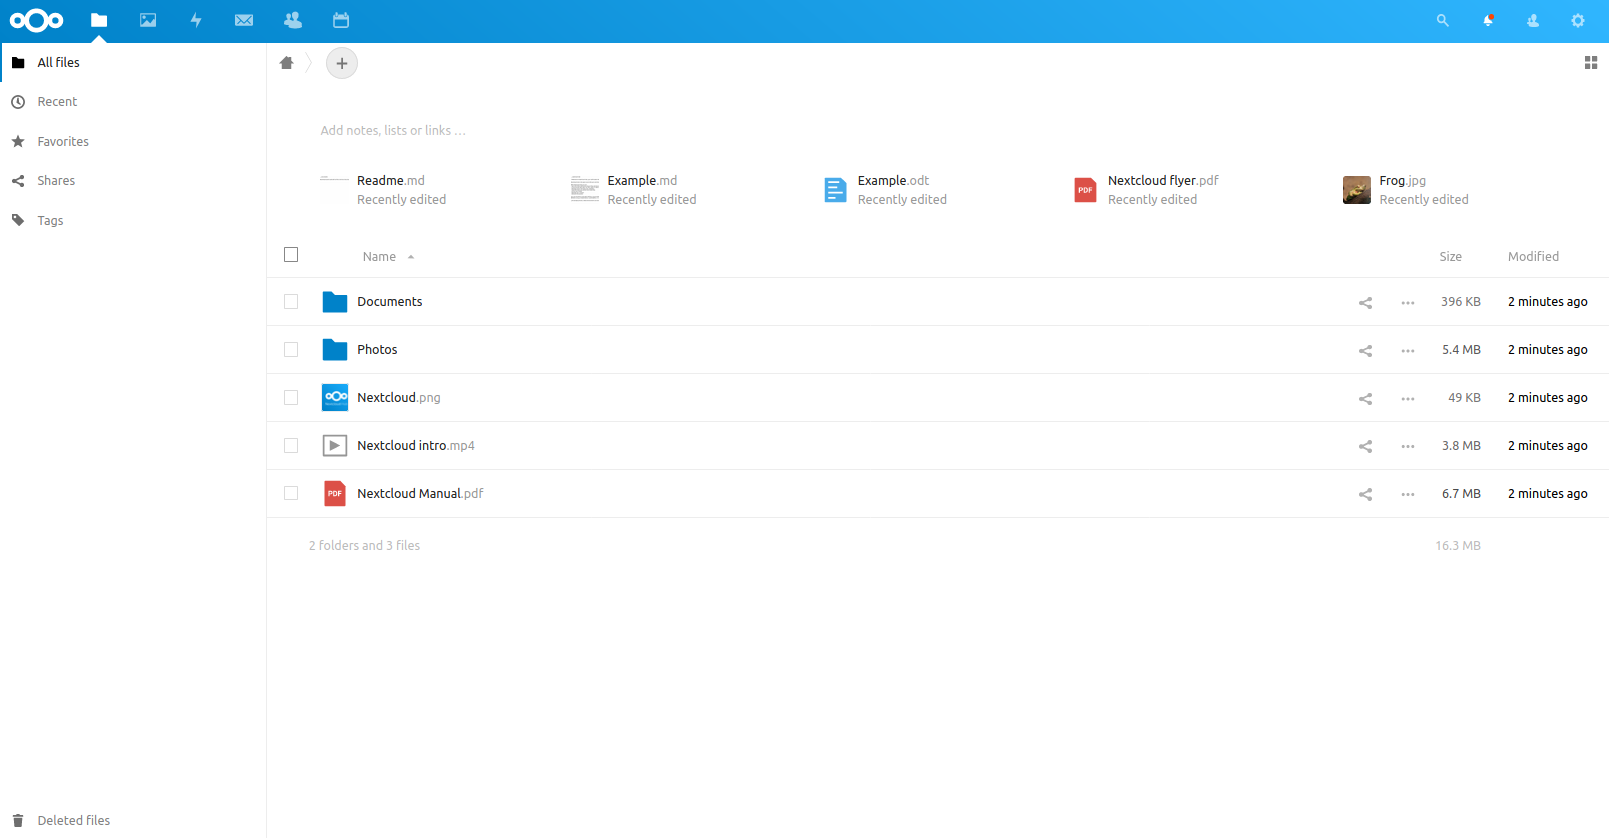
To see the folders and files on your drive, access the "Files" section. As soon as you access the shared folders, delete the sample files inside and replace them with those of your choice.
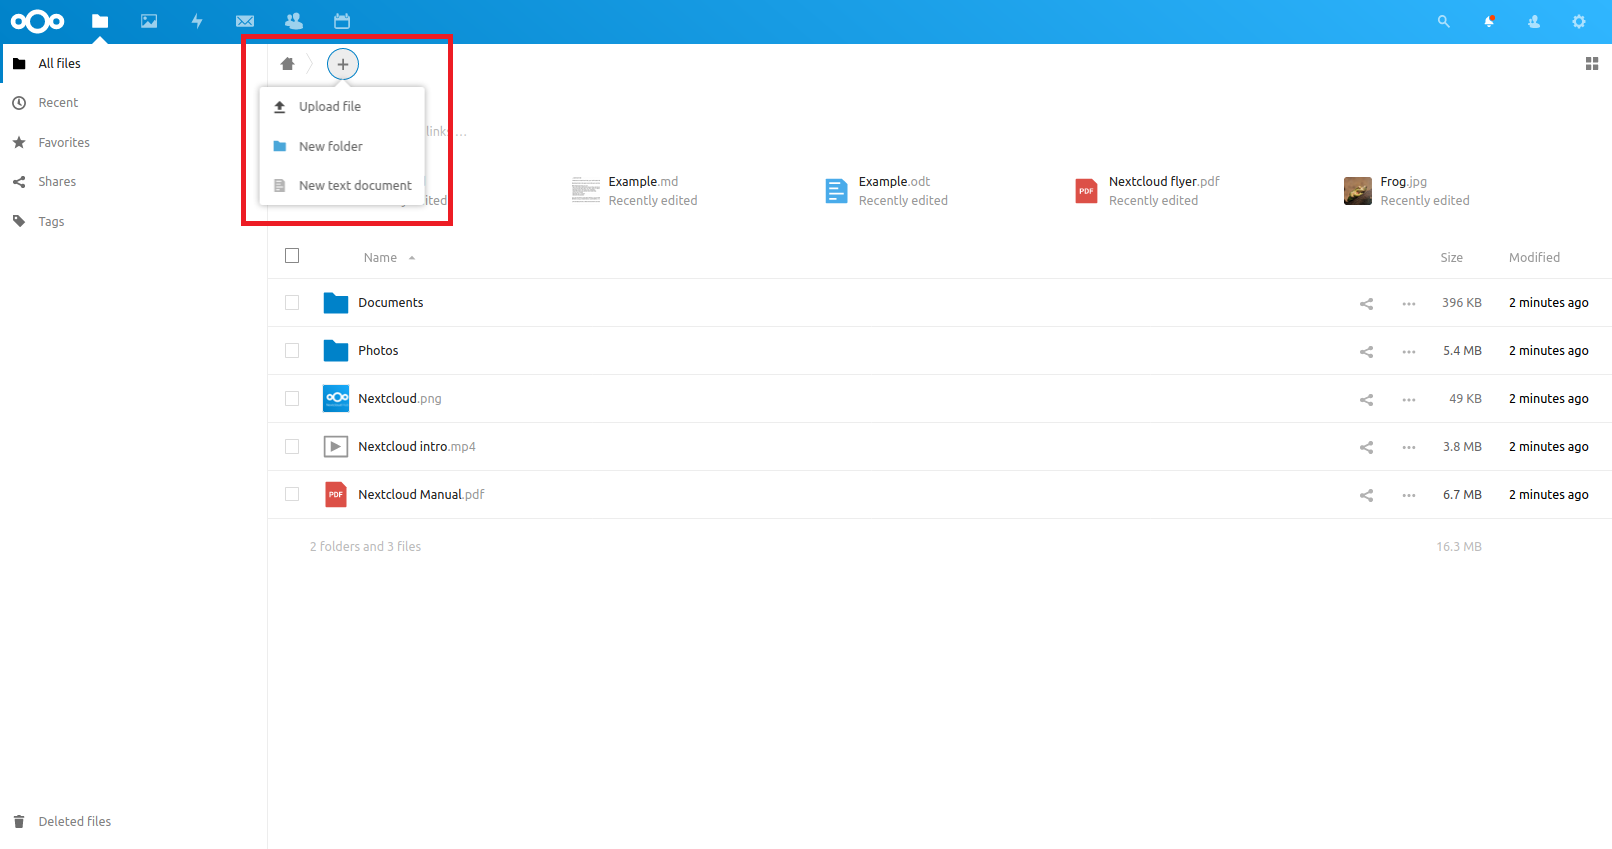
To add personal files, create folders or new text documents, just use the "+" key at the top, as shown in the following screen:
Go to the lower left box to access your deleted files and the Nextcloud settings and view the memory occupied by your files. Unlike other free storage services, the main advantage of Cloud Storage created with Nextcloud is that files can be uploaded until your server's hard disk is completely full.
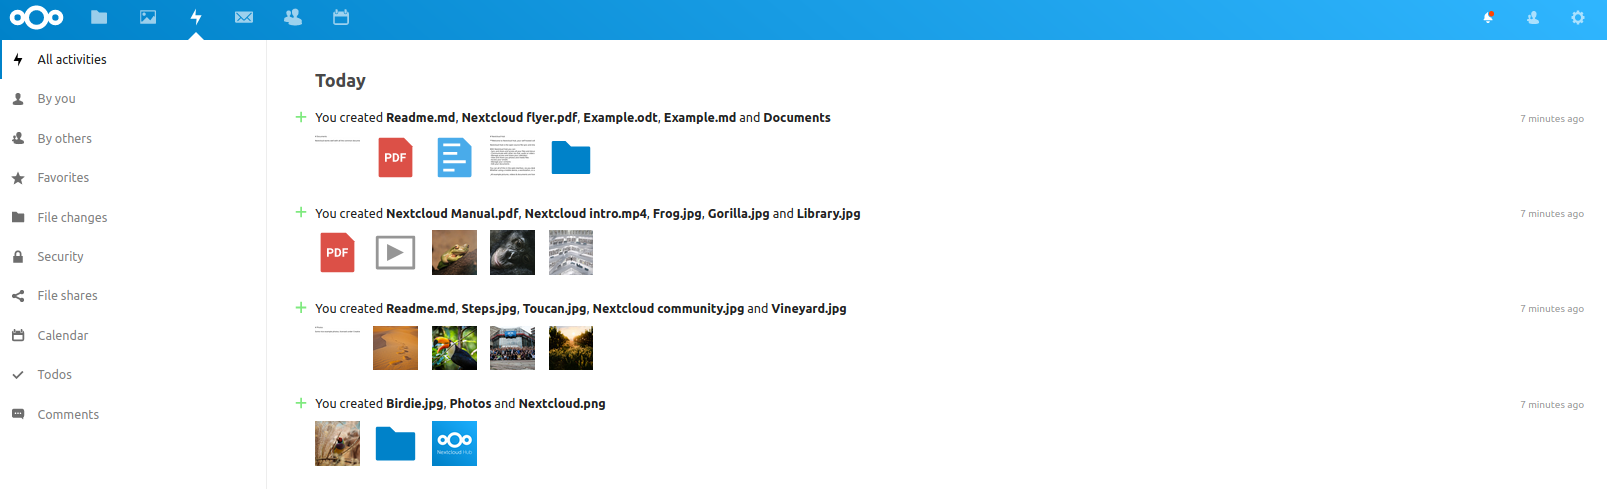
Through the top bar, access the different plugins installed. By opening the "Activities" window history of the actions carried out on the platform can be seen.
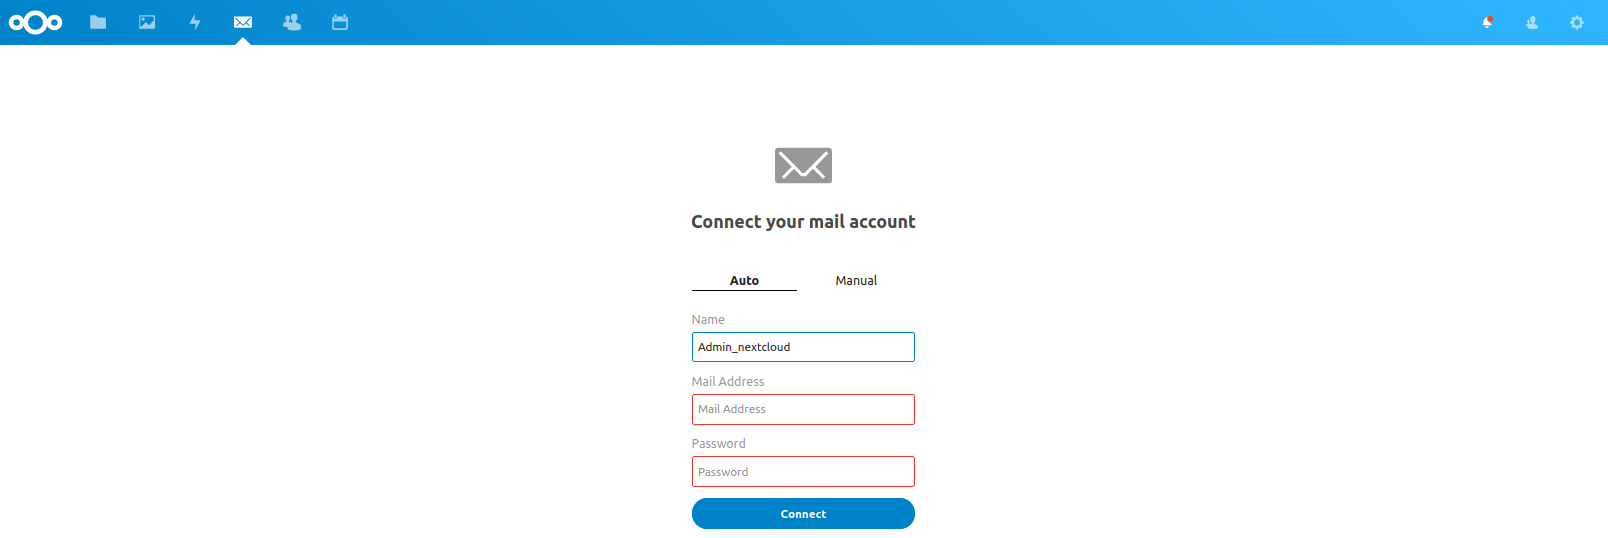
The next "Mail" screen allows you to configure your email address, synchronizing your mailbox on Nextcloud.
Use the two sections "Contacts" and "Calendar" to synchronize the contacts and the calendar with those of your personal account.